COPYRIGHT © 1999 CANON INC. CANON imageRUNNER 400/330 REV.0 JAN. 1999 PRINTED IN JAPAN (IMPRIME AU JAPON)
9-25
CHAPTER 9 FIXING SYSTEM
11. Adjusting the Lower Fixing Roller
Pressure (nip)
If you have replaced the upper fixing
roller or the lower fixing roller, or fixing faults
occur, make adjustments as follows:
If you are taking measurements when the
fixing roller is cold, wait 15 min after the end
of the wait period, make 20 copies, and then
take measurements.
Taking Measurements
1) Make a single A3 solid black copy, and
feed the output into the multifeeder to
make a solid black copy. Then, set the
resulting output in the multifeeder. (The
output carries two layers of toner.)
2) Select NIP-CHK in service mode
(FUNCTION>FIXING); then, press the
OK key.
3) Check to see that the copier automatically
makes a soiled black copy and delivers it.
4) Measure the area of the copy where the
toner is shiny.
Figure 9-230
Caution:
a and c are points 10 mm from the ends
of the copy paper.
Dimension
b
a-c
Measurements*
5.5 ± 0.3 [mm]
0.5 mm or less
* Taken when both upper and lower rollers
are fully heated.
Table 9-201
5) If the measurements are not as indicated,
turn the adjusting screw [1] at the rear and
the front of the fixing assembly to make
adjustments.
Figure 9-231
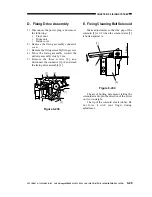
12. Fixing Lower Roller and the Bearing
When replacing the lower roller or the
bearing, apply heat-resisting grease to prevent
caking on the lower fixing roller and the
bearing. (Clean the parts before application.)
A3
Center
of copy
a
b
c
Feeding
direction
[1]


