background image

C-10

Chapter C - Basic Operations 

Automated Chemistry Analyzer

AU2700 User's Guide

May, 2002

See Also

For detailed information on analyzer maintenance, refer to the Maintenance Chapter.

8.  Perform a Reagent Volume Check.  Look at how many tests remain in each bottle and load 

any necessary reagents.  If new bottles are added, perform another check.
A.  Verify that reagents without barcodes are placed in the correct positions in the 

compartment.  Reagents without barcodes need to be “fixed.”  Refer to the procedure 

called “How to Fix a Reagent Position,” located in this chapter.

B.  Select [System Status], then [Reagent Status].  Press function key F5 (check start), then 

select “Check All Positions.”  

C.  Verify that the refrigerator lids are on.  Click the “Start” button to begin and select “Yes” 

to start the check.

D.  Verify “Checked” and “Reagent of Group” displays in blue.  

If yellow or red appear, refer 

to “Reviewing reagent position errors” in [System Status], [Reagent Status] located in the 

Software Chapter of this Guide.

See Also

For detailed information on the [Reagent Status] Screen, refer to the Software Chapter.  Also, refer to 
“Checking Analysis Conditions” located in the As Needed Tasks section of this chapter.

9.  Verify that fixed reagents are in the correct positions.

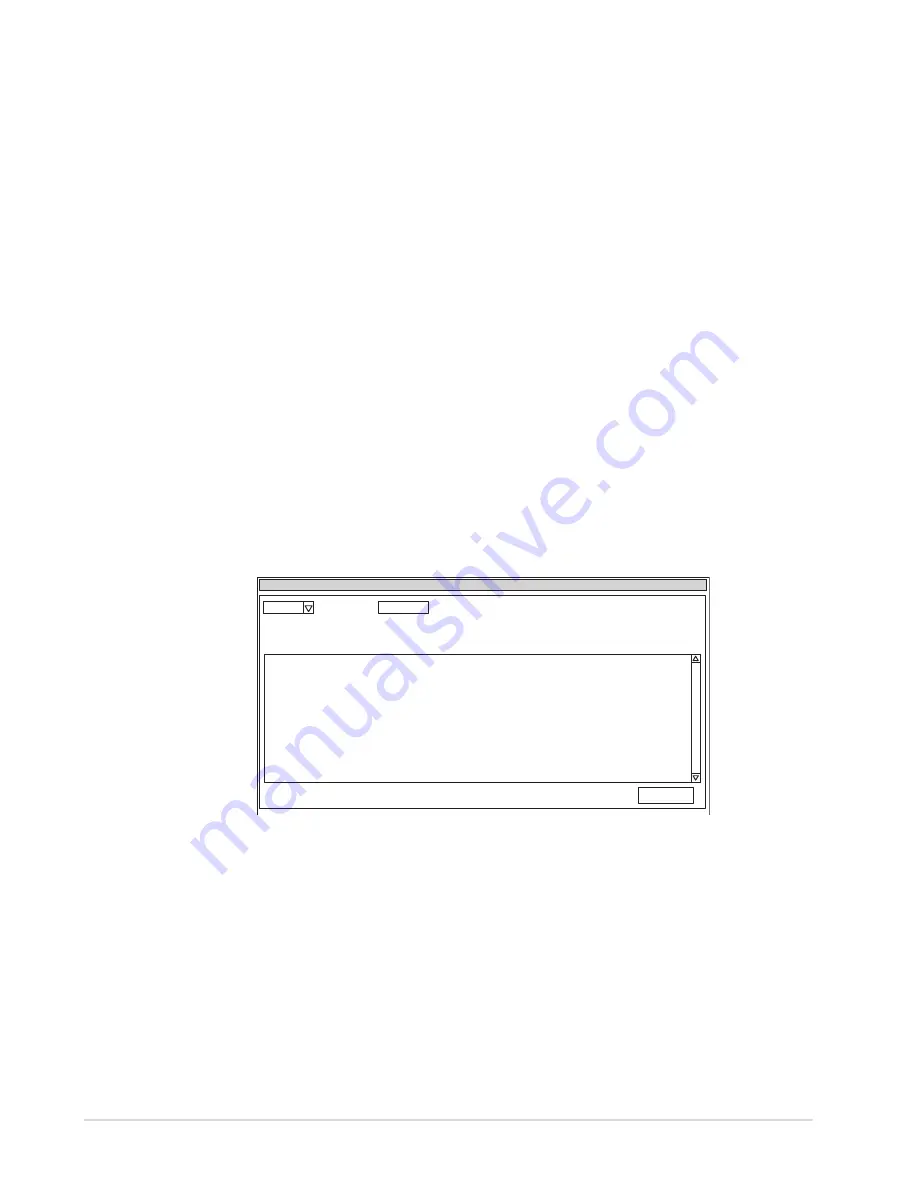
10. Determine which tests need reagent blanks and/or calibrations.  Press function key F8 

(position display).  Reagent bottle information displays.  If a reagent expires, it will be 

highlighted in yellow and say “Expired” in the comment column.  

For information on 

reagent position errors, refer to [System Status], [Reagent Status] in the Software Chapter 

of this Guide.

OLU1013E

Position Display

1.

aaaaa 60

999

9999 999

1

R.ID Read Error

Close

Type:

Test

Vol

(mL)

Shot

Pos.

Expired Lot

No.

No.

Bottle Seq. Comment

Onboard

Stability

Cal.

Stability

Содержание AU2700

Страница 1: ...Beckman Coulter Inc 250 S Kraemer Blvd Brea CA 92821 AU2700 Chemistry Analyzer For In Vitro Diagnostic Use Users Guide Vol 1 BM0561V1 NOV 2009 ...

Страница 2: ...need to modify and or add procedures to meet the laboratory requirements of CLSI The AU2700 is ISO13485 certified Design and production adheres to ISO13485 international quality standards The AU2700 has been tested and found to comply with the limits for a Class A digital device pursuant to Part 15 of the FCC Rules These limits are designed to provide reasonable protection against harmful interfer...

Страница 3: ...ons on Use A 5 3 Installation Environments A 10 Installation Environment Conditions A 10 Temperature and Humidity Conditions A 10 Installation Space Requirements A 11 Power Source and Grounding A 11 Water Supply and Drainage A 12 Installing a Deionizer A 13 Wiring and Piping A 13 4 List of Standard Accessories A 15 5 Analyzer Warning and Caution Labels A 16 Chapter B System Outline Introduction B ...

Страница 4: ...rom a Host Computer C 35 2 6 Preparing Samples and Racks C 36 2 7 Placing Racks on the Analyzer C 52 2 8 Daily Maintenance and Inspection C 54 2 8 1 Periodic Maintenance C 54 2 8 2 Consumables C 56 2 8 3 Changing Reagents C 57 2 8 4 How to Set Fix a Reagent Position C 61 2 8 5 Adding Wash Solution C 62 2 8 6 How to Place the Sample Pre dilution Bottle C 63 3 Starting Analysis C 65 4 Obtaining Resu...

Страница 5: ...tions D 32 2 2 Test Requisition D 35 2 2 1 Normal Analysis D 35 2 2 2 Repeat Analysis D 39 2 2 3 Quality Control D 43 2 2 4 Calibration D 45 2 2 5 Retrieve Repeat Data D 47 2 3 Reaction Monitor D 49 2 4 Calibration Monitor D 55 2 4 1 Calibration Curve D 55 2 4 2 Calibration Trace D 58 2 4 3 Reagent Blank Monitor D 60 2 5 Photocal Monitor D 62 2 6 QC Monitor D 64 2 6 1 Daily Control D 65 2 6 2 Day ...

Страница 6: ...11 Comment Masters D 156 4 Auxiliary Menu Operations D 157 4 1 Data Statistics D 158 4 2 Correlation Chart D 160 4 3 Histogram D 162 4 4 Reagent Consumption D 164 4 5 Reagent Inventory D 166 4 6 Parameters Management D 168 4 7 Calibration Verification D 170 4 8 Standby Set D 172 5 Maintenance Menu Operations D 173 5 1 Data Operation D 174 5 1 1 FD Data Management D 174 5 1 2 Set Date Time D 176 5 ...

Страница 7: ...easy steps to prepare for and start analysis how to obtain results and an operation flowchart It also describes other frequently used procedures performed during daily routine operations Chapter D Software This chapter describes the functions and operations related to each software screen Chapter E Software Menu Outline This chapter outlines software menus Volume II Maintenance Error Flags Trouble...

Страница 8: ...r long term treatment Warning This is used when there is the possibility that severe injuries can occur Caution Indicates that the operator should exercise care to prevent personal injury physical damage and serious adverse effect on analysis results It also indicates biohazards Personal injury is referred to as injuries such as mild burns and electric shock that do not require hospitalization or ...

Страница 9: ... may not be transferred exchanged or leased to any party without the prior written consent of Beckman Coulter Trademarks Corporate and product names that appear in this manual are their trademarks Change bars Periodically replacement pages for this document are sent to end users with updated information To help identify changes to affected pages change bars appear in the outer page margin next to ...

Страница 10: ...cts in accordance with the terms and duration of such manufacturers warranties b any Product which has been disassembled repaired tampered with altered changed or modified by persons other than Beckman Coulter s own authorized service personnel unless repair by others is made with the written consent of Beckman Coulter c defects or damage to the Products resulting from wear tear misuse negligence ...

Страница 11: ...ersede all prior and contemporaneous oral or written agreements understandings proposals and communications pertaining to the subject matter hereof WHO IS COVERED BY THIS WARRANTY This warranty is exclusively for the benefit of the original customer and cannot be transferred or assigned WHAT TO DO WHEN SERVICE IS NEEDED Please call 1 800 223 0130 and speak with Beckman Coulter s Technical Services...

Страница 12: ... the highest possible system performance be sure to observe the precautions listed on the following pages Chapter A Precautions and Installation Environments Introduction A 1 1 Safety Precautions A 2 2 Precautions on Use A 5 3 Installation Environments A 10 Installation Environment Conditions A 10 Temperature and Humidity Conditions A 10 Installation Space Requirements A 11 Power Source and Ground...

Страница 13: ...e covers secured by screws such as the rear cover and side covers unless being guided by an Beckman Coulter Representative If liquid spills or leaks occur inside the system contact Beckman Coulter Technical Services Careless operation with liquid present may result in an electric shock Preventing Personal Injury To protect yourself from injury while using the system observe the following precautio...

Страница 14: ...ns when handling reagents control serum and reference material Handle the samples according to the instructions Do not open the reagent refrigerator cover cuvette wheel large STAT table cover or ISE cover during analysis Treating Waste Liquids The waste liquid and mixtures may require special treatment before being discarded This system is structured to discard concentrated waste liquids mixtures ...

Страница 15: ...ents used with the system are strong acids or alkalis To protect yourself from injury observe the following precautions Warning Some reagents are strong acids or alkalis Exercise great care so that your hands and clothing do not come into contact with the reagents If your hands or clothing come into contact with reagents immediately wash them off with soap and water If a reagent comes into contact...

Страница 16: ...rectly maintained analysis results will be effected After replacing main parts such as the photometer lamp syringes probes and cuvettes perform calibration Follow the reagent manufacturer or distributor s instructions for information about timing frequency and materials required for calibration analysis Use only detergents that meet type density and usage specifications specified in this manual If...

Страница 17: ...A 4b Automated Chemistry Analyzer AU2700 User s Guide November 1 2009 This page intentionally left blank ...

Страница 18: ...inappropriately and could affect results Do not attempt to change parameters during a measure mode This will compromise the integrity of your system and data Do not use a screen saver This could cause the analyzer to function inappropriately General Precautions During Use of the System Caution Handling samples Samples available for analysis This system is designed to analyze serum urine and other ...

Страница 19: ... manufacturer or distributor The methods used to store the reagents reference materials and control serums are described in each package insert Observe the instructions If reagents reference materials and control serums are stored improperly results will be inaccurate even if they are used within effective periods Also top system performance may not be obtained Consult the corresponding reagent ma...

Страница 20: ...wet or have chemicals on them Operating the system Upon completion of analysis check the sample numbers and sample IDs To operate this system observe the procedures described in this manual Incorrect operation may result in improper analysis results or system failure To learn about total system operations take the training course offered by Beckman Coulter This manual is intended for personnel who...

Страница 21: ... precautions Never use the computer for a purpose other than that intended Frequently scan diskettes or other media used in the AU2700 to avoid transmitting viruses The danger of exposing the AU2700 computer to a software virus exists A computer virus is malicious software which is designed to intentionally destroy programs and data Computer viruses make their way into computers by copying themsel...

Страница 22: ...ion and take appropriate corrective measures After using the analyzer observe the following precautions Follow proper shutdown procedures Use caution when performing troubleshooting procedures For assistance with troubleshooting contact Beckman Coulter Technical Services Do not modify the equipment Inspecting and maintaining the system Be sure to perform scheduled analyzer maintenance If the analy...

Страница 23: ...m above sea level Temperature and Humidity Conditions The temperature of the installation room should be between 18 and 32 C and the temperature fluctuation during a measure mode should be less than 2 C The humidity must be between 40 and 80 RH with no condensation Temperature and humidity fluctuations must be within the specified range s otherwise the system cannot produce reliable data If the te...

Страница 24: ...g an emergency be sure to provide at least 9 inches of space Dimensions of main system units Unit inches Analyzer ANL Sampler SMP Width 79 x Depth 45 x Height 50 Weight 1 540 lbs Data processor DPR Width 27 6 x Depth 27 6 x Height 62 Weight 146 lbs Power Source and Grounding The power source shown below must be prepared before delivery of this system The distribution panel should be located so tha...

Страница 25: ...rounding terminal should conform to class 3 grounding construction less than 100 ohms of grounding resistance Warning To be performed by Beckman Coulter personnel only Install a grounding wire to prevent electric shock and to prevent system malfunction OLU4056 Crimp terminal Hole diameter Ø5 4 mm Water Supply and Drainage The water supply and drainage facilities shown below must be prepared before...

Страница 26: ...w it to be disposed of by qualified personnel Installing a Deionizer The AU2700 requires deionized water for washing water and reagent diluent Select a deionizer which can supply the average amount of water consumed 65 L hour and the maximum instantaneous water consumption 3 8 L minute For information about requirements for a deionizer refer to the quantity consumed and maximum consumption of the ...

Страница 27: ...tem rear face Drain hole Drain hole Power cable 10 m 4 or less To deionizer 1 2 3 4 Water supply hose 30 Washing waste liquid hose 30 Concentrated waste liquid hose 30 Exhaust air hose 30 See Also For more information on system specifications refer to the Specifications Chapter ...

Страница 28: ...2 Hose band 4 Sample probes 2 Reagent probes 4 Mix Bars 18 Photometer lamp 1 Digital Printer PrinterW 1 PrinterW Warranty 1 User s Guide 1 Quick Response Guide 1 Program with On line Help 1 set Wrench 1 5 1 Partition 2 sets 20 pcs set 30 mL bottles 15 mL bottles Separator 1 set 80 pcs set For reagent tray Adapter A for STAT table 1 set 22 pcs Stickers 1 set 4 kinds of stickers to label STAT table ...

Страница 29: ...ck warning prevention against an electric shock Warning Never remove the covers secured by screws such as the rear cover and side covers unless being guided by an Beckman Coulter Representative If liquid spills or leaks occur inside the system contact Beckman Coulter Technical Services Careless operation with liquid present may result in an electric shock OLU4128 Do not touch prevention against in...

Страница 30: ...severe injuries can occur Blue Caution Indicates that the operator should exercise care to prevent personal injury physical damage and serious adverse effect on analysis results It also indicates biohazards Personal injury is referred to as injuries such as mild burns and electric shock that do not require hospitalization or extensive medical attention Physical damage is referred to as damage to t...

Страница 31: ...nd Caution Label Position OLU2113E CAUTION LASER RADIATION DO NOT STARE INTO BEAM OR VIEW DIRECTLY WITH OPTICAL INSTRUMENTS CAUTION LASER RADIATION DO NOT STARE INTO BEAM OR VIEW DIRECTLY WITH OPTICAL INSTRUMENTS CLASS 1 LASER PRODUCT complies with IEC60825 1 ON RESET EM STOP ...

Страница 32: ...ystem and fundamental screen operations Chapter B System Outline Introduction B 1 1 Outline of Functions B 2 2 Configuration of System Components B 4 3 Outline of Screen Operations B 7 3 1 Keyboard Functions B 10 3 2 Using the Mouse B 13 3 3 Selecting Menus and Items B 14 3 4 Help Functions B 21 4 Login Logout Function B 22 5 Description of Measure Modes B 23 ...

Страница 33: ...s beginning with the start sample number specified in the start condition menu each time the sample rack is processed Rack ID Analysis Using this method of analysis the system reads the rack ID on the rack but does not read the specimen barcode label The rack ID label manages the sample analysis data A rack ID label must be positioned on the front of each rack The sample numbers are calculated usi...

Страница 34: ... In rack ID analysis the system automatically assigns the sample number calculated from the rack ID System date time The system date time is controlled by the system clock Index date time The index date time is used to store retrieve the sample data When the system is started the referenced index date time defaults to the system date time It can be modified to a given index date time ISE Unit Outl...

Страница 35: ...s Cuvette wheels inner outer Syringes Power supply unit Water supply drain unit Breaker Monitor Printer Data processor ISE Rev Diag button Sample probes Mix unit R2 reagent probes ISE reagent bottles STAT test button STAT Rotation Diag button Maintenance ISE Prime STAT table Sample Transport Belts 1 2 Ethernet cable Rack supply belt Detergent tanks Power On button EM STOP button Reset button DPR A...

Страница 36: ...600 photometric tests can be performed per hour with a maximum of 2133 tests per hour with the ISE Mix Unit The mix unit contains 18 teflon coated mix bars The mix bars are washed with diluted wash solution B and rinsed between each cuvette mix in the mix bar wash wells The mix bar unit rotates to the positions for mixing washing and rinsing Photometer Lamp The AU2700 has a polychrometer photometr...

Страница 37: ...th user friendly displays that make the analyzer easy to learn and operate Breaker and Buttons If the main breaker for the power is turned on the power to the incubator and the reagent refrigerator is turned on If the Power ON button is turned on the system starts and the operation screen appears If the EM STOP button is pressed the main power is immediately turned off including the power to the i...

Страница 38: ...enu OLP1031 Guidance message display area P Parameters A Auxiliary M Maintenance U User L Logout R Routine Help The icon of the analyzer with a question mark displays the operation help screen with video clips The icon of the triangle with an exclaimation point displays the alarm help program System Status Use the System Status screen to perform a W1 W2 or Photocal according to the maintenance sch...

Страница 39: ...e system changes the operation mode Example of Tabs Display screens can be selected by clicking a tab The following illustration displays an example of tabs OLP1051 Test name Test Name Long Name Reagent ID Calculated Tests Multi Reagent Swicth Help Exit Set ALARMCLEAR STANDBY 1997 09 03 10 10 Tabs Example of a Dialog Box If a setup function is attempted or if confirmation of a function is necessar...

Страница 40: ... Report No Report Format Common Sample Results Fix Results Seq Comment Line Help Exit Set Image Format Print Report No An error has occurred in the analyzer system Contact a service engineer Analyzer Alarm Help window Alarm Help Measure Start Checking for Start Wait for a while Message display window Message display window Displays information about notification messages etc Help window Displays t...

Страница 41: ... Shift Tab Shift Back Space _ Q W E R T Y U I O P A S D F G H J K L Z X C V B N M Ctrl Alarm Help End Process key Stop Stand by key Page Up Page Down Start key Starts analysis Stop Standby key Stops analysis The system moves from Stop to Standby or Standby to Stop Pause key Continues analyzing the current samples under analysis then pauses When pause is released by pressing start analysis starts f...

Страница 42: ...97 09 03 10 10 3 Cuvette Status 6 DPR Status 5 Alarm List 4 Data Display 7 STAT Table Status 0 Reagent Status Measure S No Online S No Input Output Printer Bath Temp REF Coolant Temp C C STAT Cal QC Status Calibration QC OLU1011 1 ISE Status Reagent Electrode READY R2 Status R1 Status Checked 2 Analyzer Status R2 R1 Mode Display STAT Cuvette Wheel I S E R a c k B u f f e r R a c k S u p p l y To r...

Страница 43: ...key F2 key F4 key F6 key ALARMCLEAR STANDBY 1997 09 03 10 10 F8 key P Parameters A Auxiliary M Maintenance U User L Logout R Routine Each function displayed on the screen is executed by pressing the corresponding function key For example to close the currently displayed screen press the F2 key which corresponds to Exit on the screen ...

Страница 44: ...inter on the menu or function to be selected 3 Press and release the left mouse button quickly The item will be selected Tip Do not use the right mouse button No function is assigned to the right mouse button The functions in the drawing below can be selected using the mouse ALARMCLEAR STANDBY 1997 09 03 10 10 L Data Report OLP1034 Operation icons and Help icons Selectable with the mouse or the op...

Страница 45: ...e menu bar using the arrow keys The cursor highlighted menu will open the pull down menu automatically This method is helpful for searching or confirming the pull down menu items 3 Move the cursor onto a desired menu on the pull down menu using the up or down arrow keys 4 Press the Enter key If the menu does not contain a submenu the selected menu is executed and the screen display changes If the ...

Страница 46: ...The test on which the cursor is placed will be set Selecting multiple items by batch This method is used to select multiple items test etc from the displayed list It is used if multiple items are batch processed For example if printing reports for routine samples emergency samples etc select the sample to print then execute batch processing for report printout Use the spacebar to select an item Th...

Страница 47: ...ich can be selected To use a pull down menu move the cursor to a field that displays an inverted triangle Press the space key or click the left mouse button The options for that field appear To make your selection use the up or down arrow key located on your keyboard When the cursor is on the selection of your choice press enter If using a mouse click the left mouse button Your selection appears i...

Страница 48: ...p Exit Print S No Delete Sample Normal 1997 09 03 10 10 ALB GOT GPT G GTP S No 0001 Type Serum Profile P S ID Male Sex Age Year Month Round No Remaining Samples 7100 Sample Dilution Rate Test Total T Search ID S 1 XXXXXXXXXXXXXXXXXXXX Start Entry Change Test Online GPT G GTP XXXXXXXXXXXXXXXXXXXX Last S No Samples Execute Cancel Selecting an item with a check box To select an item with a check box ...

Страница 49: ...n Pnnn Pnnn Pnnn Pnnn Selecting a button To select an item with a button use one of the following options Move the cursor to the button you want to select and press enter Press the shortcut key in parenthesis while holding the ALT Key down Click on the button with the left mouse button Press the Enter key or click the left mouse button Test Requisition Demographics ALARMCLEAR STANDBY Help Exit Pri...

Страница 50: ...A 1 Profile Name 2 10 Profile Name 10 Select Profile Press the PageUp key or PageDown key If using the mouse drag the scroll bar Scroll bar Test Requisition Demographics ALARMCLEAR STANDBY Help Exit Exit S No Delete Sample Normal 1997 09 03 10 10 ALB GOT GPT G GTP S No 0001 Type Serum Profile P S ID Round No Remaining Samples 7100 Test Total T Search ID S 1 XXXXXXXXXXXXXXXXXXXX Start Entry Change ...

Страница 51: ...r key Retaining the original data Only press the Enter key Tip To load the entered data be sure to press the Enter key after entry If the screen is closed without loading the entered data will not be valid If a multi digit number contains zeros in the first digits they do not need to be entered To enter 0001 for example type 1 and press the Enter key and 0001 will automatically appear ...

Страница 52: ...d in the U S and other countries Menu help Function Key F1 Describes how to use the selected software screen While a screen is selected press the F1 key If using the mouse move the pointer onto function key F1 on screen then click the left mouse button Alarm help Displays information about system alarms Press the help home key while the alarm message is displayed If using the mouse move the pointe...

Страница 53: ...rted immediately are displayed in blue Menus with a level higher than the login level are displayed in a light color To avoid entering a login name and password just press enter The lowest level of menus are available When login is executed the login name and time are recorded in the alarm log list Procedure for Executing Login or Temporary Login When the system is started the window for inputting...

Страница 54: ...ort belts Measure 2 No more racks are detected on the sample transport belt All R1 dispensing is being completed Then a final cuvette wash occurs Measure End Not displayed A nonfatal mechanical error occurred during analysis with one or more samples having R2 mixed prior to the nonfatal mechanical error Processing will finish for the samples that have R2 mixed One Touch Mode Preprogrammed STAT ana...

Страница 55: ... 16 2 3 2 Calibration Analysis with Barcodes C 17 2 3 3 Performing a Reagent Blank or Calibration on the STAT Table C 18 2 3 4 Programming Advanced Calibration C 19 2 3 5 Programming Auto Calibration C 20 2 4 Quality Control Analysis C 22 2 4 1 Requisitioning QC Samples C 22 2 4 2 QC Analysis with Barcodes C 23 2 4 3 Performing QC on the STAT Table C 24 2 4 4 Performing Auto calibration and QC on ...

Страница 56: ... the STAT Table C 80 4 3 6 Reporting Repeat Results or Original Results C 83 4 4 Editing Results C 85 4 5 Correcting Results C 87 4 6 Printing Edited or Corrected Data C 88 4 7 How to Reprint Reagent Blank Calibrator QC and Patient Data C 89 4 8 Saving Parameters and Data to a Floppy Disk C 90 5 Finishing Analysis C 91 6 As Needed Tasks C 93 6 1 Checking Analysis Conditions C 95 6 2 Processing Pri...

Страница 57: ...n Chart OLP4001E Preparing the Samples and Racks 2 6 Preparing the Samples and Racks Preparing the Quality Control Sample 2 4 Quality Control Analysis 2 6 Preparing the Samples and Racks 2 7 Placing the Racks on the Analyser 3 STARTING ANALYSIS 4 OBTAINING RESULTS Placing the Rack on the System 2 7 Placing the Racks on the Analyzer Preparing the Patient Sample 2 5 Starting Normal Analysis 2 6 Prep...

Страница 58: ...as updated by selecting Routine Calibration Monitor Reagent Blank Monitor 6 Confirm that the calibration factors are updated for each calibrated test by selecting Routine Calibration Monitor Calibration Curve Measuring Quality Control Samples After updating the calibration curves quality control testing should be performed in accordance with regulatory requirements and each laboratory s standard p...

Страница 59: ... DR0061 DR0062 Caution The following items affect measurement The K and Cl results are not affected by bilirubin but small positive errors will occur in the Na results Positive errors will occur in the Cl results due to other halogen ions Br I If the hematocrit value for the total blood sample is 65 or more positive errors may be recognized in the K results When measuring plasma samples use Beckma...

Страница 60: ...e system The main power remains ON to maintain the temperature of the reagent refrigerators and reaction bath incubator Periodically the ISE performs a prime cycle After the end process procedure close the main valve to the deionized water Handling Alarms If an error occurs while using the system an alarm message is displayed on the monitor screen Use the on line help to assist in correcting the p...

Страница 61: ...rming QC on the STAT Table C 24 2 4 4 Performing Auto calibration and QC on the STAT Table C 25 2 4 5 Programming Auto QC C 26 2 5 Starting Normal Analysis C 27 2 5 1 Entering Individual Requisitions Routine Emergency and Priority STATs C 28 2 5 2 How to Requisition by a Profile Routine Emergency and Priority STATs C 30 2 5 3 Entering Group Batch Requisitions Routine Emergency Priority STATS C 31 ...

Страница 62: ... automatic priming of the ISE Starting the AU2700 If the AU2700 system is off perform the following procedures If the AU2700 is on and a new index needs to be created select Routine Start Conditions then skip to step 4 1 Open the main deionized water supply valve 2 Press the On button Initialization occurs the lamp comes on and the software is loaded 3 After pressing the On button the Start Up scr...

Страница 63: ...Menu bar 7 Perform the following daily maintenance procedures Refer to the Maintenance Chapter for detailed procedures Check the sample and reagent syringes for leaks or condensation Fill the concentrated wash solution bottles Analysis pauses and a warning message displays on the screen if there is insufficient concentrated wash solution Check the sample probes reagent probes and mix bars The prob...

Страница 64: ...check D Verify Checked and Reagent of Group displays in blue If yellow or red appear refer to Reviewing reagent position errors in System Status Reagent Status located in the Software Chapter of this Guide See Also For detailed information on the Reagent Status Screen refer to the Software Chapter Also refer to Checking Analysis Conditions located in the As Needed Tasks section of this chapter 9 V...

Страница 65: ... the Comment column After checking the list click the close button See Also For detailed information on System Status refer to the Software Chapter 12 Press function key F2 exit key The system status screen appears Press function key F2 exit again See Also For detailed information on starting analysis refer to the section in this chapter called Starting Analysis ...

Страница 66: ...on open bottle stability OLU2002E FRONT ISE POWER ON OFF ISE power switch ISE reagent dispenser REF solution tank Buffer solution tank MID solution tank Check the level of liquid in the tanks If the liquid level is low an insufficient liquid alarm will sound After this alarm occurs the following number of samples can be processed 180 for Mid 600 for Reference and 240 for Buffer solution See Also F...

Страница 67: ...lace the serum and or urine high and low standards in the labeled positions on the STAT table 8 7 6 5 4 3 2 1 22 21 20 19 18 17 16 15 14 13 12 11 10 9 W2 W1 U L U H S L K SE L N a S H CLE AN 8 7 6 5 4 3 2 1 22 21 2 0 1 9 18 17 1 6 1 5 1 4 1 3 12 1 1 1 0 9 U L U H S L K SEL Na S H C L E A N OLU2003 Top view of STAT table STAT ROTATION DIAG switch STAT table Sample cup STAT table cover small D Repla...

Страница 68: ...8 42 12 33 F Select function key F5 ISE unit start Highlight A Cal for Serum B Cal for Urine or C Cal for Serum and Urine When the prompt Start Operation appears select Yes It takes approximately 4 minutes to calibrate for serum and urine Caution After analysis is started keep your hands away from moving parts G When the calibration is complete the results are displayed in a list Verify the slope ...

Страница 69: ... testing is not performed The Start Condition screen displays whether the reagent blank and calibrator have tests requisitioned Note The software can be programmed to allow urine tests to use serum calibrators This feature is selected in Parameter Calibration Calibration Specific Use the at the Test Name field to select tests Then use the at Type to select urine Add a ü to Use serum cal then click...

Страница 70: ...der Use the arrow to select Inner or Outer exclusively if tests are programmed on both the inner and outer wheel in Parameter 4 Press function key F4 start entry 5 Select the tests requiring a calibration Blue indicates reagent blank only yellow indicates reagent blank and calibration All Enter a profile number 1 99 at the profile field Use the mouse or keyboard to select individual tests Select f...

Страница 71: ...elected in Parameters Calibration Calibrator For information on programming a new calibrator refer to Parameters Calibration Calibrator located in the Software Chapter 2 From the main screen select Routine Test Requisition and Calibration in that order The calibration requisition screen is displayed 3 Follow steps 2 through 7 listed in the procedure called Performing a Calibration and Reagent Blan...

Страница 72: ... for reagent blank calibrator or QC in System Maintenance and cups are not detected 2 Requisition reagent blanks or calibrations for the STAT table A Determine what tests need to be calibrated from System Status Reagent Status B Select System Status STAT Table Status Make sure reagent blank and calibrator cup s are placed in the correct positions on the STAT table C Select function key F6 Cal Req ...

Страница 73: ... checked before patient testing begins Important Advanced calibration is used with calibration racks or manual calibration from the STAT table Advanced calibration and auto calibration cannot be programmed for the same test The following error message appears when both are programmed for the same test Advanced Calibration STAT Table Calibration Auto Mismatch 1 From the main menu select Parameters ...

Страница 74: ...owing error message appears when both are programmed for the same test Advanced Calibration STAT Table Calibration Auto Mismatch 1 Calibration positions and sample types must be assigned to the STAT table in System Maintenance 2 Select Parameters Calibration STAT Table Calibration 3 From the Round Name prompt select 1 2 or 3 4 Press function key F4 set 5 From the Operation prompt select Auto 6 Ass...

Страница 75: ...hange Bottle No or Change Lot No 12 Check Execution on Measure Start to calibrate each time the analyzer goes from Standby to Measure 1 13 Use the arrow buttons next to the Test Name field to go to the next test 14 Repeat steps 10 13 for all tests requiring auto calibration 15 Select the Close button 16 Press function key F2 exit and verify information 17 Press function key F2 exit again to return...

Страница 76: ...tart Entry QC QC 1997 09 03 10 10 Type ITM01 ITM02 ITM03 ITM04 ITM05 ITM06 ITM07 ITM08 ITM09 ITM10 ITM11 Cuvette Individual selection Individual Reguisition R 2 At Type select serum urine or others 3 Select F4 Start Entry Select any tests that do not need QC to remove the blue highlight Select F8 Deselect All to remove the highlight from all tests Select the test s required for QC analysis Select ...

Страница 77: ...s with barcodes must be performed in a green rack 1 From the main menu select the Parameters QC Control and QC Common 2 Place a check in the box by the Barcode QC Operation field under the Check tab 3 Select the control tab on screen with the mouse 4 Press function key F4 set 5 Press function key F5 edit 6 Set the control IDs of QC samples and select close 7 Select function key F2 exit twice to re...

Страница 78: ...em Maintenance and cups are not detected 2 Requisition QC for the STAT table The STAT table check resets the requisition screen to perform ALL QC tests all tests are highlighted in blue If you do not want to run all QC after the STAT table check you must deselect the tests A From System Status STAT Table Status Make sure the QC is placed in the correct positions on the STAT table B Select function...

Страница 79: ...le Calibrations and STAT Table QC in Parameters must be programmed to Auto 1 From the main menu select the System Status STAT Table Status 2 Load the reagent blank calibrators or QC cup s in the correct positions on the STAT table Use the STAT ROTATION DIAG Button if necessary Only place calibrator and QC material on the STAT table if analysis from this material is required 3 Perform a STAT table ...

Страница 80: ...uto QC 9 Press function key F5 edit 10 The Available Unavailable status displays based on programming from Parameters QC Control QC Specific If a test has QC numbers assigned the status is available If the test does not have QC assigned the status is unavailable 11 From the Cyclic Type prompt select Test or Sample Test counts the specific test regardless of sample tubes Sample counts sample tubes ...

Страница 81: ...ading from a host computer If normal analysis is being performed using the ISE unit select the ISE tests Na K Cl or requisitions can be downloaded from a host computer to the AU2700 Profiles can be created to requisition a common group of tests at once Tips If calibration or quality control is required with the normal patient samples white racks it is necessary to requisition for calibration and q...

Страница 82: ...ollowing from the type pull down menu serum urine or other 3 Verify the sample number is correct for the next sample number to be processed on the AU2700 If you are processing emergency samples Type an E to test emergency samples in the red rack or type a P to test emergency samples on the STAT table Use function key F8 S No to select a specific sample number 4 Press function key F4 start entry 5 ...

Страница 83: ...1018 Test Requisition Demographics ALARMCLEAR STANDBY Help Exit S No Normal 1997 09 03 10 10 S No 0001 Type Serum S ID Male Comment C Sex Age Year Remaining Samples 7100 XXXXXXXXXXXXXXXXXXXX Month Test Total Start Entry Search S ID 10 Press function key F2 exit twice to return to the main menu ...

Страница 84: ...No Remaining Samples 7100 Sample Dilution Rate Test Total T Search ID S 1 XXXXXXXXXXXXXXXXXXXX Start Entry Change Test Online 2 Select the following from the type pull down menu serum urine or other 3 Verify the sample number is correct for the next sample number to be processed on the AU2700 If you are processing emergency samples Type an E to test emergency samples in the red rack or type a P to...

Страница 85: ...menu serum urine or other 3 Verify the sample number is correct for the next sample number to be processed on the AU2700 If you are processing emergency samples Type an E to test emergency samples in the red rack or type a P to test emergency samples on the STAT table Use function key F8 S No to select a specific sample number 4 Press function key F4 start entry 5 First select tests individually o...

Страница 86: ...Use function key F8 S No to select a specific sample number D Press function key F4 start entry E First select tests individually by profile or batch If requisitions are required for more than one sample type select function key F2 exit to return to Type Individually Highlight the tests to be performed in blue by clicking them with your mouse Tests highlighted grey are not operational for the samp...

Страница 87: ... End LED turns on when STAT sample aspiration is complete Remove STATs from the table when the End LED is On Caution Do not open and close the STAT table cover unless necessary The temperature in the STAT table may increase depending on the frequency of opening and closing the STAT table cover due to setting emergency samples Dew condensation may occur in the STAT table or on the sample cups If an...

Страница 88: ...ile P S ID Male Sex Age Year Month Round No Remaining Samples 7100 Sample Dilution Rate Test Total T Search ID S 1 XXXXXXXXXXXXXXXXXXXX Start Entry Change Test Online 2 Press function key F7 online The on line requisition window is displayed 3 Specify the sample type The sample type can be selected by using the pull down menu located by the type box 4 Enter the sample number s of the sample for wh...

Страница 89: ...om the main menu select Parameters Online in that order 2 Select F4 set 3 Select the pull down menu in each category on screen to select Real time at any of the Test Requisition Information fieldsfor automatic downloading by sequence or sample ID Tip If an online error occurs during real time online analysis the analyzer defaults to test profile number 0 Note Manual requisitions have a higher prio...

Страница 90: ...ter Prepare the Sample and Dispense it into the Sample Containers 1 Prepare the sample containers 2 Dispense the serum urine or other fluid into the sample containers Make sure the sample is free of clots suspened material and that there are no bubbles on the surface of the samples to be processed OR 3 Process blood collection tubes according to standard laboratory protocol Prepare the Control Ser...

Страница 91: ...uisition QC function key F6 QC must be placed in the highest numbered position of the rack for barcoded analysis to work properly For samples without barcodes place the control samples in the green rack in the order of the control numbers which were set as parameters User defined positions for serum urine and other quality controls are programmed in the System Maintenance screen The control number...

Страница 92: ...irty apply a new label Place the label on the front surface of the rack Place the label so that it is parallel with the sides of the rack 11 The label should not stick out from the rack 0 The label cannot be placed on the protruding part of the rack 1 0 The label should not stick out from the rack Rack front OLU2004E Rack side Protruding part of the rack Rack ID label Orient the label so the numbe...

Страница 93: ...ollowing illustration Make sure the entire surface of the label adheres to the container Do not apply a sealant etc or mark the sample container below the barcode label Do not insert foreign matter into the sample container between the lower edge of the label and the bottom Any of these conditions could cause the sample container sensor to fail If the specifications listed above cannot be met due ...

Страница 94: ...Margin Right Margin b a a Printing Barcode Labels Print barcode labels according to the following specifications Print contrast signal value Should be 0 6 for 90 or more of measurements and more than 0 55 for other measurements Print contrast signal value RL R0 RL RL Reflectance of white bars and margins R0 Reflectance of black bars The reflectance of white bars and margins should be more than 70 ...

Страница 95: ...icant digit MODULA 103 2 of 5 interleaved Least significant digit MODULA 10 Number of barcode digits Maximum 26 digits all ID Search Type Real time on line entry Batch Online Width of bar and space NB narrow bar is standard If you require a different bar width and space refer to the following specifications NB Narrow Bar NS Narrow Space WB Wide Bar WS Wide Space G Gap 0 2 to 0 5 mm NB to 1 25NB 2 ...

Страница 96: ...ers in the Correct Rack Rack placement depends on the analysis mode selected 1 Sequential Sample numbers must be placed in sequential order in the racks 2 Rack ID Rack IDs can be in use for Rack ID numbers 1 400 Rack ID Sample Number 1 1 10 2 11 20 3 21 30 4 31 40 Etc up to Rack ID 400 System 3 Sample ID Once requisitioned by sample ID and the sample ID is placed properly on the sample containers ...

Страница 97: ...e of sample container the dead volume in other containers will increase Use sample containers that meet the following conditions in the Flex rack Outer Diameter 11 5 to 16 0 mm Inner Diameter 9 0 to 15 0 mm Length 55 0 to 102 0 mm Note Even if the conditions listed above are met the Venoject II type tubes cannot be used The caps of adjacent sample tubes will interfere with each other To insert sam...

Страница 98: ...ition operation J A B C D E F G H I K L M N O Sample unloaded White rack Sample Nos determined automatically 10 1 2 3 4 5 6 7 8 9 11 12 13 14 15 16 Sample Nos set by requisition operation If the sample cups are set with one position unload Sample Nos shifted A sample unload alarm takes place Analysis test F for sample No 6 is not executed A no test requisition alarm takes place An analysis test is...

Страница 99: ... not be completely inserted because the label can get caught on the edge of the hole on the rack Apply a barcode label with an angle of 5 degrees or less See the following illustration Make sure the entire surface of the label adheres to the container Do not apply a sealant etc or mark the sample container below the barcode label Do not insert foreign matter into the sample container between the l...

Страница 100: ...hould be 0 60 or more If NB narrow bar is between 0 130 and 0 156 mm The print contrast signal value should be 0 85 or more Print contrast signal value RL R0 RL RL Reflectance of white bars and margins R0 Reflectance of black bars The reflectance of white bars and margins should be more than 70 The following should not be present Scratch with a diameter greater than 0 1 mm omitted pattern blur or ...

Страница 101: ...S Narrow Space WB Wide Bar WS Wide Space G Gap 0 2 to 0 5 mm NB to 1 25NB 2 0NB to 3 0NB 2 0NB to 3 0NB NB to 3 0NB 0 165 0 2 mm NB to 1 25NB 2 2NB to 3 0NB 2 2NB to 3 0NB NB to 3 0NB If a high print contrast signal value is obtained by printing a barcode clearly on a label with a high reflection factor and if the width of bars and spaces are retained as follows the narrow barcode can be used only...

Страница 102: ...the equipment with the END LED not lit will result in pause state and the emergency samples will not be analyzed 3 Remount the STAT table cover small 4 Press the STAT test switch When no error has occurred analysis will start and the SET LED and the END LED will go out When an error has occurred an error message and the error contents will be displayed In this case confirm the displayed error cont...

Страница 103: ...setting it on the STAT table A sample cup with a barcode attached should be set on the STAT table with the barcode facing in the direction as shown in the figure below OLU2115E The sample cup should be placed in an outer hole on the STAT table with the barcode facing outward 8 7 6 5 4 3 2 1 22 21 2 0 1 9 18 1 7 1 6 1 5 1 4 13 12 11 1 0 9 U L U H S L K SE L Na S H C L E A N The barcode is not read ...

Страница 104: ... a barcode read error Remove the sample container from the rack and then rotate the container in the correct direction before reinserting it into the hole OLU2005E Rack Sample cup The rack ID label is applied to this surface Direction that rack moves The rack ID label is applied to this surface Barcode label The barcode label is applied to this surface Flex Rack Adapters The flex rack does not nee...

Страница 105: ...apter into the rack 3 A clicking sound verifies that the adapter lock is engaged on the rack 1 2 3 4 5 6 7 8 9 10 Adapter lock Guide Adapter Slit Push in Rack window Guide groove Rack Slit Flex Rack Adapter Removal 1 With your finger push the adapter lock lightly from the outside of the rack window to disengage the lock 2 When the upper edge of the adapter comes out from the rack grasp the adapter...

Страница 106: ...rack White rack Red rack Set the sample cup with distilled water at the front Set in order of smallest calibrator No Set in order of smallest control No Set in any order Placing Racks on the Analyzer 1 Open the cover for the samples on the rack feeder as shown in the diagram below OLU2007 FRONT F R O Top view of rack feeder Sample protection cover Rack Surface where the rack ID label is applied Wi...

Страница 107: ...ID label is placed is facing away from you Blue Rack If reagent blank or calibration is required place the blue rack on the feeder first Yellow Rack If calibration is required place yellow racks sequentially after the blue rack Green Rack Run QC before routine analysis White Rack For sequential analysis place the racks in sample number order The order for setting the racks is arbitrary for rack ID...

Страница 108: ...robe and mix bars Inspect the printer and printer paper Prepare for a Sample probe wash Change the DI water in the pre dilution bottle Daily ISE Maintenance Inspect the ISE Buffer syringe Clean the Sample pot and Electrode lines Weekly Analyzer Maintenance Perform a W2 washes Cuvettes Mix Bars Sample Reagent probes Waste lines Perform a Photocal after the W2 Perform a Photometer check after the Ph...

Страница 109: ...E Buffer Syringes Replace the Deionized Water Filter Part of 6 month PM Replace the Sample Probe Filter Part of 6 month PM Replace the Photometer Lamp Part of 6 month PM Perform a W1 procedure Clean Air Filters Part of 6 month PM Clean belts and rack transport areas Sonicate the sample probes Clean the mix bars Clean or replace the static discharge brushes As Needed ISE Maintenance Replace the ref...

Страница 110: ... ISE buffer solution Approx 180 mL 200 samples day ISE MID solution Approx 260 mL 200 samples day ISE REF solution Approx 35 mL 200 samples day ISE cleaning solution Approx 1 mL day 200 samples day Tips The ISE buffer MID and REF solutions mentioned above are required for ISE operation The solutions are used during analysis when performing periodic priming and priming before analysis The amount of...

Страница 111: ...s The first and second reagent refrigerator can each hold 48 reagent bottles maximum Warning If using 15 or 30 mL bottles be sure to use the correct partitions as shown in the drawing below If using 120 mL bottles remove the separator between bottles Two 60 mL positions are required for the 120 mL bottles and three 60mL positions are required for the 180mL bottles 1 Open the analyzer cover 2 Lift ...

Страница 112: ...cannot be placed in fixed positions set in Reagent Status Warning When setting 15 mL or 30 mL reagent bottles use a partition to secure the bottle If using 120 mL or 180mL bottles remove the partition between bottles Two 60 mL positions are required for the 120 mL bottles and three 60mL positions are required for the 180mL bottles 4 Replace the R1 or R2 reagent refrigerator cover to its original p...

Страница 113: ...stem to checked status without actually performing a check B Check for Select Position Use to specify that only one or more specific R1 or R2 positions are to be checked C Check for Changed Position with ID If barcoded reagents have been moved since the last reagent volume check a new volume check will be performed on moved R1 or R2 bottles only D Check for all Positions Use to check all reagent p...

Страница 114: ...system indicates that the remainder of reagent is approximately 165mL This is due to the variation in capacity between bottles and the influence of dead volume are taken into account When reagent has been added first put the cap on the pouring opening and then insert the insertion pipe into the dispensing opening When inserting the insertion pipe exercise care not to foam the reagent After adding ...

Страница 115: ... 45 40 35 30 25 20 15 10 Reagent History 1 From the main menu select System Status Reagent Status 2 Select the R1 or R2 position to fix 3 Select function key F6 edit Use the pull down menu to select a test at the Test field that needs to be Fixed 4 Select the Fixed Reagent field 5 Enter the lot number and bottle number while in the Edit window 6 Use the pull down menu to select the bottle size of ...

Страница 116: ...s start to resume analysis OLU2096 Front view Diluted detergent tank B Detergent tank B Deionized water tank Adding Concentrated Wash Solution Warning When removing the cap on the wash solution tank be careful not to get any of the wash solution on your hands If your hands or clothing come into contact with the wash solution immediately wash it off with water Also if any wash solution gets in your...

Страница 117: ...450 tests approximately 1 Prepare a 120 mL reagent bottle to be used as a pre dilution bottle 2 Fill the sample pre dilution bottle with deionized water See the Maintenance Chapter for proper cleaning procedures 3 Set the bottle near the reagent refrigerator as shown below Place the bottle in the compartment so it does not protrude above the surface of the analyzer top If it is not placed properly...

Страница 118: ...ution 10 uL 50 uL 50 340 27 uL Dilution Dilution Sec Last Last Pre dilution Rate 100 0 0000 Min OD Max OD 2 0000 First L Last L Reagent OD limit 9999 999 L Dynamic range 1 000000 A H 0 0000 2 5000 First H Last H 9999 999 H 0 000000 B 100 Onboard Stability Period Correlation factor 5 Select function key F4 set 6 Set the sample pre dilution rate at 1 5 100 Tip For reference the main sample pre dil r...

Страница 119: ...m Start No Normal Repeat 03 12 2000 11 59 Routine Routine Emergency STAT Urine Start No Normal Repeat Others Start No Normal Repeat Routine Emergency STAT Routine Emergency STAT Calibration Remaining Samples nnnn Set Cal QC Inventory Check Inventory Check Masking 2 Check the settings for the data index round number operator name Also check the start number for serum urine and other samples If the ...

Страница 120: ...No to perform corrective actions before analysis Follow the necessary corrective actions to recover from the error See Also For information on recovering from errors refer to the Error Flags and Troubleshooting Chapters Tip An alarm will occur if 1 A different reagent lot number is used from those used for reagent blank or calibration 2 If different R1 and R2 reagent lot numbers are mixed for the ...

Страница 121: ...control and Twin Plot screens Contents 4 1 Checking Results C 68 4 2 Checking Quality Control C 69 4 3 Performing a Repeat Run C 74 4 3 1 How to Print a Repeat Run Work List C 75 4 3 2 How to Modify the Repeat Work List C 76 4 3 3 How to Perform an Auto Repeat Run C 77 4 3 4 How to Perform a Manual Repeat Run C 79 4 3 5 How to Perform a Manual Repeat Run Using the STAT Table C 80 4 3 6 Reporting R...

Страница 122: ... the printout and check it for error flags If error flags appear on the printout perform the corrective action corresponding to that flag For a detailed description of the printout please refer to your AU2700 Training Manual in the Modes of Data Interpretation Section 2 Perform corrective actions for any alarms generated during the run See Also For information about error flags refer to the Error ...

Страница 123: ...larms before routine sample results are valid See Also For information about errors flags refer to the Error Flags Chapter 1 On the main screen select Routine QC Monitor and Daily Control in that order The screen for selecting the control sample for quality control is displayed OLP1021 QC Help Exit Control No Qnnn Qnnn Qnnn Qnnn Sample No Index Control Name yyyy mm dd hh mm Serum Type Daily Data C...

Страница 124: ...xx xxxxx 3SD 1SD Ð1SD Ð3SD 2SD Ð2SD Q n n n Q n n n Q n n n Q n n n Q n n n Q n n n Q n n n Q n n n Q n n n 5 Check the chart for abnormal data See Also For information about handling errors refer to the Troubleshooting Chapter 6 Use function key F5 previous control test and function key F6 next control test to look at other QC test charts 7 Select function key F3 print to print statistics data gr...

Страница 125: ...number of the control sample to be referenced and choose OK 3 Select the test s to be referenced 4 Press function key F6 day to day The chart of day to day variation data is displayed OLP1038E ALARMCLEAR STANDBY Day To Day Control 1997 09 03 10 10 Index Test Name Control Name xxxxxxxxxxxxxxxxxxxx Mean Day to Day Statistics N Mean SD CV Range Base Value Mean SD CV Range Help Print Exit Daily Data P...

Страница 126: ...ee Also For information about errors flags refer to the Error Flags Chapter In quality control usually a normal control and an abnormal control are used The following figure shows a two dimensional plot with the normal control on the x axis and the abnormal control on the y axis OLP4086E 2SD 2SD Normal region sample Abnormal region sample MEAN 2SD MEAN 2SD When the normal and abnormal controls are...

Страница 127: ...ed by each box on the screen 2 Select tests to be viewed by using the mouse 3 Press function key F6 twin display plot The twin plot chart is displayed 4 Check the chart for abnormal data See Also For information about handling errors refer to the Troubleshooting Chapter For more information on Quality Control refer to the Calculations section of the Specifications Chapter 5 Use function key F5 pre...

Страница 128: ... be programmed to automatically place a sample into the repeat data file If Auto Repeat is set in Parameters the repeat run will be performed automatically according to the information in the repeat run data file If Standard Repeat is set in Parameters System System print the contents of the repeat run data file in a work list Perform a repeat run manually according to the contents of that file Im...

Страница 129: ...Total T Round No Repeat S No S ID XXXXXXXXXXXXXXXXXXXX XXXX Renum N List of Rep R Sample Dil D Normal Dilution Cond Serum Help Exit Start Entry Print S No Online Change Test Delete Sample 2 Press function key F3 print The window for printing the work list displays 3 Select the sample type for which the repeat run work list is to be printed 4 Enter the range of sample numbers It is also possible to...

Страница 130: ...n 4 Press function key F4 start entry 5 Select the test for which the repeat run is to be performed Tests that are selected will appear in color Normal Dark Blue Dilution Light Blue Cond Green Tests that are not selected will appear in light gray It is possible to select several tests Tests already requisitioned can be selected to remove them from the requisition 6 After selecting the test s press...

Страница 131: ...at run extraction conditions set using Parameters Repeat Parameters Once the system is programmed repeats are performed automatically with no extra operator involvement Performing an Auto Repeat Run Warning When running an Auto Repeat Run if two racks with the same rack ID are processed in the same run the data from the second rack will overwrite the data from the first rack if Repeat data overwri...

Страница 132: ...gency rack the analyzer stays in Measure 1 To start additional racks press the Rev Diag button The belt reverses two spaces Load the first rack one space in front of the rack detection sensor The belt advances one space and detects the rack then continues rack advancement The analyzer goes into Measure 2 when the last repeat rack goes past the sensors on the rack buffer belt Press the Start key ic...

Страница 133: ...ically 2 A separate dilution cuvette is made on the analyzer The diluent is DI water from the pre dilution bottle The predilution rate may be set at 1 for no dilution or 5 100 depending on the desired dilution Results using the dilution cuvette are calculated and printed as the corrected result automatically C The OR mode will requisition a repeat if any flag selected is generated D The AND mode w...

Страница 134: ...e 5 following categories A The normal repeat mode uses the original sample volume to repeat the test B The dilution repeat mode uses a user defined sample volume smaller than the original sample volume to perform a dilution Dilution can also be performed by using a dilution cuvette and defining the amount of dilution from 5 100 See How to Perform a Manual Repeat Run for more information C The OR m...

Страница 135: ...ation C The OR mode requisitions a repeat if any flag selected is generated D The AND mode requisitions a repeat only if all flags selected are generated on a test E The Condense category increases the sample volume for a repeat run 8 If you want to set up specific test repeat ranges Select Parameters Repeat Parameters Repeat Specific Enter a range at the Repeat Decision Level to generate J above ...

Страница 136: ... in the box indicates that Auto Rewrite will be performed If it is not checked an Auto Rewrite will not be performed How to Manually Overwrite Original Results with Repeat Results 1 In the Parameters Repeat Parameters Repeat Common screen the Repeat Data Overwrite field can be selected to manually overwrite all original data Press function key F4 set then select the check box by this field Press f...

Страница 137: ...n screen All of the original and repeat samples containing the specified test will display for easy overwriting of a single test Select any original test results to be overwritten with the repeat result Select F5 rewrite The data should now have an S flag to indicate the test was repeated and the original result overwritten with the repeat result See Also For more information about error flags ref...

Страница 138: ...12 30 ALARMCLEAR STANDBY Help Exit Test No Data Edit 1997 09 03 10 10 Index Test Name Sample No Sample ID Routine Serum Emergency STAT nnnn nnnn Ennn Ennn Pnnn Pnnn Routine Urine Emergency STAT Unnn Unnn UEnnn UEnnn Routine Others Emergency STAT Xnnn Xnnn XEnnn XEnnn UPnnn UPnnn XPnnn XPnnn Data Display Search Add 2 Use the pull down menus to select an index and test name 3 Specify the type of the...

Страница 139: ...Result Flag JH 1 000 Index 1997 10 10 19 00 Test Reagent INF Reagent INF 6 Press function key F5 edit or F5 edit results If samples were selected the sample screen appears If tests were selected the test screen appears 7 Edit the displayed analysis results Note If the barcode type is set to ISBT128 in the System screen the barcode ID entered as a sample ID is checked against ISO7046 Mod 37 2 for c...

Страница 140: ...agement and Data Correction in that order The screen for correcting the data is displayed OLP1023 1989 07 07 12 30 ALARMCLEAR STANDBY Help Exit Test No Data Edit 1997 09 03 10 10 Index Test Name Sample No Sample ID Routine Serum Emergency STAT nnnn nnnn Ennn Ennn Pnnn Pnnn Routine Urine Emergency STAT Unnn Unnn UEnnn UEnnn Routine Others Emergency STAT Xnnn Xnnn XEnnn XEnnn UPnnn UPnnn XPnnn XPnnn...

Страница 141: ...rrected Data The analyzer is in Standby Mode 1 On the main screen select Routine Data Report and Data List in that order 2 Select an index using the pull down menu 3 Specify the type of the sample to be printed 4 Enter the range of sample numbers It is also possible to enter the range of sample IDs 5 Press function key F3 print The print setup dialog box displays 6 Click the OK button Printing beg...

Страница 142: ...ange of sample numbers It is also possible to enter the range of sample IDs 5 Press function key F3 print Start Printing Select OK 6 After the data is printed select function key F2 exit The analyzer is in Measure Mode If a printer error occurs during a measure mode The data that did not print will be stored in the printer buffer The mode will display as Meas to Meas End The analyzer is not in the...

Страница 143: ...the floppy disk The load files from FD option will load files from the floppy disk onto the computer hard drive Loading files onto the computer hard drive writes over the existing files with the same name Important A safer option can also be used When saving files to a floppy disk files can be saved to the hard drive by selecting the option called Save files to HD This keeps the hard drive current...

Страница 144: ... STAT 4 From the sample number field enter the range of sample numbers to save or leave the asterisk to save the entire range displayed The samples can also be saved by entering a range of sample ID numbers from the sample ID field 5 Insert the floppy disk in the computer Select function key F5 Start Save From the Insert FD Start prompt select yes The message Operating Wait for a while displays ...

Страница 145: ...maintenance is complete perform an End Process Even though analysis is finished it does not mean that the power to the system is turned off completely The reagent refrigerators and incubator require power to be maintained The ISE unit also requires power to perform an automatic periodic priming cycle Contents Ending ISE Analysis C 92 Ending Analyzer Analysis C 92 ...

Страница 146: ...formed during a W2 The power to the system is automatically turned off after the W2 is complete Performing an End Process 1 Check that all of the samples are analyzed 2 Check that the system is in the Standby mode 3 Check for floppy disks in the floppy disk drive If there is a floppy disk in the drive remove it 4 From the main menu press the End key located on the keyboard The window for finishing...

Страница 147: ...g the STAT Table One Touch Mode C 98 6 2 2 Using the STAT Table Normal Analysis Mode C 100 6 2 3 Using the Red Rack C 103 6 3 Performing a Stop or an Emergency Stop During Analysis C 105 6 4 Pausing Analysis C 107 6 5 Stopping the Rack Feed Unit C 108 6 6 Creating a New Profile C 109 6 7 Changing QC Ranges C 110 6 8 Changing Calibrator Set Points C 111 6 9 Turning On Off the Sample ID Barcode Read...

Страница 148: ...e Processing emergency samples using the red rack Processing can be performed as a different sample type E ahead of routine samples Stop Operation If analysis must be stopped in progress press the stop function key on the screen or the Stop Standby key on the keyboard The analysis operation will come to a complete stop Emergency Stop If all power to the system must be turned off press the Emergenc...

Страница 149: ...e Status 6 DPR Status 5 Alarm List 4 Data Display 7 STAT Table Status 0 Reagent Status Measure S No Online S No Input Output Bath Temp REF Coolant Temp C C STAT Cal QC Status Calibration OLU1011 1 ISE Status Reagent Electrode READY R2 Status R1 Status Checked 2 Analyzer Status System Status Icon System Status Icon If the System Status icon displays a yellow exclamation point a reagent shortage or ...

Страница 150: ...e detergent DI water temperature of refrigerator and incubator DPR Status Displays the sample number of the sample for which analysis has started and ended Displays sample numbers that were input output on line between the system and host computer and displays printer status Use to resume printing if a printer error occurred during a measure mode STAT Table Status Displays the presence or absence ...

Страница 151: ... STAT Button Using the Red Rack If many emergency samples require analysis use the red rack Instruction If a sample is centrifuged in a primary tube to be analyzed on the AU2700 system check that there is sufficient serum for analysis in addition to the dead volume required for sample detection If the serum height in the sample tube is less than the limit transfer the serum into a smaller sample c...

Страница 152: ...tatus Measure S No Online S No Input Output Printer Bath Temp REF Coolant Temp C C STAT Cal QC Status Calibration QC OLU1011 1 ISE Status Reagent Electrode READY R2 Status R1 Status Checked 2 Analyzer Status System Status Icon 1 Check for fatal or nonfatal errors From the Standby mode select the analyzer start key or icon to review the error list If errors are present perform corrective actions Se...

Страница 153: ...S H CLE AN STAT table cover small Sample cup STAT table Position for placing the sample for the one touch mode position No 1 STAT test switch OLU2107E 1 Place the STAT sample in position 1 on the STAT table 2 Press the STAT Button Analysis starts and the STAT button begins to blink The sample number is automatically updated The new sample number is the number of the priority sample before the STAT...

Страница 154: ... The STAT table has 22 positions that can be programmed for user defined functions one option is to assign the position for priority STAT analysis The following procedure explains how to perform a priority STAT in the normal analysis mode instead of the one touch mode The requisition procedure is performed in the same way as normal analysis except in the P category Tip If condensation appears on t...

Страница 155: ...batch If requisitions are required for more than one sample type select function key F2 exit to return to Type 5 Press the STAT button to turn the STAT SET LED on The STAT SET LED must be on before STATS can be loaded Do not load samples if the SET LED blinks or does not come on The SET LED turns on when loading is possible If necessary press the STAT ROTATION DIAG Button to rotate to the appropri...

Страница 156: ...the figure below OLU2115E The sample cup should be placed in an outer hole on the STAT table with the barcode facing outward 8 7 6 5 4 3 2 1 22 21 2 0 1 9 18 1 7 1 6 1 5 1 4 13 12 1 1 1 0 9 U L U H S L K SEL Na S H C L E A N The barcode is not read for cups placed in the inner holes STAT table Instruction Do not place the barcode label below the holes on the STAT table This may cause barcode read ...

Страница 157: ...al analysis requisition Tips If normal analysis is in progress and emergency racks must be processed press the feeder stop key The window for stopping the feeder is displayed Select YES and press enter The rack feeding process stops 1 On the main screen select Routine Test Requisition and Normal in that order The screen for requisitioning normal analysis is displayed OLP1017 Test Requisition Demog...

Страница 158: ...so For information about how to place samples and racks refer to Preparing Samples and Racks located in this Chapter 10 Set the red rack in the rack feeder Any white racks on the rack feeder unit can be manually moved back and the red rack placed in front for the next sample analysis 11 Press start to begin or resume analysis See Also For information on how to start analysis refer to Starting Anal...

Страница 159: ...gency stop it is not possible to use the data Analysis must be repeated 1 Press the Stop icon on the menu bar or press Stop on the keyboard during analysis The window for executing a stop is displayed 2 Select YES then press enter A message indicating that a stop is being executed is displayed The entire analysis operation stops the system switches to the stop mode within 4 5 seconds Resetting the...

Страница 160: ...on in the cuvettes or may cause abnormal results If reagent was in the cuvettes for a lengthy period of time perform a W1 prior to restarting analysis Resetting the System after an Emergency Stop 1 Press the White button Reset on the front of the analyzer 2 After 10 seconds press the Green button On The software will load Wait approximately 20 minutes until the photometer lamp has stabilized befor...

Страница 161: ...g Only the Reset and Check Specified Position options are available perform the Check Specifed Positions on the new reagent s The reagent check is only available before the Reagent Short alarm is generated 1 Press the Pause function key or pause icon on the menu bar during the analysis operation The window for executing the pause is displayed 2 The analyzer mode displays as Meas Pause for 14 minut...

Страница 162: ...ndow for stopping the feeder is displayed 2 Select Yes and press enter A message indicating that the rack feeder is being stopped is displayed The analysis operation continues for racks that have already been fed from the feeder and stops at the rack at the start of the rack feeder Starting Analysis After the Rack Feeder Has Been Stopped 1 With the rack feeder stopped perform the requisition opera...

Страница 163: ...rs Profile 2 Select function key F4 set 3 Select function key F8 profile no and enter a profile number to make a new profile 4 Enter the profile name at the Profile Name field then select OK 5 From the Test No field select function key F5 edit and select the tests required for the profile Select Close to set the profile 6 Verify the tests selected appear on the screen with the correct profile numb...

Страница 164: ...key F4 set then function key F5 edit Enter the new QC average mean standard deviation SD and range at the fields The average is listed on the package insert The range 2SD above and 2SD below the mean is listed on the package insert Type in the entire value of the range The SD 1SD is the range divided by 4 4 Press the Close button and select function key F2 exit to set the new ranges 5 Optional Sel...

Страница 165: ...ect Parameters Calibration Calibration Specific 2 Use function key F8 test no to get to a specific test number or use the arrow buttons next to the test name field 3 Select function key F4 set Enter the new calibrator concentration at the CONC field from the package insert 4 Select function key F2 exit to set the new concentration ...

Страница 166: ...e ID reader can be turned on or off for racks routine emergency and or priority STATs 1 Select Parameters System System 2 Select function key F4 set From the Test Requisition field select the pull down menu next to the routine emergency or STAT field 3 Select Sequential to turn off the barcode reader or select Barcode to turn on the barcode reader ...

Страница 167: ...umn allows some maintenance to be performed automatically at system start up The maintenance items are selected in System Maintenance Warning If maintenance W1 or Photocal is enabled in the Auto Power On screen make sure all covers are closed and that warnings are posted since the instrument will begin maintenance at the programed time without any warning 3 Select function key F2 exit 4 When the E...

Страница 168: ... Use the mouse to select a blank line number Select function key F5 entry The User Menu set up screen will display Select the first menu to be part of the User Menu Select OK The screen selected appears as part of the User Menu list on the right side of the screen 3 Use the mouse to select the next menu position in the User Menu 4 Repeat steps 2 and 3 until all the screens you want to add are part...

Страница 169: ...key or icon yellow square located at the top of the screen If analysis is performed after shifting to Standby results could be compromised since the system temperature did not have time to stabilize completely 1 Verify that the analyzer is in a Warm Up Mode 2 Select Auxiliary Standby Set If the analyzer is currently in Stop select the Stop key again The analyzer can be initialized and returned to ...

Страница 170: ...e button D Click on the Use Cuvette tab to assign tests to the inner or outer cuvette wheel Select function key F4 set and pick the test number Select function key F5 edit and make changes Click the close button Note To maximize throughput place the most frequently used tests first in the numerical list on the Test Name screen Alternate tests evenly on the inner and outer wheel If the same test is...

Страница 171: ... the green rack Enter the control name expiration and lot number Press function key F2 exit twice B Select Parameters QC Control QC Specific Use function key F8 test no to get to a specific test Enter the test and click OK C Select function key F4 set Enter the control number which is the QC number located in the QC Common screen D Press function key F5 edit to select Single or Multi The single ch...

Страница 172: ...umber assigned will be the calibrator position in the yellow rack unless the calibrator ID option is in use C Click on the close button D Press function key F2 exit twice The main menu returns AB Calibration Type E Select Parameters Calibration Calibration Specific F Select function key F4 set Refer to the methodology sheet and enter the calibration type and formula G For each calibration point en...

Страница 173: ...assign a name to the list number you are formatting D Select a list type by using the pull down menu located next to the Attribute field E Use the mouse to click on and select information in the following columns Common Format Title Information Format and Sample Information Format F Select the Test tab located in the upper left corner of the screen G Select the test arrangement by using the pull d...

Страница 174: ...st switch Change round End Press the End processing key Standby mode Warmup mode Standby mode YES NO NO YES Initialize mode Login Perform inspections Create a report and master data file Save analysis data Using the Report menu and Data List menu See D 175 D 178 Details of inspection methods See F 6 Set on the rack feeder Set on the STAT table Check the quality control data Check the quality contr...

Страница 175: ...l and using the One Touch Mode D 7 1 3 Reagent Status D 8 1 4 ISE Status D 15 1 5 Analyzer ANL Status D 19 1 6 Cuvette Status D 22 1 7 Data Display D 24 1 8 Alarm List D 26 1 9 Data Processor DPR Status D 28 1 10 STAT Table Status D 29 2 Routine Menu D 31 2 1 Start Conditions D 32 2 2 Test Requisition D 35 2 2 1 Normal Analysis D 35 2 2 2 Repeat Analysis D 39 2 2 3 Quality Control D 43 2 2 4 Calib...

Страница 176: ...ts D 99 3 3 2 Checked Tests D 101 3 3 3 Sample Blank D 103 3 4 Repeat Parameters D 104 3 4 1 Repeat Common D 104 3 4 2 Repeat Specific D 106 3 5 Quality Control D 108 3 5 1 QC Common D 108 3 5 2 QC Specific D 111 3 5 3 STAT Table QC D 113 3 6 Calibration D 116 3 6 1 Calibrator D 116 3 6 2 Calibration Specific D 119 3 6 3 STAT Table Calibration D 128 3 7 Online D 131 3 7 1 Protocol D 132 3 7 2 Test...

Страница 177: ...on D 170 4 8 Standby Set D 172 5 Maintenance Menu Operations D 173 5 1 Data Operation D 174 5 1 1 FD Data Management D 174 5 1 2 Set Date Time D 176 5 1 3 Retrieve Database D 177 5 1 4 Off line Output D 178 5 1 5 Modem D 180 5 2 Analyzer Maintenance D 181 5 3 Consumable Management D 182 5 4 Periodic Maintenance D 184 5 5 Maker Maintenance D 186 5 5 1 Program Version D 186 5 5 2 Analyzer Diagnostic...

Страница 178: ...D 4 Chapter D Software Automated Chemistry Analyzer AU2700 User s Guide March 31 2005 ...

Страница 179: ...tus 1 1 About System Status D 6 1 2 Performing a W1 W2 or Photocal and using the One Touch Mode D 7 1 3 Reagent Status D 8 1 4 ISE Status D 15 1 5 Analyzer ANL Status D 19 1 6 Cuvette Status D 22 1 7 Data Display D 24 1 8 Alarm List D 26 1 9 Data Processor DPR Status D 28 1 10 STAT Table Status D 29 ...

Страница 180: ...ystem status changes during analysis a message may appear or the background color of the screen may change The following background colors usually indicate the following Blue No error Yellow Error occurred but analysis is possible Red Error occurred and analysis is not possible Note The ISE Status turns red and displays Busy during ISE Calibration and cleaning This is normal and not cause for alar...

Страница 181: ...tatus 5 Alarm List 4 Data Display 7 STAT Table Status 0 Reagent Status Measure S No Online S No Input Output Printer Bath Temp REF Coolant Temp C C STAT Cal QC Status Calibration QC OLU1011 1 ISE Status Reagent Electrode READY R2 Status R1 Status Checked 2 Analyzer Status Description Perform a W1 W2 or Photocal according to the maintenance schedule located in the Maintenance Chapter to ensure accu...

Страница 182: ...or reagents which are not barcoded and verify the remaining number of tests in the bottles The following can be viewed or entered tests per bottle bottle volume reagent on board stability calibration stability reagent lot number and bottle sequence See Also For information on correcting many of the following abnormal messages refer to the Fatal and Nonfatal Errors section located in the Flags Chap...

Страница 183: ... the barcode or from F6 Edit Sequence Reagents are displayed in priority order Sequence is the order in which reagents are to be used if multiple reagents exist for the same test item The sequence is automatically assigned to reagents for the same test item according to 1 Lot lowest 2 On board stability 3 Volume lowest 4 Position lowest Comment Displays the contents of errors Use this software scr...

Страница 184: ...st reagent refrigerator Reagent History H Meaning Frame Color Fixed reagent Blue Reagent ID White Probe detergent Green 120 180 mL bottle positions Gray Meaning Inside Color No bottle Background color Reagent bottle no error Blue Probe detergent bottle no error Blue Reagent bottle an error exists Yellow Probe detergent bottle an error exists Yellow Diluent bottle an error exists Yellow 120 180 mL ...

Страница 185: ...lays Buttons Changes the position number displayed The position number can also be changed by using keyboard functions Shift key Page Down button Shift key Page Up button Type Displays the sample type serum urine or other Use Reagent ID Fixed Reagent Options Use reagent ID tells the system to identify the reagent by the barcode label on the bottle Fixed reagent tells the system that a certain reag...

Страница 186: ... The Reagent Status screen returns Bottle Empty This comment appears when linked or sequenced bottles are in use When the volume of bottle sequence 1 reaches 400ul for 15mL bottles 1 mL for 30 mL and 60 mL bottles and 2 mL for the 120mL bottles Bottle Empty appears in Reagent Status and in the Start window If sequenced bottles are in use the bottle is changed to bottle sequence 2 from bottle seque...

Страница 187: ...itions and verify the round number selected If necessary use the pull down menu to change the round to 1 2 or 3 Onboard Expired The onboard stability has expired Put on a new bottle of reagent and perform a reagent volume check Onboard Overrode The onboard stability value was changed in Parameters Specific Test Parameters R1 Reagent The first reagent exists in the second reagent refrigerator R2 Re...

Страница 188: ...d Refer to the procedure called Clean the Sample Probe DI Filter located in the Monthly Maintenance section of the Maintenance Chapter Unchecked in red Reagents were not checked the refrigerator door was opened or Parameter screens were accessed Undefined Reagent The read reagent ID is not defined in Parameters Common Test Parameters Test Name or it is not defined in the round Unpaired Reagent The...

Страница 189: ...0 0 998 0 999 1 000 3 001 0 222 1 003 Na K Cl ISE Status Normal Range 38 68 38 68 38 68 0 80 1 20 0 75 1 25 0 75 1 25 Help Exit Result Cal Result Select Slope Chart 1994 12 18 1994 12 18 1994 12 18 1994 12 18 1994 12 18 1994 12 18 1994 12 18 1994 12 18 13 33 12 04 11 56 9 00 18 44 13 01 18 42 12 33 Description Use this screen to display the data and graph of the slope of the calibration curves for...

Страница 190: ...e in range Slopes out of range will be highlighted in yellow MID SOL factor This is a value which is obtained based on the concentration of the MID standard to establish a reference for measuring Na K and Cl ion concentrations Factors out of range will be highlighted in yellow Slope Chart tab Display a slope chart Slope values obtained from calibration can be viewed by selecting the slope chart ta...

Страница 191: ... displayed Date Time Displays the date and time that the selectivity check was performed Chk Conc Displays the concentration of check solution which is calculated from the results of the selectivity check each time Normal Displays the reference values of each check solution concentration Start and calibrate the ISE For procedures on start up and calibration refer to Starting the ISE located in the...

Страница 192: ...fer prime MID standard Reference prime Prime bypass 1 Select System Status ISE Status 2 From the Result Cal Slope Chart or Selectivity Check Results tab press function key F6 prime A window to select a prime operation item is displayed 3 Using your mouse select from the following primes to be performed A Replace Electrode B P Tube Exchange Prime C Total All Prime D Buffer Prime E Mid Ref Prime F P...

Страница 193: ...de MID BUFFER REF Exit ANL Status 1997 09 03 10 10 OLU1107E Unconnect Description This screen displays the status of the following Rack feeder status Detergent Wash Solution ISE reagent status DI water tank level R1 R2 refrigerator temperature Incubation Bath Temperature Cuvette wheel status Reagent Compartments Vacuum Tank It also displays the sample number of the sample being analyzed in the R1 ...

Страница 194: ... Blue Status of reagent by each position in the R1 R2 compartments Including ISE Reagent in the ISE section Meaning Change in background color Empty Yellow Full Blue Not in use Grey Cuvette Wheel Incubator temperature Message Meaning Change in background color Temp display between 36 5 37 5 C Within range Blue Other temp display Lower than 36 5 C and higher than 37 5 C Out of range Yellow Status o...

Страница 195: ...entrated detergent tank and diluted detergent tank Message Meaning Change in background color None No error Blue Tank Empty Tank s is empty Red ISE Electrode Status Meaning Change in background color Slope value is either greater than 68 or less than 38 Na and K are positive Cl is negative Yellow MID liquid correction factor exceeds the acceptable limit Yellow Acceptable limit Na 0 80 1 20 MID liq...

Страница 196: ...k for the inner and outer wheel after a photocal is performed It also displays the date time that the photocal measurement and W2 were executed The recommended mean cuvette check range is 0 03 The absolute check field should be set to 6 5 to maximize the range The cuvettes are color coded to indicate photocal status White Cuvettes passed the photocal Green Failed the cuvette check Red Failed the m...

Страница 197: ...displayed for each error For procedures on performing a photocal refer to the Maintenance Chapter F3 Print Print cuvette information It is possible to print a list of defective cuvettes Cuvettes are considered defective if they did not pass photocal 1 In the Cuv Status screen press function key F3 print A window to start printing is displayed 2 Select OK Printing begins F5 Check Start Check cuvett...

Страница 198: ...F AAAAA nnnnnnnnnF AAAAA nnnnnnnnnF AAAAA nnnnnnnnnF AAAAA nnnnnnnnnF AAAAA nnnnnnnnnF Serum Urine Help Exit System Status Icon Measured Data Measuring Data All Data STAT Data ISE Data Description Use this screen to display results during analysis or if real time output with the printer is not functional Analysis data displayed on the screen is updated when sample analysis is complete Use this sof...

Страница 199: ...the screen illustration on the previous page If the analyzed result is abnormal an error flag will be attached to the right of the sample data Although more than one error flag may be attached only the one with the highest priority is displayed See Also For information about interpreting data refer to the Basic Operations Chapter Obtaining Results For more information about error flags refer to th...

Страница 200: ...m of 4096 alarms can be displayed Use this menu to determine recent or common alarms The most recent alarms are displayed at the top of the list To view detailed information about an alarm highlight the alarm then press function key F6 Display Help The alarm help screen will display Use this software screen to Display the alarm list Select System Status Alarm list The Alarm list screen is displaye...

Страница 201: ...yzer AU2700 User s Guide Chapter D Software D 27 May 2002 F5 Re Display To display the most current alarms select function key F5 re display F6 Display Help To display the alarm help screen select function key F6 display help ...

Страница 202: ...Icon Printer Control Description This screen displays the sample number for which analysis has started and ended It also displays sample numbers that were input output on line between the system and host computer and the status of the printer Use this software screen to View sample analysis data transfer and printer status 1 Select System Status DPR Status Measure Status Normal run and repeat run ...

Страница 203: ...e Blue Red Blue Ring Yel Ring Gre Ring Red Ring Ora Ring Yel Description This screen displays the status of each position on the STAT table It also provides the status of QC and calibration for the STAT table This screen can also be used to requisition QC and calibration analysis Important It is recommended that the operator determine the acceptable length of time to leave samples controls and cal...

Страница 204: ...al Grey Automatic Grey Sample dispense Indicates sample dispense status Circle Color Red Not dispensed Patient samples were not analyzed because samples were not requisitioned or reagent is missing Blue Sample dispensed Yellow Dispensing sample White Cup detected Grey No cup detected Ring Color Indicates sample type Blue Reagent Blank Yellow Calibrator Green QC Red STAT Orange Repeat STAT F5 Check...

Страница 205: ...etrieve Repeat Data D 47 2 3 Reaction Monitor D 49 2 4 Calibration Monitor D 55 2 4 1 Calibration Curve D 55 2 4 2 Calibration Trace D 58 2 4 3 Reagent Blank Monitor D 60 2 5 Photocal Monitor D 62 2 6 QC Monitor D 64 2 6 1 Daily Control D 65 2 6 2 Day to Day Control D 68 2 6 3 Twin Plot D 70 2 6 4 Data Edit QC Monitor D 72 2 7 Data Management D 75 2 7 1 Data Edit D 75 2 7 2 Data Correction D 77 2 ...

Страница 206: ... open Start conditions cannot be changed in a measure 1 mode however they can be changed in Standby Data index A data index is a data file used to store analyzer data Usually one data file is used per day or per shift This is a main search key for analyzed data Enter a year month date and time in the format according to the displayed message You can also use the pull down menu by the date index fi...

Страница 207: ...y STATs emergency STATs and repeats 1 After pressing Power On the Start Condition screen will appear To change the data index select function key F4 set then select function key F8 data index A new index can be created with the current date and time or existing indexes can be accessed Enter the date and time Click OK using your mouse The Start Condition screen can also be selected from Routine Sta...

Страница 208: ...AL No In cases where there is a barcode a list of CAL s CAL IDs and CAL names will display F6 QC View the QC rack setup Press function key F6 QC Use this screen to confirm control sample location for QC with respect to their position on the green rack It is also possible to confirm barcode IDs of control samples When green racks are used a rack diagram appears on screen displaying QC Each control ...

Страница 209: ... Total T Search ID S 1 XXXXXXXXXXXXXXXXXXXX Start Entry Change Test Online Description Routine samples must have a requisition for the tests that will be run on each sample Requisitions can be performed on the AU2700 in this screen or downloaded from a host computer to the AU2700 Requisitions are processed sequentially by sample number or by the sample ID number There are three methods for perform...

Страница 210: ...olytes Profiles are setup in Parameters Common Test Parameters Profile By selecting the profile option you can requisition tests in a batch rather than individually Sex Sex can be set when it is selected in the Parameters Format Requisition Format screen Age and Month Age and Month can be set when it is selected in the Parameters Format Requisition Format screen Test A maximum of 51 tests with ISE...

Страница 211: ...wing function keys appear F6 Cancel Sub screen of F5 Change Test Entries can be canceled before saving Press function key F6 Cancel before pressing F4 Entry and select Yes F7 Sample Dilution Sub screen of F5 Change Test Press function key F7 Sample Dilution The sample dilution dialog box displays Enter a sample dilution factor then select OK The dilution function can be used on chemistry tests onl...

Страница 212: ...le number If information needs to be corrected on a particular sample enter the number of the sample to be edited For emergency samples Enter an E before the number Emergency samples are performed in the red rack For priority samples Enter a P before the number Priority samples are performed on the STAT table Patient Information 1 to 6 Displays patient information setup in Parameters Format Requis...

Страница 213: ...t ranges sample volume and abnormal flags can be programmed to automatically place a sample into the repeat data file If Auto Repeat is set in Parameters the repeat run will be performed automatically according to the information in the repeat run data file If Standard Repeat is set in Parameters System print the contents of the repeat run data file in a work list Perform a repeat run manually acc...

Страница 214: ...d 999 Select OK to close the dialog box Sex The gender entered in Routine Normal will display here Age Year Month The age of the patient entered in Routine Normal will display here Test list Displays the tests available for selection in a list Test Total Displays the total number of samples analyzed on each test Select the Test Total button and the Test Total will display in the dialog box Select ...

Страница 215: ...er How to Print a Manual Repeat Run Report repeat results or original results Refer to the Basic Operations Chapter Reporting Repeat Results or Original Results F3 Print Print a repeat run work list Refer to the Basic Operations Chapter How to Print a Repeat Run Work List F4 Start Entry Press this function key to enable screen changes F5 Change Test Displays the remaining tests available for selec...

Страница 216: ...number F6 STAT Repeat Use this function key to set up a repeat run using the STAT table The sample number of the selected repeat run sample will be assigned an HP prefix For more information on this procedure refer to the procedure called To repeat a sample from a routine rack on the STAT table located in Chapter C Basic Operations F7 Change Dil Use this function key to change the repeat run type ...

Страница 217: ...screen is used to select QC tests in green racks or barcoded QC samples only This does not pertain to QC samples on the STAT table This screen can be used to delete the QC requisition on the tests described above which do not need QC analysis The QC screen default setting is to perform all tests Type The sample type can be changed to serum urine or other Select the sample type from the pull down m...

Страница 218: ...cked Use this software screen to Change the QC requisition The operator can either cancel or restore the Selected QC test 1 Select Routine Test Requisition QC 2 Press function key F4 start entry 3 Use the mouse to deselect tests that are not needed 4 Press function key F2 exit twice The contents will be saved F4 Start Entry Requisition QC samples For procedures refer to the Basic Operations Chapte...

Страница 219: ...R Analyzer Requisition C F4 Start Entry Help Exit RB All Change Option Select All Test Entry ALARM CLEAR Description Use this screen to requisition for reagent blanks and calibrators in racks Tests with expired calibrations and tests with new bottles or lot numbers of reagent depending on Advanced Calibration programming in Calibration Specific are automatically requisitioned for calibration after...

Страница 220: ... A legend of colors show the available types of calibration options RB only light blue One point green All yellow Use this software screen to Requisition for a calibration For procedures refer to Performing Calibrations and a Reagent Blank located in the Basic Operations Chapter Perform a calibration For procedures refer to Performing Calibrations and a Reagent Blank located in the Basic Operation...

Страница 221: ...ers Emergency STAT nnnn nnnn XEnnn XEnnn UPnnn UPnnn XPnnn XPnnn Execute Retrieve File Initialize Retrieve Repeat Data Description This screen has two main functions 1 Initialize the repeat data if changing between auto repeat and manual repeat This initializes the repeat data file only 2 This screen is also used to retrieve repeat requisitions with flags when using manual repeat methods Function ...

Страница 222: ...er pressing OK F6 File Initialize Initialize a repeat run data file The operator can delete repeat run samples that have been saved in a repeat run data file 1 Select Routine Test Requisition Retrieve Repeat Data 2 Press function key F6 file initialize A window to start initialization is displayed 3 Select OK Initialization starts See Also For procedures refer to Performing a Repeat Run located in...

Страница 223: ...n UPnnn XPnnn XPnnn Normal Repeat Cal QC ALL Cuvette No Mix No R1 Sample R2 Search Data Cuvette Mix No Reaction Monitor Description This screen displays the absorbance data by photometric points for a completed test The reaction process can be viewed on either a graph or by data display The displayed data can also be printed as a data list This screen will display up to 300 previous indexes Test N...

Страница 224: ...ding to the chart on page D 118 of the User Guide Control Calibrator ID Enter a control ID range or a calibrator ID range up to 26 alphanumeric characters maximum Display Cuvette Count This field shows the average measurements set in Parameters Calibration Calibration Specific Check any of the boxes Each time the space bar is pressed the check box switches from Checked to Unchecked Sequence No Dis...

Страница 225: ...age to show the fact will be displayed Dotted lines for representing the main wavelength sub wavelength and reaction data on the graph can be identified by each display color ALARMCLEAR STANDBY Reaction Monitor 1997 09 03 10 10 Index Sample No nnnnnnn Wave length 1 nnn Wave length 2 nnn Data nnnnnnn nnnnnnn nnnnnnn nnnnnnn nnnnnnn 0 5 10 15 20 25 27 POINT OD Help Exit Print Display Data Rgt Inf RB...

Страница 226: ... right box Up to two abnormal data flags will be displayed Cuv No The cuvette No will be displayed Mix No The mixing bar No will be displayed Reagent No R1 R2 The reagent positions of R1 Reagent 1 and R2 Reagent 2 will be displayed respectively When Reagent 2 is not used the left box remains void Method The analysis method will be displayed Point 1 2 On both Measurement 1 and Measurement 2 the fir...

Страница 227: ...tion about the reaction process searched according to the specified condition can be displayed as a graph Specify the necessary search conditions in the Reaction Monitor screen press function key F5 search data A graph of the specified reaction process will be displayed after a message indicating that the search in progress is displayed The lines of the primary wavelength secondaata a message will...

Страница 228: ... Routine Reaction Monitor press function key F5 search data and the Reaction Curve screen appears In the Reaction Curve screen press function key F7 change axis A window to set up the display conditions is displayed 2 Set the display scale to either Manual or Auto If Manual is selected set the lower and upper limit values A specific part of the graph will be magnified and displayed If Auto is sele...

Страница 229: ...n key or the mouse Passed Calibration Failed Calibration Expired Help Upper Inner Lower Outer STANDBY 11 30 2000 10 10 Description Use this screen to confirm if a calibration has passed light gray or failed yellow or the calibration data has expired orange It is also possible to automatically recalculate the concentration from an absorbance based on the formula of calibration This screen can also ...

Страница 230: ...ecified analysis test will be displayed Perform another calculation If an update of calibration failed it is possible to automatically recalculate the factor from an absorbance based on the calculation formula of calibration When this recalculation is performed the calibration will be properly updated 1 In the Calibration Curve screen click on a chemistry select function key F5 recal A screen to e...

Страница 231: ... a factor The operator can display a coefficient factor of the calibration calculation formula which corresponds to a slope of a calibration Press function key F6 factor A list of factors will be displayed in the window Print calibration data 1 Press function key F3 print A window to specify the print mode is displayed 2 Select from the following choices by using your mouse Without factor All cali...

Страница 232: ...um Change Test Help Exit Alb CO2 Tbili Dbili Cal Chol HCL C Creat Gluc Phos Iron LIP Mag Tpro Trig UIBC BUN Uric S Cal S Cre S Glu S Bun TRF Upper Inner Lower Outer Expired Failed Calibration Success of updating Description Use this screen to display the factors generated by the previous calibrations Selecting a test displays the last 30 calibrations on a single graph 60 are saved If a test passed...

Страница 233: ... your mouse Displaying an updated calibration In the Measured Date field use the pull down menu to select a date Modify display conditions To modify the display size of a graph change the X and Y axis 1 In the Calibration Trace screen press function key F7 change axis A window appears to set the display conditions 2 Set the display condition to either Manual or Auto If Manual is selected set the l...

Страница 234: ...ron LDH LIP Mag Tpro Trig UIBC BUN Uric S CAL S CRE S GLU Print Upper Inner Lower Outer Description Use this screen to review the current and past reagent blanks during reagent troubleshooting These records can be reviewed either on a graph or from the data Also the data can be printed in a list ISE tests and LIH tests cannot be monitored here Type The sample type can be changed to serum urine or ...

Страница 235: ...en appears press function key F3 print A window to specify the printing mode is displayed 2 Select from the following print options Display Test Prints only the data of currently displayed tests All Tests Prints the data of all tests Data only Prints data only Comments won t be printed Data Comment Prints the data and comment at the same time 3 Select OK Printing begins ...

Страница 236: ...2 123 124 125 126 127 128 129 130 131 132 133 134 135 136 137 138 139 140 141 142 143 144 145 146 147 148 149 150 151 152 153 154 155 156 157 158 159 160 161 162 163 164 165 Cuvette No Mean Check Error Cuvette Check Error Abs Check Error Cuvette Inner Description After a photocal measurement always confirm the measured results Use this screen to display cuvette status White Cuvettes passed the pho...

Страница 237: ...re D 63 May 2002 Print photocal measurement results 1 Press function key F3 print A window to specify the printing mode is displayed 2 To print currently displayed data select Display Cuvette To print all cuvette data select All cuvettes and select OK Printing begins ...

Страница 238: ...2 3SD 1SD Central value M 3SD 1SD Upper control limit 2SD Lower control limit 2SD If some data is outside the control limits or if the data traces a slope or changes suddenly even though the data falls within the control limits it is necessary to consider the causes and take the appropriate action Possible causes are deterioration of reagents stained cuvettes incorrect parameter settings and deter...

Страница 239: ...QC Monitor ALARMCLEAR STANDBY Daily Control 1997 09 03 10 10 ITM01 ITM02 ITM03 ITM04 ITM05 ITM06 ITM07 ITM08 ITM09 ITM10 ITM11 Description Use this screen to observe quality control data on a specified analysis date Also QC daily statistics and graphs can be viewed comments can be added and a list of QC data can be printed To compare the average of quality control data go to the day to day control...

Страница 240: ...a A daily variation chart related to the specified control sample will be displayed 5 To display the sample number measuring type control ID result flag and lot number press function key F7 daily data Select Close to exit the window 6 Press function key F2 exit twice Add comments for the displayed daily variation data A comment can be added to each control sample 1 Press function key F4 comment A ...

Страница 241: ...n using your mouse QC Monitor Column displays Green within 1SD 1 Yellow reverse video Outside 1SD and within 2SD 2 Yellow reverse video Outside 2SD and within 3SD 3 Yellow reverse video Outside 3SD E Red normal video Error no data value 4 Press function key F6 daily data The chart will display 5 Press function key F2 exit twice Print the daily variation data 1 Select Routine QC Monitor Daily Contr...

Страница 242: ...ay Control 11 30 2000 10 10 ALB GOT GPT G GTP 03 12 2000 15 00 Description Use this screen to compare the average of quality control data and graphs by index A maximum of 300 QC indexes can be displayed and saved Day to day data and graphs can be printed and comments added To observe quality control data on the same analysis date go to the daily control screen Index left box Use the pull down menu...

Страница 243: ...nu next to the index field 3 Highlight the tests to be displayed or printed 4 Select function key F6 day to day to view the graphs and statistics of the indexes selected Each index will be an average QC value 5 Press function key F7 daily data to refer to statistical values such as the number of samples mean and standard deviation of the daily data Items for which daily statistical values are disp...

Страница 244: ...he values for the second control are listed on the Y axis The coordinates are determined by the standard deviation from the mean of each control The number of points are divided into equal groups of three The first group is plotted using a plus the second group a square and the last group an X The box in the center indicates the 2SD range All points should fall within the box The Mean and SD for e...

Страница 245: ...wn menu located by the index field Select a different index date and time with your mouse 4 Select function key F6 twin plot display The chart displays 5 Select function key F2 exit twice Display the number of samples mean and the standard deviation for QC 1 From the main menu select Routine QC Monitor Twin Plot 2 Use the pull down menu by the sample type field to select the sample type 3 Select t...

Страница 246: ...cription Use this screen to edit QC results and add comments Result data can be displayed in two ways by individual sample and by individual test Edited QC will have an e flag next to the result Deleted QC will have a d flag next to the result Caution The QC data edit screen permits the operator to modify the analysis results obtained In order to reduce the possibility of an incorrect diagnosis be...

Страница 247: ...ple number at the sample number field To search for data by test press function key F8 test no then enter the test number in the test number field and select OK Tips To modify the index date and time use the pull down menu located by the index field Select an index date and time using your mouse 3 To begin the search press function key F5 data display 4 Press function key F5 edit result A window a...

Страница 248: ...Select the close button 5 Press F2 Exit To delete all tests of the displayed QC sample number do the following 1 Press F8 Delete A prompt appears to Delete all tests 2 Click OK A d flag appears on all tests of the displayed QC sample number 3 Press F2 Exit Adding Comments to QC Data Adding an index comment An index comment is registered on the index date and time as needed For example if the photo...

Страница 249: ...ne Emergency STAT Unnnn Unnnn UEnnn UEnnn Routine Others Emergency STAT Xnnnn Xnnnn XEnnn XEnnn UPnnn UPnnn XPnnn XPnnn Data Display Search Add Description Use this screen to edit results Result data can be displayed in two ways by individual sample and by individual test Edited data will have an e flag attached Sample IDs and flags can be edited Caution This screen permits the operator to modify ...

Страница 250: ...played 3 Set Sex Age Low and high limit and 6 types of demographics 4 After the entry is completed select YES The settings will be saved as search keys Edit a sample in real time mode For procedures refer to Editing Results in the Basic Operations Chapter Edit a sample ID in batch or no host mode For procedures refer to Editing Results in the Basic Operations Chapter Precaution If your analyzer is...

Страница 251: ...results Should a calibration analysis fail it is still possible to obtain the valid calibration factor by performing another calibration and recalculating a factor based on a new cal OD The acceptable factor is then used to recalculate analysis results The calibration process must be set to OD in Parameters Calibration Calibration Specific Correct Data After analysis is complete use this screen to...

Страница 252: ...k the Cancel button during correction F6 Recal Data Concentration values can be re calculated based on the stored absorbance values As a result the existing analysis data will be overwritten by the data after re calculation 1 Press the F6 Recal Data key The Re calculation dialog box is displayed 2 Select the YES button A message is displayed informing user Data Re calculation has started To interr...

Страница 253: ...alues for sample data can be recalculated based on the acceptable cal OD values Do this only if cal process is set to OD in the Cal Specific screen As a result the existing analysis data will be overwritten by the data after recalculation Also analysis tests subject to recalculation can t be printed for a report Data can be sent online A c flag is attached Important Data cannot be recalculated if ...

Страница 254: ...run data that will be written over original sample data After data is rewritten repeat data results will display with an S flag Note Entry of a sample ID range is not permitted Specify a sample number range of repeat run samples Index Select the index date time from the pull down menu Test Name Select a test number and name from the pull down menu Routine Emergency STAT Serum Urine Others Select t...

Страница 255: ...ergency STAT nnnn nnnn Ennn Ennn Pnnn Pnnn Routine Urine Emergency STAT Unnnn Unnnn UEnnn UEnnn Routine Others Emergency STAT Xnnnn Xnnnn XEnnn XEnnn UPnnn UPnnn XPnnn XPnnn Search Add Report No List Pending Description Use this screen to batch print data in a report format Index Select the index date time from the pull down menu Test Name Select a test number and name from the pull down menu Rout...

Страница 256: ...and months From the Report Operator field enter the name of the person who is printing the reports To use this option the coordinates for Report Operator must be set in Parameters Format Report Format under the Common tab Verify the Output Test field is set to All Use the spacebar to change from Test No Output 6 Select function key F3 print Start Printing OK 7 Optional Select function key F6 list ...

Страница 257: ...a List No 1 Description Use this screen to reprint reagent blank calibrator QC routine emergency and STAT data Index Select the index date time from the pull down menu Test Name Select a test number and name from the pull down menu Routine Emergency STAT Serum Urine Others Select the sample type to be searched Each time the space bar is pressed the check box switches from Checked to Unchecked Samp...

Страница 258: ... XPnnn Data Transfer Search Add Normal Run Repeat Run QC Cal Index 1 11 28 2000 12 37 Online List Pending Note Searching is only possible by sample number key and sample ID key Description Use this screen to send data to a host computer To batch transfer data in this screen the Parameters Online Setup screen must be set to batch Index Select the index date time from the pull down menu Cuvette QC C...

Страница 259: ... transferred to the host Set the sample no range to be transferred or enter for all sample numbers Use the tabs in the upper left corner of the screen to select Repeat Run and QC Cal 2 Select function key F5 data transfer and select OK at the prompt The following steps are optional 3 To change the index use the pull down menu located by the index field 4 Select function key F7 list pending to disp...

Страница 260: ...D 86 Chapter D Software Automated Chemistry Analyzer AU2700 User s Guide May 2002 ...

Страница 261: ... 3 5 2 QC Specific D 111 3 5 3 STAT Table QC D 113 3 6 Calibration D 116 3 6 1 Calibrator D 116 3 6 2 Calibration Specific D 119 3 6 3 STAT Table Calibration D 128 3 7 Online D 131 3 7 1 Protocol D 132 3 7 2 Test No D 134 3 8 Format D 135 3 8 1 Printer D 135 3 8 2 Requisition Format D 137 3 8 3 Report Format D 139 3 8 4 List Format D 142 3 9 Special D 143 3 9 1 Contamination Parameters D 143 3 9 2...

Страница 262: ...8 69 70 71 72 73 74 75 76 77 78 79 80 81 82 83 84 85 86 87 88 89 90 91 92 93 Wat1 94 Wat2 95 Wat3 96 LIH 97 Na 98 K 99 C1 Test Name Long Name Reagent ID Calculated Tests Multi Reagent Switch Use Cuv LIH Reagent Test Name 96 LIH Set Description Use this screen to define test names regular allows five characters long allows 20 characters and reagent barcode numbers Calculated tests can be named and ...

Страница 263: ...st 3 numbers of the barcode located on the reagent bottle 6 Repeat steps 3 through 5 for each analysis test to be set or use the arrow keys to sequentially page through tests for editing 7 After the entry is complete press function key F2 exit twice The reagent IDs are saved Calculated Tests tab Program a calculated test For procedures refer to Parameters Inter related Tests Calculated Tests locat...

Страница 264: ...st Selected 35 Set Profile No Description Use this screen to set up test panels Individual tests are assigned for each profile Profile number 0 is defined as the default profile The default profile is automatically used in 3 situations 1 Barcode read error in barcode analysis 2 No requisition for a sample in the sequential analysis mode 3 Online errors Note If no tests are selected for profile num...

Страница 265: ...ect tests for a maximum of three rounds Rounds are a set of similar analysis tests grouped together so that specific tests can be accessed quickly A maximum of 51 tests including ISE can be set in a round Example Designate analysis tests used for routine analysis to Round 1 and analysis tests used for drug analysis to Round 2 Note The test number is the order the tests will be run on the sample fr...

Страница 266: ... print order of the test items have been set in the round Select the Close button Use this software screen to Add a new test s to the round For procedures refer to Programming a New Test located in the Basic Operations Chapter Tip Tests assigned to inter item calculation tests cannot be specified for a round The LIH Measure field can be set to all or select using the pull down menu This feature ap...

Страница 267: ...99 H 0 000000 B 100 Onboard Stability Period Correlation factor OLP1001 Description Use this screen to set specific parameters for each of the individual tests Enter specific parameters based on the reagent manufacturer s methodology sheet Beckman Coulter methodology sheets are located in the User s Guide Vol II Use this software to View and or Program Specific Test Parameters 1 Select Parameters ...

Страница 268: ...d from the pre dilution bottle into a dilution cuvette Then the sample probe dispenses sample into the dilution cuvette to make the set pre dilution The sample probe then aspirates from the dilution cuvette into the test cuvette Reagent blank calibrators and QC samples are also pre diluted for tests programmed to pre dilute Min OD An absorbance check for methods defined as FIXED FIXED 1 RATE or RA...

Страница 269: ...m error resulting in one chemistry assay being conducted using the parameters ofa different chemistry assay potentially generating erroneous sample results 1 Verify that Use Test Name displays 96 LIH Sample Volume Enter 1 6 to 25 uL Sample Dilution Enter 0 Reagents R1 Volume Enter 15 to 250 µL Reagents R1 Dilution Enter 0 no dilution or 10 to 250 µL Onboard Stability Period Enter 1 to 999 for the ...

Страница 270: ...ct the sample type Serum or Urine 2 At operation select Yes to perform the test or No not to perform the test for each sample type Note Do not change any other information in this tab Test Name General LIH ISE Range ALARMCLEAR STANDBY Help Exit Set Specific Test Parameters 11 30 2000 10 10 9999 999 L Dynamic range 1 000000 A 9999 999 H 96 00000 B Correlation Factor OLP1004 25 0 uL 10 uL Sample Vol...

Страница 271: ...ata outside the programmed ranges Select Flag to generate a P positive or N negative flags for DAU tests Sex Select a box 1 6 to enter gender specific normal reference ranges Age L Year Month Enter the youngest age year and month to generate an L flag Age H Year Month Enter the oldest age year and month0 to generate an H flag L Enter the lowest reference range based upon the gender and age entered...

Страница 272: ...D 98 Chapter D Software Automated Chemistry Analyzer AU2700 User s Guide D 98 Chapter D Software Automated Chemistry Analyzer AU2700 User s Guide April 18 2008 This page intentionally left blank ...

Страница 273: ... calculation formula Four kinds of coefficients from a to d can be set using a numerical value within the range of 9999999 to 9999999 Patient information between 1 and 6 set in Routine Normal can be set as a coefficient To do this use the n n 1 to 6 format In the Coefficient column Patient information will be displayed To leave blank enter a space Formula Use the entered calculated test numbers A ...

Страница 274: ... 100 Chapter D Software Automated Chemistry Analyzer AU2700 User s Guide May 2002 5 Set a test name constant and formula 6 After the settings are complete press function key F2 exit Parameters are saved ...

Страница 275: ... the nnn th comment to be set in the Comment Master File as a check name To set No designation enter a space See Also For information about the Comment Master File refer to Comment Master located in the parameters section of this chapter Test Name Set analysis tests subject to calculation Five kinds of analysis tests from A to E can be assigned as the checked analysis tests Use the pull down menu ...

Страница 276: ...Inter Related Tests Checked Tests 2 Enter an Inter Test Check Name Use the pull down menu located by the Inter Test Check Name field The buttons can also be used to select a test name 3 Select a sample type Use the pull down menu located by the Type field 4 Press function key F4 set Set the following Check name Test name Constant Formula and Check range 5 After the setting is complete press functi...

Страница 277: ...lor test A color test cannot be selected if no tests were programmed in Parameters Also tests set for inter test calculation cannot be selected Blank Test Use the pull down menu to select a blank test A blank test cannot be selected if tests were programmed in Parameters Also tests set for inter test calculation cannot be selected Use this software screen to Set sample blank correction factors Def...

Страница 278: ...ense AND mode R U u Y y D B Z F G p T P N H L J K Description Use this screen to define the overall settings for the auto repeat function The flags triggering a repeat requisition are chosen here for normal and diluted repeats Reflex testing can also be defined in this menu If any repeat data is to automatically overwrite the original data select the repeat data overwrite check box See Also For de...

Страница 279: ...at field 3 Set auto repeat repeat data overwrite and select an error flag 4 When the above parameters are set select the Group tab 5 Set a deciding test and related test 6 After the setting is completed press function key F2 exit Parameters will be saved Perform Reflex Testing Reflex testing is the ability to repeat a test whether it was requisitioned in the original run or not based on another te...

Страница 280: ...and automatic repeat overwrite for each test J and K flags will be generated if the repeat range is exceeded in this screen Diluted Normal and Condensed Volume and Rates Use one of the following options for first time analysis First time analysis Undiluted analysis Pre diluted analysis dilution rate 1 5 to 100 times OLU4112E Use one of the following options for repeat analysis Repeat run analysis ...

Страница 281: ...rs Repeat Specific Menu screen has existing pre set values for the Diluted and Condensed sample volumes DO NOT USE these defaulted settings To avoid instrument use of the default settings when performing repeat analysis Diluted and Condensed volumes should be entered as the same value as the Normal sample volume until such time as validated parameters for each analyte can be obtained 1 In the Repe...

Страница 282: ...s screen sets the overall conditions for on board QC data management The selection of Westgard Rules and barcoded QC samples are made here Use this screen to define up to 60 different control materials This screen is also used to define positions in the green rack The QC mode can be set to preset or cumulative This screen is also used to define the QC number name ID number expiration and lot numbe...

Страница 283: ...the number that constitutes a trend set from 4 to 10 QC mode Set a calculation method to obtain a reference value of a quality control chart Set this to Off Preset or Cumulative In the preset mode a predefined value will be used as the reference value In the cumulative value mode an average of the daily data will be used as the reference value S No for Day to day Enter a sample number for day to d...

Страница 284: ...t barcode use with control samples and the control names control ID expiration and lot number 1 Select Parameters QC Control QC Common 2 Press function key F4 set 3 Set the barcode QC operation Choose from the following options at each field 4 Select the Control tab located in the upper left corner of the screen 5 Control names and control IDs for QC numbers 1 to 60 will be shown in a list 6 Press...

Страница 285: ...N standard deviation and range for a defined set of indices and a time period for cumulation Also use this screen to determine if control results are interpreted using Westgard rules multi or standard deviation check single Up to 6 controls can be assigned for a test Control No From the control samples that are set by the QC Common menu for each control 1 to 6 set the control sample to be used her...

Страница 286: ... name 4 Press function key F2 exit The parameters set in this process will be saved Change QC ranges For procedures refer to Changing QC Ranges located in the Basic Operations Chapter Display stack values of QC samples This system maintains the quality control data used to check all the Multi rule check levels that were set 1 Select Parameters QC Control QC Specific 2 Select the cumulative tab 3 P...

Страница 287: ...le is cooled it should not be used to store samples calibrators and controls for an extended period of time Do not open and close the STAT table cover frequently this will increase the temperature See Also For more information refer to Quality Control Analysis and How to Reprint Reagent Blank Calibrator QC and Patient Data located in the Basic Operations Chapter Also refer to Quality Control locat...

Страница 288: ...ll down menu 4 Press function key F4 Set 5 Select the test 6 Press function key F5 Edit 7 Set the Cyclic type Count and Execution on Measuring Start The following settings apply only if Auto is selected from the Operation field Available Unavailable Displays whether a test is enabled available or disabled unavailable Note If STAT table QC is set to Auto and sample blank tests are requisitioned set...

Страница 289: ...lyzer AU2700 User s Guide Chapter D Software D 115 May 2002 Perform QC on the STAT Table For procedures refer to Performing QC on the STAT Table located in the Quality Control Analysis section of the Basic Operations Chapter ...

Страница 290: ...ODR3023 S 12 PALB 1 ODR3029 S 13 PALB 2 ODR3029 S 14 PALB 3 ODR3029 S 15 PALB 4 ODR3029 S 16 PALB 5 ODR3029 Description Use this screen to enable calibrator barcode operation and define calibrator demographics calibrator number calibrator ID expiration date and lot number A maximum of 200 different calibrator materials can be assigned The calibrator number will determine the position the calibrato...

Страница 291: ...ters Calibration Calibrator 2 Press function key F4 set 3 Select Calibrator Barcode Option if required 4 Move the cursor to a test 5 Press function key F5 edit 6 Move the cursor to the next available calibration number for the sample type and assign the following calibrator name calibrator ID if in use expiration and lot number 7 Select the Close button 8 Repeat steps 4 7 for each additional calib...

Страница 292: ... 10 70 10 C0 10 H0 1 21 1 71 1 C1 1 H1 2 22 2 72 2 C2 2 H2 3 23 3 73 3 C3 3 H3 4 24 4 74 4 C4 4 H4 5 25 5 75 5 C5 5 H5 6 26 6 76 6 C6 6 H6 7 27 7 77 7 C7 7 H7 8 28 8 78 8 C8 8 H8 9 29 9 79 9 C9 9 H9 10 30 10 80 10 D0 10 I0 1 31 1 81 1 D1 1 I1 2 32 2 82 2 D2 2 I2 3 33 3 83 3 D3 3 I3 4 34 4 84 4 D4 4 I4 5 35 5 85 5 D5 5 I5 6 36 6 86 6 D6 6 I6 7 37 7 87 7 D7 7 I7 8 38 8 88 8 D8 8 I8 9 39 9 89 9 D9 9 ...

Страница 293: ... 6 Point 7 1 Alb Inner Outter Description Use this screen to define the following for each test calibration type formula calibration number concentration factor range stability and count Calibration parameters are provided on the methodology sheets located in the User s Guide Concentration is set using the calibrator package insert values See Also For more information regarding calibration refer t...

Страница 294: ... two values excluding maximum and minimum values Process Set the method to be used if an update of the calibration fails Set to either OD or CONC To perform a concentration conversion using the existing factors set to CONC Otherwise set to OD if a concentration conversion is not initially performed Save the measured OD value and batch perform the concentration conversion after performing the calib...

Страница 295: ... 0 and at 2 other points If a calibration uses 2 points check this box Slope Check Slope Check has three settings None The default setting Positive slope check compares all increasing OD values to the next calibration point Negative slope check compares all decreasing OD values to the next calibration point If an error occurs the user will hear an audible alarm and a error message will be generate...

Страница 296: ...the messages displayed set the analysis parameters 5 After the setting has been completed press the F2 Exit key The parameters set in this process will be saved F6 Inner Outer This is used to program calibration information for both the inner and outer cuvette wheel Each test is assigned to run in the inner outer or both sides of the wheel in Parameters Common Test Parameters Test Name Use Cuvette...

Страница 297: ...t Set the individual test parameters of each ISE test Na K Cl Perform the following using a test number 97 for Soduim 98 for Potassium and 99 for Chloride in the Calibration Specific screen 1 Select Parameters Calibration Calibration Specific 2 Select the ISE tab located in the upper left corner of the screen 3 Use the pull down menu or buttons on screen to select a test name 4 Select a sample typ...

Страница 298: ...calibration chart is a line but does not pass through the origin reagent blank An example analysis item Calcium ACAL AB ACAL OD CONC OD OLP4060 Concentration value Enter the value of one kind of standard liquid or the calibrator then set a calibration chart using an OD value obtained from the automatic calibration setting function This can be applied to general calibrations which are lines and pas...

Страница 299: ...NC OD OD 6 OD 4 OD 3 OD 1 OD 5 OD 2 With a maximum of 7 points OD values and the entered concentration value set a calibration This will be applied to analysis items whose calibration is not a line but each of the curved sections has a constant slope Typically used for turbidimetric and immunoassays Concentration value 1 Concentration value 2 Concentration value 3 Concentration value 4 Concentrati...

Страница 300: ...ODn a x ODn OD1 b a b OD1 CONC CONC2 CONC3 CONC4 OD4 OD4 OD3 OD3 OD2 OD2 OD1 OD1 OD OD3 OD1 OD3 OD1 ODn previous OD value ODn OD value after correction Process calibration on the ISE During ISE calibration MID HIGH LOW which have a known concentration are measured The relationship between the electrode potential and ion concentration at that time is obtained and Na K and Cl calibration coefficient...

Страница 301: ...vious ones as the result of the above slope check each standard solution is measured four times and the calibration is updated Correction by M CAL M CAL for the ISE corrects results using this formula Y AX B Coefficients A and B are obtained in the following way Perform a regression analysis between measurement values from this system without an M CAL data correction and a conventional or basic me...

Страница 302: ...trols on the STAT table Although the STAT table is cooled6 it should not be used to store samples calibrators or controls for an extended period of time Do not open and close the STAT table cover frequently this will increase the temperature See Also For more information refer to Calibration Analysis and How to Reprint Reagent Blank Calibrator QC and Patient Data located in the Basic Operations Ch...

Страница 303: ... Repeat step 5 for each position that needs to be set 7 After completing the settings press function key F2 Exit The settings are saved Set STAT Table Parameters 1 Select Parameters Calibration STAT Table Calibration 2 Select the Test tab located in the upper left corner of the screen using your mouse 3 Select the round name using the pull down menu 4 Press function key F4 set 5 Select the test s ...

Страница 304: ...ted in the Parameters Common Test Parameters Test Name screen to assure proper reagent calibration The Multi Reagent Switch option is used to select reagents that will automatically calibrate new R1 and R2 simultaneously If this option is not used new R1 will be calibrated with old R2 or old R1 will be calibrated with new R2 depending on which bottle is empty first For more information refer to Pr...

Страница 305: ...o set communication protocols for the online connection to a host computer Communication can be set to none batch or real time The type of sample and the tests to be transmitted are also controlled here Test Requisition Information Receive Sets the way in which information is received from the host computer real time batch or none Results Transfer Sets the way in which information is sent to the h...

Страница 306: ...e the setting select one of them from the pull down list Data Format Sets this format to 6 or 9 To change the setting select one of them from the pull down list Zero Suppress Sets this function to Yes or No To change the setting select one of them from the pull down list Character Length Sets this length to 7 or 8 To change the setting select one of them from the pull down list Parity Bit Sets thi...

Страница 307: ...try within the range of 0 to 3 To change the setting select one of them from the pull down list BCC Check Sets whether to append BCC Block Check Character to the end of a text To append BCC check the check box at the left Each time the Space key is pressed the check box status is switched between Checked and Unchecked T1 to T7 Sets the time out of T1 to T7 within the range between 0 and 99 respect...

Страница 308: ...est numbers corresponding to test items used in online communication can be viewed or defined in this screen Change the display to the Online Test No tab screen by selecting the Test No tab Test Name and Online Test No list Lists the test names and online test numbers for each combination Test Name in the dialog box Displays the test name to be edited button button in the dialog box Each time eith...

Страница 309: ...Use this screen to set printer parameters and to add and set parameters for a second printer The printer can be set to print real time reports or the usual data log list Printer Use Check this box to use the standard printer If this box is not selected all other fields cannot be selected Lists To print data lists check this box Batch Report To print reports set up in the Reports screen select this...

Страница 310: ...e reports you want to print Set the index from the pull down menu 7 Select the sample type and sample number or ID to print 5 If you want to add a report operator name or restrict the printing by a certain sex and or age select function key F5 search add From the Sex field use the pull down menu to select male or female From the Age field enter the age range in years and months From the Report Ope...

Страница 311: ... TRI message The titles are user programmable as are the maximum number of characters 20 and the type of response expected text or numeric Once the responses are defined in this screen responses can be entered in the Test Requisition screen for each requisition The patient information titles and response information from demographics will then print out on a formal report Use this software screen ...

Страница 312: ...t to Characters or Value Set the Characters field to enter titles from the Test Requisition screen Set to Value field to enter a numerical value which can be used in the Calculated Test screen as a constant to pull up demographic information From the title field enter the title you want to appear in the Test Requisition screen and on the formal report A maximum of 20 digits can be entered 3 After ...

Страница 313: ...Change Page Report Name ALARMCLEAR Help Exit Format Print Image Report No Real Time Report QC Reagent Blank Calibration Data Format 9 6 9 Description This screen defines how a report is formatted what information is included and its position on the page The locations are set in X horizontal and Y vertical coordinates The layout of the page is also defined here Up to five different user defined rep...

Страница 314: ...ter the coordinates for S ID to appear on the report 4 15 S ID Enter the coordinates for the sample ID barcode to appear on the report 10 15 Type Title Enter the coordinates for Type to appear on the report Type Enter the coordinates serum or urine types appear on the report Sex Title Enter the coordinates for Sex to appear on the report 4 16 Sex Enter the coordinates for male M or female F to app...

Страница 315: ...ents and direction Press the Close button 5 Select the Line tab located in the upper left corner of the screen A total of 50 lines can be added to reports Enter the coordinates length and direction of each line to be drawn on the report Line directions can be set to H horizontal or V vertical Press function key F5 edit A window appears Select Close when finished Note Use function key F6 image to p...

Страница 316: ...ID S ID Title Type Type Title Sex Sex Title Age Title Age Month Title Month Sample Volume Sample Volume Title OUT Status Title OUT Status Calibrator Lot No Calibrator Lot No Title Description This screen is used to program data lists Demographic data and tests can be selected for each of five forms Before list options throughout the software can be used a list must be formatted in this menu and al...

Страница 317: ...vette Test Name Test Name Cleaner Kind Count 1 2 3 4 5 6 7 8 9 10 11 12 13 14 Contamination Carry Over 1 Carry Over 2 Periodic Cleaning F4 Set F5 Edit Set Contamination Close No Preceding Test Name Following Test Name Cleaner Kind Wash Count Cancel Mixer Cuvette ALARM CLEAR Help Exit Edit Description Use this screen to program a decontamination protocol when reagent cross contamination is suspecte...

Страница 318: ...a probe washes during decontamination Refer to the Contamination Parameters section in the Method Parameters section for Beckman Coulter recommendations for specific test contamination requirements The designated CLN solution is loaded in the reagent compartment in a fixed position Assign the CLN position in System Status Reagent Status The preferred positions are No 1 2 and 3 in successive order ...

Страница 319: ...be changed Cleans the sample probes in 2 wash solution from the sample probe detergent bottles at Measure Start and before Standby Carry Over 2 tab This tab affects the cleaning of the sample probes Use this tab to set the cleaning cycle performed before and or after a certain test is performed Select a combination from the dialog box after selecting F4 Set and F5 Edit Then enter the number of cle...

Страница 320: ...ion Value 1 Decision Value 2 Limit Point 1 Limit Point 2 Logic Check 3 Check Point 1 Check Point Interval Decision Value 1 Decision Value 2 Limit Point 1 Limit Point 2 STANDBY 11 30 2000 10 10 Description This screen is not used for routine analyzer functions For the operator s general information this screen is used to set up check points and decision limits to detect 1 of 4 different abnormal re...

Страница 321: ...st Printer 136 Chr Second Printer None Description This screen is used to set up an additional printer Use this software screen to Display optional equipment settings Current settings for the optional equipment can be referred to as required The following optional conditions can be displayed Number of print characters for a standard printer Additional printer and number of print characters Set opt...

Страница 322: ...ack No Rack ID number determines sample number Example Rack 1 1 10 2 11 20 etc 3 Barcode The barcode parameters are programmed The upper rack ID limit number for serum urine or other samples is designated The repeat mode is set to auto or standard manual Caution When Test Requisition is set to Sequential check the setting for Test Requisition Information Receive in Parameters Online If it is set t...

Страница 323: ...t Set the upper limit of rack numbers that can identify samples by their type For example If the upper limit for routine serum sample racks is 100 the next number 101 will be identified as a urine sample rack For routine and emergency samples enter a value that satisfies the Upper limit of serum s rack No Upper limit of urine s rack No For repeat run samples enter a value that satisfies the Routin...

Страница 324: ... requires approximately 30 minutes from power on for the photometer lamp to warm up Set this screen using military time Auto Start Up Time Set a day and time to power on the instrument Auto Preparation Check the box in this column to perform the maintenance item s that were set up in system maintenance In system maintenance it is possible to select a W1 a photocal or both Use this software screen ...

Страница 325: ... set up and customized for your laboratory requirements All submenus have the ability to be selectively password protected 1 Select Parameters System Password If the log in function is disabled the password screen will not display Note If Parameter System Password is selected and the message This menu can t be selected appears the Parameters Login Name and checkbox at Login Function have not been ...

Страница 326: ...gin Function Description In order to restrict a user with the log in log out function it is necessary to set up a login name and menu level in advance The maximum security level is 1 and the minimum security level is 10 A maximum of 30 login names and login levels can be set Use this software screen to Set a new log in name and menu level 1 From the main menu select Parameters System Login Name 2 ...

Страница 327: ... name must have level one security assigned or menus and sub menus will be inaccessible Change security level of individual menus and submenus 1 Select Parameters System Login Name 2 Select the Menu Level tab 3 Select F5 Edit 4 Enter the menu access level for each menu The default menu level is 1 which is the highest security level Be sure to program menus required for basic operation at a level 1...

Страница 328: ...ly used menu options to the user menu A maximum of 16 frequently used menus can be added from Routine Parameters Auxiliary and Maintenance Once a list is created in this screen it will appear in the User menu located on the main menu bar Use this software screen to Customize the user menu 1 Select Parameters System User Menu 2 Using your mouse select a blank line 3 Press function key F5 entry A wi...

Страница 329: ...one line Modify a shortcut key or screen name Warning Do not modify the software names unless instructed to do so by authorized Beckman Coulter personnel 1 Move the cursor over a screen for which the shortcut key or name is to be modified then press function key F6 change A window to modify shortcut keys and menu names will be displayed Tips To stop this operation press cancel at any time The User...

Страница 330: ... OLP1comm No Comment 1 2 3 4 5 6 7 8 9 10 11 12 13 14 15 16 17 18 Description Use this screen to create or edit a list of saved comments Comments created here can be accessed by selecting a number from any screen where a Comment function is available such as the QC and calibration screens Up to 240 comments can be added in this screen Use this software screen to Create and edit comments 1 Select P...

Страница 331: ...re D 157 May 2002 4 Auxiliary Menu Operations 4 1 Data Statistics D 158 4 2 Correlation Chart D 160 4 3 Histogram D 162 4 4 Reagent Consumption D 164 4 5 Reagent Inventory D 166 4 6 Parameters Management D 168 4 7 Calibration Verification D 170 4 8 Standby Set D 172 ...

Страница 332: ... STAT nnnn nnnn XEnnn XEnnn UPnnn UPnnn XPnnn XPnnn Data Display Search Add OLP1dats Description This screen allows selection of the samples to be used in generating sample statistics Statistics include the number of samples mean SD CV range and min max value Statistics can be calculated for routine emergency STAT serum urine or other samples Left Index Box Select a starting range for review by us...

Страница 333: ...ify the entire range of samples enter an 5 After calculation the results can be displayed in a list Press function key F5 data display The following data will be displayed in a list Specified index date and time Sample type of the selected sample s Number of samples selected Analysis test name Number of samples mean standard deviation coefficient of variation CV range maximum value and minimum val...

Страница 334: ...st Name Use the pull down menu to select the test name to be used on the X axis Y Test Name Use the pull down menu to select the test name to be used on the Y axis Serum Urine Other Routine Emergency STAT Select the sample type by clicking on the check box next to the type Sample No Set the sample number range within the numbers printed in parenthesis To specify all samples enter an asterisk To le...

Страница 335: ...ameters for the X and Y axis of a correlation diagram it is possible to modify the display size of a correlation diagram 1 Press function key F6 change axis A window to set up display parameters appears 2 Set the display condition to either Auto or Manual and press the Enter key If Auto is selected the correlation diagram displays at the largest possible size in which all the data can be viewed If...

Страница 336: ...outine Others Emergency STAT nnnn nnnn XEnnn XEnnn UPnnn UPnnn XPnnn XPnnn 1 Alb Chart Display Data Display Histogram Description Use this screen to select the database to be used in generating histograms Histograms can be calculated for routine emergency and STAT serum or urine samples The number of samples mean SD CV range and min max statistics will be calculated and displayed with the histogra...

Страница 337: ...umber will automatically be set to 7 If Manual is selected specify the number of class intervals to be displayed using a value between 5 and 10 The entered value will be set and displayed in the normal value range 5 To print press function key F3 print Select Display test or All tests and select OK The Display tests selection prints only the data being displayed Display histogram information 1 Fre...

Страница 338: ...to display information regarding the amount of reagent used for each test and the type of sample Print or save to FD bi weekly or monthly reports on reagent usage to send to Beckman Coulter Left Index Box Select a starting index to calculate reagent usage Right Index Box Select an ending range for review by using the pull down menu Type Use the pull down menu to select serum urine or other Serum U...

Страница 339: ... This includes repeat run tests 9 To print reagent consumption information select the screen you want to print from and press function key F3 print Select OK at the prompt 10 Press function key F2 exit twice Save Reagent Consumption data to floppy 1 Initialize the floppy disk as a parameter disk Select Maintenance Data Operation FD Data Management FD Initialize tab Initialize Parameter FD Press F5...

Страница 340: ...n Use this screen to program a reagent inventory check This check will determine if there is a shortage or surplus of reagents on the system The auto screen calculated the expected reagent consumption The manual screen is used to manually set the reagent consumption for each day of the week Set Index Set a start index date time range Use the pull down menu to select an index End Index Set an end i...

Страница 341: ... inventory Manually enter reagent consumption 1 From the main menu select Auxiliary Reagent Inventory 2 Select the tab labeled Manual 3 Move the cursor to a day of the week 4 Press function key F4 edit A dialog box will appear 5 Enter a value for the expected reagent consumption 6 Press the Close button 7 Repeat steps 2 through 6 until all settings are complete 8 Press function key F2 exit ...

Страница 342: ... reprogramming Individual files can be saved and loaded Save files to HD Parameters stored in a backup file on the hard disk will be overwritten by new parameters saved at this time Save a copy of the old parameters on a floppy disk if they need to be retained Load files from HD Parameters currently set by each submenu of the Parameters menu will be overwritten by the parameters to be loaded Save ...

Страница 343: ...t 2 Depending on your requirements select either Save Files to FD or Load Files from FD The save files to FD option will save files on the computer hard drive to the floppy disk The load files from FD option will load files from the floppy disk onto the computer hard drive Loading files onto the computer hard drive writes over the existing files with the same name Important A safer option can also...

Страница 344: ...ng a calibration verification graph Samples must be processed on the analyzer first Index Use the pull down menu to select a different date and time Test Name Use the pull down menu to select the test name Type Select the sample type by using the pull down menu Material No This field defaults to 1 To change the material number use the keyboard or buttons Sample No Set the sample number range withi...

Страница 345: ...w appears Enter the standard material name material ID expiration date and lot number Select Close 8 Select function key F2 exit 9 Select the Select Sample tab Enter the sample number or sample ID for the first level of samples Repeat as many times as necessary 10 Select function key F5 display chart A graph of the observed vs expected values displays with all specified levels on a single graph Th...

Страница 346: ...rm up mode If the system is in a stop mode shift to standby using the stop key or icon square located at the top of the screen If an emergency stop is performed the analyzer stays in a warm up mode for 1 5 hours Use this screen to bypass the warm up time if necessary Caution If analysis is performed after shifting to the Standby Mode results could be compromised since the system temperature did no...

Страница 347: ...2 Analyzer Maintenance D 181 5 3 Consumable Management D 182 5 4 Periodic Maintenance D 184 5 5 Maker Maintenance D 186 5 5 1 Program Version D 186 5 5 2 Analyzer Diagnostics D 187 5 5 3 ISE Diagnostics D 192 5 5 4 Alarm Log D 195 5 5 5 File Management D 196 Caution The Maker Maintenance submenu should be performed according to the instructions provided by Beckman Coulter Technical Services or aut...

Страница 348: ...a Display FD Data Initialize Description Use this menu to save serum urine or other sample data to or from a 3 5 floppy disk The floppy disk must be formatted in the FD initialize screen as a data disk If the disk is formatted as 2HD 250 samples per disk If the disk is 2DD 120 samples can be saved per disk Use the FD Data Display tab to display the data the operator specifies on this screen Use th...

Страница 349: ... saved or loaded The floppy disk can be 2HD or 2DD Select Maintenance Data Operation FD Data Management FD Data Initialize Tab Select the Initialize Data FD option Insert the floppy disk in the computer Select function key F5 Start Initialize From the Insert FD Start prompt select yes The message Operating Wait for a while displays 1 From the main menu select Maintenance Data Operation FD Data Man...

Страница 350: ...to set the system date and time This real time clock appears in the upper right corner of the screen Year Set the year within the range of 00 to 99 Month Set the month within a range of 1 to 12 Date Day Set the date within a range of 1 to 31 Hour Set the hour within a range of 0 to 23 Minute Set the minute within a range of 0 to 59 Week Day Automatically determines and displays the current week da...

Страница 351: ...e which has index dates and times for use as search keys Should an error occur in the database the sample data may not be searched normally If this happens errors generated in the database can be repaired by rebuilding it Database Select 1 of the 4 kinds of databases available by clicking on the check box Index Use the pull down menu to select the index date and time of a database Use this softwar...

Страница 352: ...Use the offline delimiter field to select offline punctuation characters The following characters can be selected from the pull down list space tab comma period semicolon colon underline slash and pipe Index Use the pull down menu to select a different date and time Cuvette Select the line Inner Outer or All of the cuvette to be searched for from the pull down list Offline Delimiter Select the pun...

Страница 353: ...fline Output 2 In the Normal Run Repeat Run and QC tabs select the following items to save Index sample type serum or urine routine emergency or stat 3 At Sample No enter the range of sample numbers to save or at Sample ID enter the range of sample ID numbers to save Enter to save the entire range of sample numbers or sample ID numbers displayed Choose a storage media and save the data To save dat...

Страница 354: ...essage in this box says Running Remote Maintenance then this gives OAI personnel access to connect to the PC via the modem If the message says Paused Remote Maintenance then remote maintenance is paused Output The Printer option prints a data list to the printer The File option saves a data file to a file and does not print Use this software screen to Using the modem 1 Select Maintenance Data Oper...

Страница 355: ...A Prime Washing Line B Replace Sample Reagent Probe C Cleaning Wash Wells D Replacing Mixing Bar OLP1ANLM E Replacing Wash Nozzle F Replacing Cuvette G Replace Sample Syringe H Replace Reagent Syringe Description Use this screen for performing maintenance procedures Use this software screen to Select a maintenance function When performing a maintenance procedure 1 Select Maintenance ANL Maintenanc...

Страница 356: ...its projected life expectancy the background screen color for that part changes to red This color change does not indicate that the part must be replaced To determine when to replace the part consult the specific part guidelines No Provides a number for the part listed Part Displays the name of the consumable Changed Displays the date and time the consumable was changed Used Shows the consumption ...

Страница 357: ...ent data in the changed column Note To view a maintenance history select function key F6 history Print the consumable list 1 Select Maintenance Consumable Management 2 Press function key F3 print A window to specify the print mode is displayed 3 Specify the print mode Select Recent or History and press the Enter key Recent The most recent date of supply or replacement will be printed History All t...

Страница 358: ...Dilution Bottle Daily 9 W2 Weekly 10 Photocal Weekly 11 Photometer Check Weekly 12 Wash the Pre dilution Bottle Weekly 13 Clean All Wash Wells Monthly 14 Clean the Wash Nozzle Monthly 15 Clean the Deionized Water Tank Monthly 16 Clean the Deionized Water Filter Sample Probe Filter Monthly History Entry Delete Grid Display Description Use this screen to determine which maintenance items are to be p...

Страница 359: ...ess function key F6 history Test names execution intervals the last ten execution dates and future dates will be displayed in a list Display the maintenance schedule Select function key F4 grid display to graphically display the maintenance schedule Keep a record of periodic maintenance 1 Move the cursor to the maintenance procedure that was performed 2 Select function key F5 execute The executed ...

Страница 360: ...to View current software versions 1 Select Maintenance Maker Maintenance Program Version 2 The screen appears with program version and revision information 3 After viewing the screen press function key F2 exit to return to the main menu ALARMCLEAR Help Exit Program Version OLP1progv Program Ver Rev Program Ver Rev ANL IPL 1 3 ANL Control 2 1 Photometer Control 1 1 ISE B R Com Control 1 1 LAN Maste...

Страница 361: ...sed by authorized service personnel for service inspection and repair work performed on this system Use this software screen to Perform analyzer diagnostics The analyzer must be in a stop mode before diagnostics can be accessed The menu consists of 3 pages of mostly hardware components which can be reset or moved in their normal operation to test proper operation when troubleshooting 1 Select Main...

Страница 362: ...e sample syringe 1 step vertically up down Reagent Probe I Reset Aligns the reagent probe in its home position J Up and Down Moves the reagent probe 1 step vertically up down K Rotation Step Moves the reagent probe 1 step horizontally Select the following wash reagent L Up Down Pulse Pulses the reagent probe the number of steps specified from 1 to 999 Up Down M Rotation Pulse Pulses the reagent pr...

Страница 363: ...uvette Wheel O Reset Aligns the cuvette wheel in its home position P Rotation Rotates the cuvette wheel according to user specifications Clockwise counterclockwise step 1 to 165 Q Pulse Pulses the cuvette wheel the number of steps specified from 1 to 999 R Magnet Off Removes power to the pulse motor To reset select O Reset Select the tab located in the upper left corner of the screen called Sample...

Страница 364: ...tton is pressed again K Belt Rotation Moves the belt backward and then forward when the Rev Diag button is pressed again Select the tab located in the upper left corner of the screen called Combination Photometer Check A 0 100 Performs a 0 and 100 photometer check on a specified cuvette The check is performed at 13 wavelengths B 0 100 Sequence The specified cuvette is measured 20 times Results are...

Страница 365: ... reagent compartment 1 N Reagent ID Movement Reads the reagent ID while moving in the reagent compartment 1 O Rack Kind Identifies rack type in rack ID position P Sample Counter Increments the sample counter Q Probe Wash The wash wells are activated and the probes move into the wells R 8 bit LED Performs a diagnostic sequence of the 8 bit LED S SUB CPU Check Performs a diagnostics check of the pho...

Страница 366: ...spection and repair work performed on this system Use this software screen to Perform ISE Diagnostics The analyzer must be in a stop mode before diagnostics can be accessed The menu consists of functions that test reset or move ISE components for troubleshooting purposes 1 Select Maintenance Maker Maintenance ISE Diag 2 Using your mouse select the item to check Explanations of each function follow...

Страница 367: ... 4TH The acceptable range between the 3rd and 4th value is 5 for all electrolytes except urine K which is 10 Na STD H 38 6 38 2 37 9 37 8 MID 82 4 81 9 81 7 81 5 K STD H 133 0 133 3 133 5 133 4 MID 35 0 35 6 35 8 35 4 C1 STD H 1452 8 1452 5 1452 8 1452 9 MID 1504 0 1504 2 1504 0 1504 4 VOLTAGE STD L 1ST 2ND 3RD 4TH Na STD L 94 8 92 1 91 8 92 0 MID 83 2 83 1 82 5 81 5 K STD L 2 6 0 7 0 6 0 9 MID 30...

Страница 368: ...d Reference solution prime is performed D Drain Electrode Liquid is drained from the sample pot through the electrodes the first time the Stat Rotation Diag button is pressed When the button is pressed the second time mid standard is primed through the electrodes Use this function when it is necessary to remove electrodes or when performing certain maintenance procedures to prevent mid standard el...

Страница 369: ...f previous alarms and screens accessed on the system Use this menu to determine recent or common alarms past alarms If an alarm is occurring at this time corrective actions are located in the alarm help function To start alarm help select the icon located at the top of the screen with the triangle and exclamation point Use this software screen to Display an alarm list 1 Select Maintenance Maker Ma...

Страница 370: ... while data is being saved the data being saved or stored in the floppy may be lost Floppy disks for parameter storage have an AU2700 PARAM volume label Initialize a 3 5 floppy disk as a parameters disk one time before parameters are saved or loaded The floppy disk can be 2HD or 2DD Select Maintenance Data Operation FD Data Management FD Data Initialize Tab Select the Initialize Data FD option Ins...

Страница 371: ...e this software screen to View the User Menu 1 Select the User menu from the menu bar Menu items added 2 Select a menu item from the pull down menu The selected screen will appear OLG4044 1 Calibration 2 QC 3 Normal 4 Start Condition 5 Daily Control 6 Day To Day Control 7 Repeat 8 Data Edit 9 Data Correction 0 Report R Routine P Parameters A Auxiliary M Maintenance L Logout U User See Also For inf...

Страница 372: ...hapter E Software Menu Outline E 1 Chapter E Software Menu Outline Introduction E 1 Chapter E Software Menu Outline 1 Routine Menu Outline E 2 2 Parameter Menu Outline E 3 3 Auxiliary Menu Outline E 4 4 Maintenance Menu Outline E 5 5 List of Screen Operations E 6 ...

Страница 373: ...al analysis Used to set the sample numbers and analysis items required for repeat run analysis Used to set the analysis items etc required for quality control analysis Used to set the analysis items etc required for calibration analysis Batch searches the samples that require repeat run for analysis results Displays information about the reaction processes during analysis Displays calibration resu...

Страница 374: ...luted repeat sample volume the repeat range to generate repeat requisitions and automatic repeat overwrite Used to set the overall conditions for on board QC data management Used to define the preassigned control values for the mean standard deviation and range or to view the cumulative mean N standard deviation and range for a defined set of indices and a time period for cumulation Used to set QC...

Страница 375: ...splays the correlation between two analysis items within the same index date and time using the correlation diagram and regression line Displays the frequency distribution of analysis data over a given period as a histogram Displays the number of shot for each remaining reagent I Reagent Inventory Sets up the reference value for each day of the week to perform daily checks as to whether there is a...

Страница 376: ...time of the analyzer OLP4031E D Data Operation A ANL Maintenance C Consumable Management M Maintenance P Periodic Maintenance V Program Version A ANL Diag I ISE Diag L Alarm Log M Maker Maintenance Used to execute drainage if replacing the probe syringe mixing bar etc and also to release air out from the tubes after replacement Used to manage information about consumable supply and replacement per...

Страница 377: ...ation Specific Parameters Calibration STAT Table Calibration List of Menus Used for Repeat Run Routine Test Requisition Repeat Routine Test Requisition Retrieve Repeat Data Routine Data Management Repeat Data Verification Parameters Repeat Parameters Repeat Common Parameters Repeat Parameters Repeat Specific List of Menus Used for Data Analysis Routine Reaction Monitor Routine Data Management Data...

Отзывы: