Chapter 6: Using the Web Interface
329
Upgrade Sequence in an Existing Cascading Chain
Depending on the firmware version(s) of your cascading chain, there may
or may not be limitations for the firmware upgrade sequence in the
chain.
Upgrade from "pre-3.3.10" to 3.3.10 or post-3.3.10:
You must follow the firmware upgrade sequence below to upgrade a
cascading chain from a firmware version older than 3.3.10 to version
3.3.10 or later. If you do not follow this upgrade sequence, you will
not be able to access some cascaded devices over the Internet.
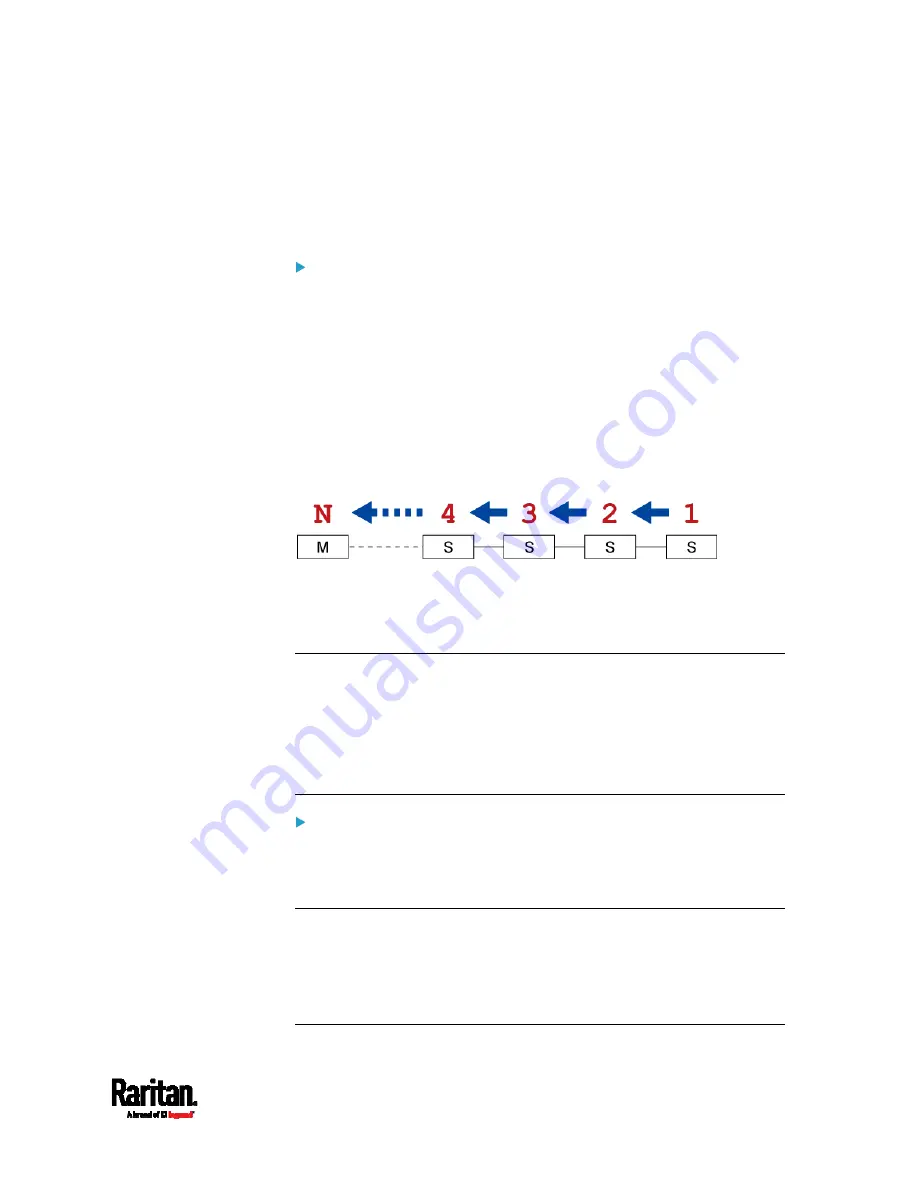
The upgrade must start from the last slave device (S), then the
second to last, the third to last, and so on until the master device
(M).
Red numbers below represent the appropriate upgrade sequence.
'N' is the final one to upgrade.
You must upgrade ALL devices in the chain to 3.3.10 or later. If
you upgrade only some devices in the chain, networking issues
occur on some cascaded devices.
Exception: A few products, such as SRC, are developed much later so
they may not support older firmware versions, such as 3.5.0, 3.4.0, and
so on. Therefore, it is suggested to AVOID downgrading your cascading
chain unless instructed by Raritan or Legrand Technical Support. For
minimum firmware versions, see Cascading Restrictions in the
Cascading Guide on the
Support page
Upgrade from 3.3.10 or post-3.3.10 to post-3.3.10:
There is no upgrade sequence limitation.
Firmware version 3.3.10 is compatible with later firmware versions
so you can upgrade all devices of the chain in a random order.
Important: Raritan does not guarantee that no upgrade sequence
limitation will be required for all future firmware versions. It is
highly suggested to check the latest revision of the Cascading Guide
or your product's User Guide/Online Help before performing the
firmware upgrade. The other alternative is to always stick to the
same sequence as the above diagram.
Summary of Contents for Raritan SRC-0100
Page 114: ...Chapter 6 Using the Web Interface 102...
Page 291: ...Chapter 6 Using the Web Interface 279...
Page 301: ...Chapter 6 Using the Web Interface 289 6 Click Create to finish the creation...
Page 311: ...Chapter 6 Using the Web Interface 299...
Page 312: ...Chapter 6 Using the Web Interface 300 Continued...
Page 625: ...Appendix H RADIUS Configuration Illustration 613 Note If your SRC uses PAP then select PAP...
Page 630: ...Appendix H RADIUS Configuration Illustration 618 14 The new attribute is added Click OK...
Page 631: ...Appendix H RADIUS Configuration Illustration 619 15 Click Next to continue...


