


Chapter 7: Using the Web Interface
485
Alternatives:
To use a different bulk configuration method, refer to:
•
Bulk Configuration via SCP
(on page 712)
•
Bulk Configuration or Firmware Upgrade via DHCP/TFTP
(on page 746)
•
Configuration or Firmware Upgrade with a USB Drive
(on page 731)
•
Raw Configuration Upload and Download
(on page 769)
Tip: Both methods of uploading 'bulk configuration' file or 'raw configuration'
file via SCP can serve the purpose of bulk configuration. The only difference is
that you can configure
device-specific
settings with the upload of raw
configuration but not with the 'bulk configuration' file.
Modifying or Removing Bulk Profiles
You can modify or remove any bulk profile except for the built-in one.
Note that a profile that has been set as the default cannot be removed, either.
To remove it, you have to remove its default setting first.
Choose Maintenance > Bulk Configuration. A list of profiles displays and then
do one of the following.
To modify an existing profile:
1.
Click on the row of the wanted profile in the list.
2.
Change the settings you want.
3.
Click Save.
To remove a single profile:
1.
Click on the row of the wanted profile.
2.
Click
on the top-right corner.
3.
Click Delete on the confirmation message.
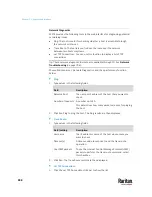
To remove one or multiple profiles:
1.
Click
to make checkboxes appear in front of profiles.
2.
Select one or multiple profiles.
Содержание Raritan PX3TS
Страница 4: ......
Страница 6: ......
Страница 20: ......
Страница 52: ...Chapter 3 Initial Installation and Configuration 32 Number Device role Master device Slave 1 Slave 2 Slave 3...
Страница 80: ...Chapter 4 Connecting External Equipment Optional 60...
Страница 109: ...Chapter 5 PDU Linking 89...
Страница 117: ...Chapter 5 PDU Linking 97...
Страница 440: ...Chapter 7 Using the Web Interface 420 If wanted you can customize the subject and content of this email in this action...
Страница 441: ...Chapter 7 Using the Web Interface 421...
Страница 464: ...Chapter 7 Using the Web Interface 444...
Страница 465: ...Chapter 7 Using the Web Interface 445 Continued...
Страница 746: ...Appendix A Specifications 726...
Страница 823: ...Appendix I RADIUS Configuration Illustration 803 Note If your PX3TS uses PAP then select PAP...
Страница 824: ...Appendix I RADIUS Configuration Illustration 804 10 Select Standard to the left of the dialog and then click Add...
Страница 825: ...Appendix I RADIUS Configuration Illustration 805 11 Select Filter Id from the list of attributes and click Add...
Страница 828: ...Appendix I RADIUS Configuration Illustration 808 14 The new attribute is added Click OK...
Страница 829: ...Appendix I RADIUS Configuration Illustration 809 15 Click Next to continue...
Страница 860: ...Appendix J Additional PX3TS Information 840...
Страница 890: ...Appendix K Integration 870 3 Click OK...
Страница 900: ......


