


Chapter 6: Using the PX3TS
132
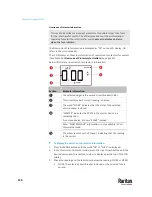
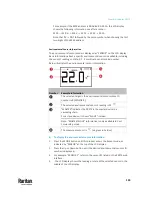
To retrieve the "IPv4" address on PX3TS:
1.
Press the MODE button to enter the Device mode, indicated by an
alphabet "d" at the top left of the display.
2.
The LCD display cycles between the four octets of the IPv4 address,
indicated by "i4" at the upper right corner of the display.
For example, 192.168.84.4 cycles in this sequence:
192 --> 168 --> 84 --> 4
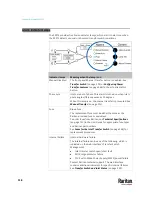
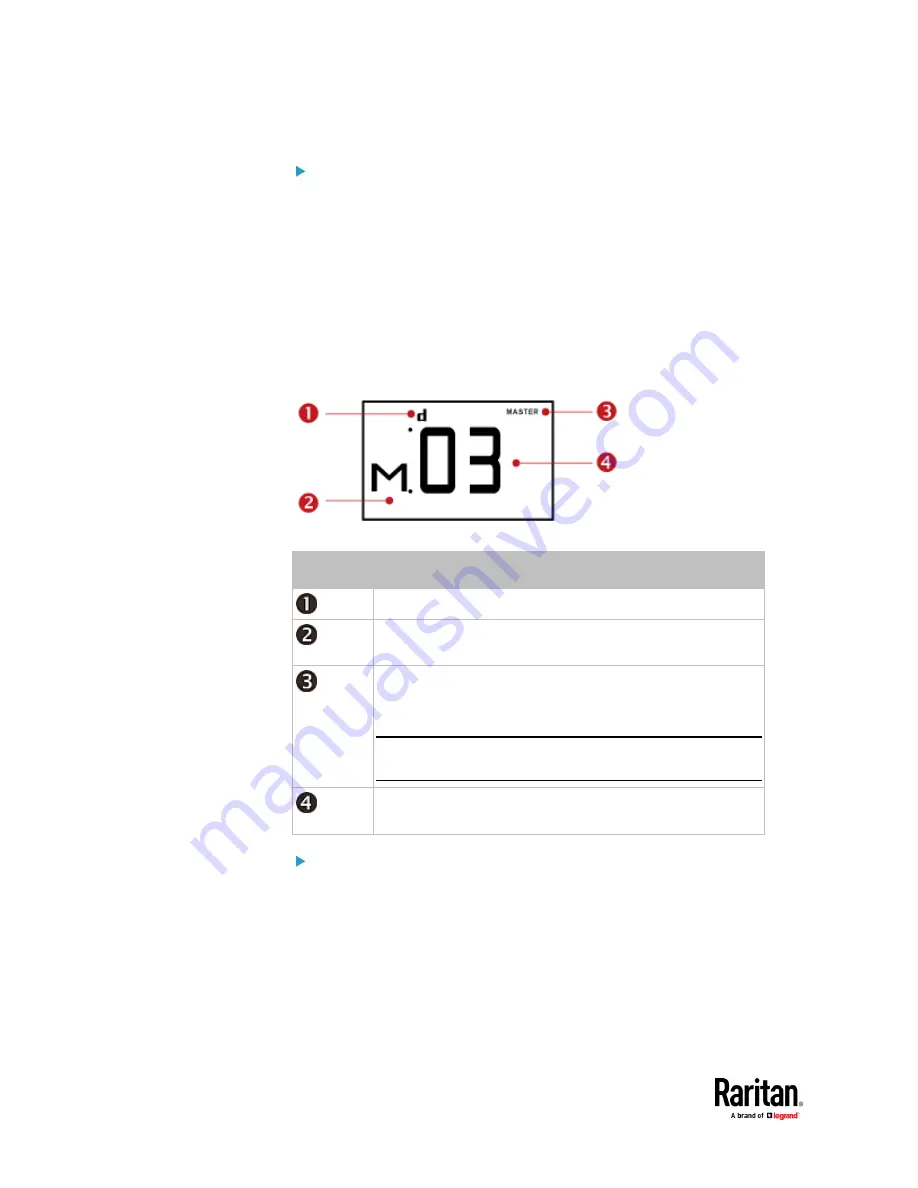
MAC Address
This product's MAC address is retrievable by operating the LCD display.
Below illustrates the MAC address information.
Section
Example information
"d" means the LCD display has entered the Device mode.
"M" indicates that the displayed information is the MAC
address.
"MASTER" indicates the PX3TS is the master device in a
cascading chain.
For a slave device, it shows "SLAVE" instead.
Note: "MASTER/SLAVE" information is only available in Port
Forwarding mode.
The LCD display is showing "03," which is part of the MAC
address.
To display the MAC address:
1.
Press the MODE button to enter the Device mode, indicated by a 'd' in at
the top left of the display.
2.
Press the FUNC button until the MAC address is displayed. The character
"M" appears in the left side of the LCD display.
3.
The MAC address is displayed as "M:XX", where XX are two digits of the
MAC address. The LCD will cycle through the MAC address from the first
two digits to the final two.
Содержание Raritan PX3TS
Страница 4: ......
Страница 6: ......
Страница 20: ......
Страница 52: ...Chapter 3 Initial Installation and Configuration 32 Number Device role Master device Slave 1 Slave 2 Slave 3...
Страница 80: ...Chapter 4 Connecting External Equipment Optional 60...
Страница 109: ...Chapter 5 PDU Linking 89...
Страница 117: ...Chapter 5 PDU Linking 97...
Страница 440: ...Chapter 7 Using the Web Interface 420 If wanted you can customize the subject and content of this email in this action...
Страница 441: ...Chapter 7 Using the Web Interface 421...
Страница 464: ...Chapter 7 Using the Web Interface 444...
Страница 465: ...Chapter 7 Using the Web Interface 445 Continued...
Страница 746: ...Appendix A Specifications 726...
Страница 823: ...Appendix I RADIUS Configuration Illustration 803 Note If your PX3TS uses PAP then select PAP...
Страница 824: ...Appendix I RADIUS Configuration Illustration 804 10 Select Standard to the left of the dialog and then click Add...
Страница 825: ...Appendix I RADIUS Configuration Illustration 805 11 Select Filter Id from the list of attributes and click Add...
Страница 828: ...Appendix I RADIUS Configuration Illustration 808 14 The new attribute is added Click OK...
Страница 829: ...Appendix I RADIUS Configuration Illustration 809 15 Click Next to continue...
Страница 860: ...Appendix J Additional PX3TS Information 840...
Страница 890: ...Appendix K Integration 870 3 Click OK...
Страница 900: ......


