


Chapter 7: Using the Web Interface
330
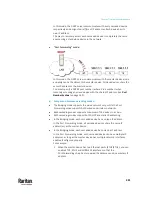
Tip: You can enable/configure multiple network interfaces in the Port
Forwarding mode so that the cascading chain has multiple IP addresses.
7.
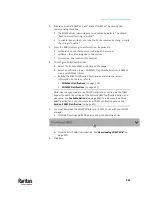
Click Save.
For information on accessing each cascaded device in the Port Forwarding
mode, see
Port Forwarding Examples
(on page 334).
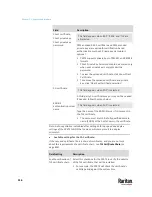
Recommendations for cascade loops:
You can connect both the first and the last PDU to your network (cascade
loop) under the following conditions:
a.
The remaining network MUST use R/STP to avoid network loops.
AND
Both the first and the last PDUs MUST either attach to the same switch or, if
they are attached to two separate switches, you must configure both ports of
these switches so that the STP costs are high. This prevents the STP protocol
from sending unrelated traffic through the PDU cascade, which can cause
bottlenecks that lead to connectivity issues in the whole network.
Online cascading information:
For more information on cascading configurations and restrictions, refer to the
Cascading Guide
on the Raritan
Support page
http://www.raritan.com/support/
).
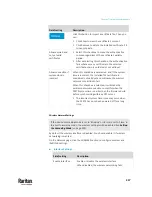
Overview of the Cascading Modes
You must apply a cascading mode to the cascading chain. See
Setting the
Cascading Mode
(on page 328).
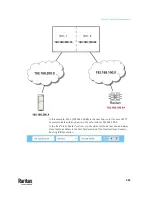
There are two cascading modes: Bridging and Port Forwarding.
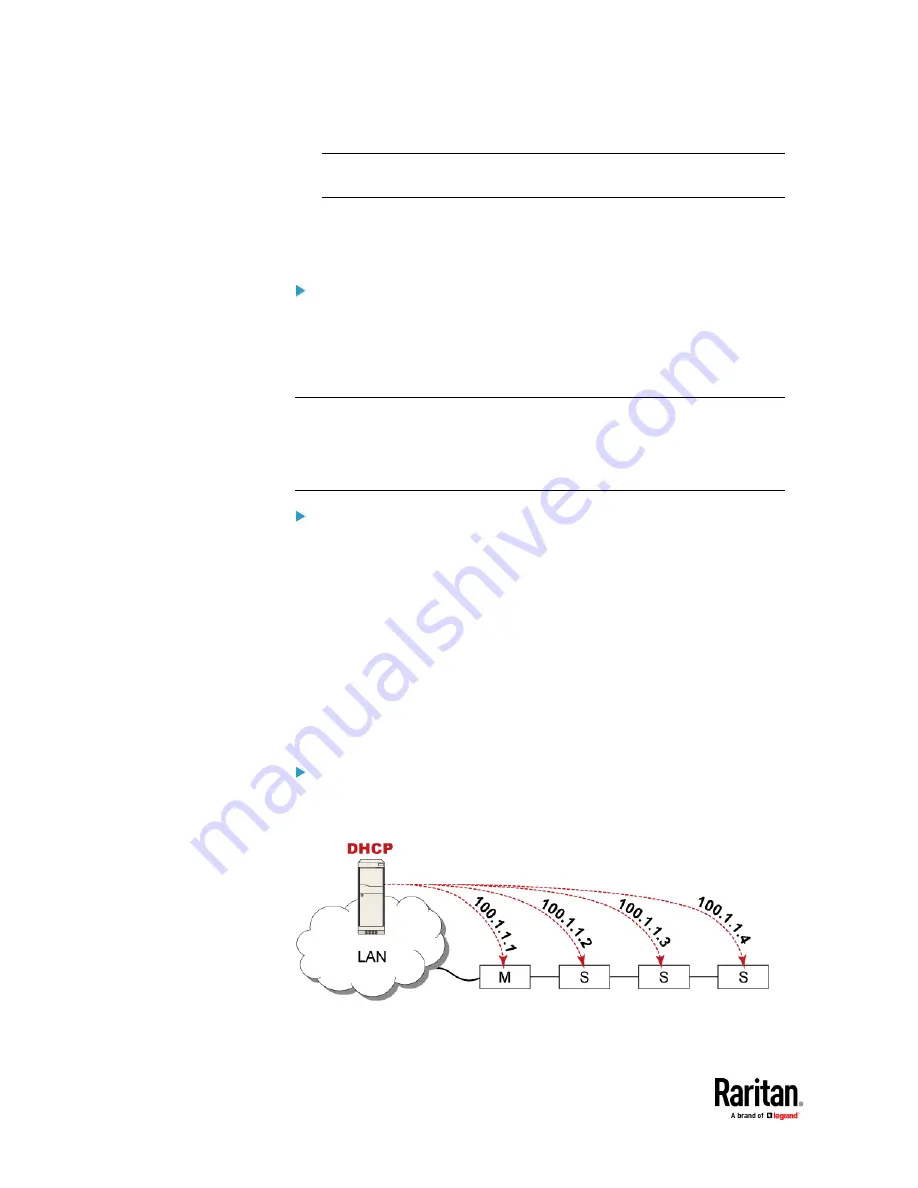
In the following illustration, it is assumed that users enable the DHCP
networking for the cascading chain comprising four devices. In the diagrams,
"M" is the master device and "S" is a slave device.
Illustration:
•
"Bridging" mode:
Содержание Raritan PX3TS
Страница 4: ......
Страница 6: ......
Страница 20: ......
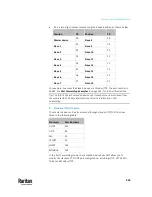
Страница 52: ...Chapter 3 Initial Installation and Configuration 32 Number Device role Master device Slave 1 Slave 2 Slave 3...
Страница 80: ...Chapter 4 Connecting External Equipment Optional 60...
Страница 109: ...Chapter 5 PDU Linking 89...
Страница 117: ...Chapter 5 PDU Linking 97...
Страница 440: ...Chapter 7 Using the Web Interface 420 If wanted you can customize the subject and content of this email in this action...
Страница 441: ...Chapter 7 Using the Web Interface 421...
Страница 464: ...Chapter 7 Using the Web Interface 444...
Страница 465: ...Chapter 7 Using the Web Interface 445 Continued...
Страница 746: ...Appendix A Specifications 726...
Страница 823: ...Appendix I RADIUS Configuration Illustration 803 Note If your PX3TS uses PAP then select PAP...
Страница 824: ...Appendix I RADIUS Configuration Illustration 804 10 Select Standard to the left of the dialog and then click Add...
Страница 825: ...Appendix I RADIUS Configuration Illustration 805 11 Select Filter Id from the list of attributes and click Add...
Страница 828: ...Appendix I RADIUS Configuration Illustration 808 14 The new attribute is added Click OK...
Страница 829: ...Appendix I RADIUS Configuration Illustration 809 15 Click Next to continue...
Страница 860: ...Appendix J Additional PX3TS Information 840...
Страница 890: ...Appendix K Integration 870 3 Click OK...
Страница 900: ......


