


Chapter 7: Using the Web Interface
376
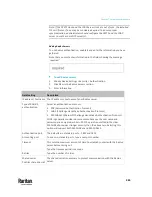
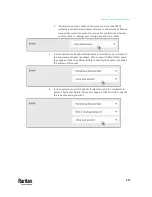
2.
Click
to schedule the desired action.
a.
Assign a name to this scheduled action.
b.
Make sure the Enabled checkbox is selected, or the PX3TS does not
perform this scheduled action.
c.
Set the interval time, which ranges from every minute to yearly.
d.
In the 'Available actions' field, select the desired action(s).
e.
Click Create.
For details, see
Scheduling an Action
(on page 416).
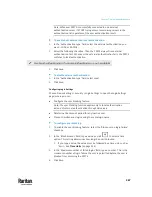
Built-in Rules and Rule Configuration
PX3TS is shipped with four built-in event rules, which cannot be deleted. If the
built-in event rules do not satisfy your needs, create new rules.
Built-in rules:
•
System Event Log Rule:
This causes ANY event occurred to the PX3TS to be recorded in the internal
log. It is enabled by default.
Note: For the default log messages generated for each event, see
Default
Log Messages
(on page 381).
•
System SNMP Notification Rule:
This causes SNMP traps or informs to be sent to specified IP addresses or
hosts when ANY event occurs to the PX3TS. It is disabled by default.
•
System Tamper Detection Alarmed:
This causes the PX3TS to send alarm notifications if a DX tamper sensor has
been connected and the PX3TS detects that the tamper sensor enters the
alarmed state. It is enabled by default.
•
System Tamper Detection Unavailable:
This causes the PX3TS to send alarm notifications if a DX tamper sensor
was once connected or remains connected but then the PX3TS does not
detect the presence of the tamper sensor. It is enabled by default.
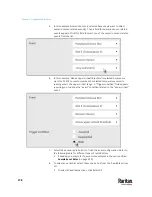
Event rule configuration illustration:
1.
Choose Device Settings > Event Rules >
.
2.
Click the Event field to select an event type.
▪
<Any sub-event> means all events shown on the list.
Содержание Raritan PX3TS
Страница 4: ......
Страница 6: ......
Страница 20: ......
Страница 52: ...Chapter 3 Initial Installation and Configuration 32 Number Device role Master device Slave 1 Slave 2 Slave 3...
Страница 80: ...Chapter 4 Connecting External Equipment Optional 60...
Страница 109: ...Chapter 5 PDU Linking 89...
Страница 117: ...Chapter 5 PDU Linking 97...
Страница 440: ...Chapter 7 Using the Web Interface 420 If wanted you can customize the subject and content of this email in this action...
Страница 441: ...Chapter 7 Using the Web Interface 421...
Страница 464: ...Chapter 7 Using the Web Interface 444...
Страница 465: ...Chapter 7 Using the Web Interface 445 Continued...
Страница 746: ...Appendix A Specifications 726...
Страница 823: ...Appendix I RADIUS Configuration Illustration 803 Note If your PX3TS uses PAP then select PAP...
Страница 824: ...Appendix I RADIUS Configuration Illustration 804 10 Select Standard to the left of the dialog and then click Add...
Страница 825: ...Appendix I RADIUS Configuration Illustration 805 11 Select Filter Id from the list of attributes and click Add...
Страница 828: ...Appendix I RADIUS Configuration Illustration 808 14 The new attribute is added Click OK...
Страница 829: ...Appendix I RADIUS Configuration Illustration 809 15 Click Next to continue...
Страница 860: ...Appendix J Additional PX3TS Information 840...
Страница 890: ...Appendix K Integration 870 3 Click OK...
Страница 900: ......


