


Chapter 7: Using the Web Interface
349
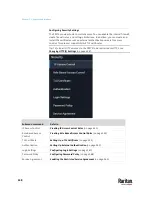
Creating IP Access Control Rules
IP access control rules (firewall rules) determine whether to accept or discard
traffic to/from the PX3TS, based on the IP address of the host sending or
receiving the traffic. When creating rules, keep these principles in mind:
•
Rule order is important.
When traffic reaches or is sent from the PX3TS, the rules are executed in
numerical order. Only the first rule that matches the IP address determines
whether the traffic is accepted or discarded. Any subsequent rules
matching the IP address are ignored.
•
Prefix length is required.
When typing the IP address, you must specify it in the CIDR notation. That
is, BOTH the address and the prefix length are included. For example, to
specify a single address with the 24-bit prefix length, use this format:
x.x.x.x/24
/24
= the prefix length.
Note: Valid IPv4 addresses range from 0.0.0.0 through 255.255.255.255.
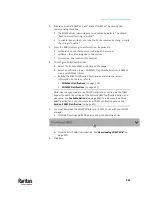
To configure IPv4 access control rules:
1.
Choose Device Settings > Security > IP Access Control.
2.
Select the 'Enable IPv4 access control' checkbox to enable IPv4 access
control rules.
3.
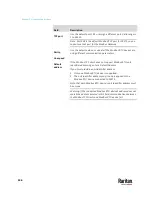
Determine the IPv4 default policy.
▪
Accept:
Accepts traffic from all IPv4 addresses.
▪
Drop:
Discards traffic from all IPv4 addresses, without sending any
failure notification to the source host.
▪
Reject:
Discards traffic from all IPv4 addresses, and an ICMP message is
sent to the source host for failure notification.
4.
Go to the Inbound Rules section or the Outbound Rules section according
to your needs.
▪
Inbound rules control the data sent to the PX3TS.
▪
Outbound rules control the data sent from the PX3TS.
5.
Create rules. Refer to the tables below for different operations.
Содержание Raritan PX3TS
Страница 4: ......
Страница 6: ......
Страница 20: ......
Страница 52: ...Chapter 3 Initial Installation and Configuration 32 Number Device role Master device Slave 1 Slave 2 Slave 3...
Страница 80: ...Chapter 4 Connecting External Equipment Optional 60...
Страница 109: ...Chapter 5 PDU Linking 89...
Страница 117: ...Chapter 5 PDU Linking 97...
Страница 440: ...Chapter 7 Using the Web Interface 420 If wanted you can customize the subject and content of this email in this action...
Страница 441: ...Chapter 7 Using the Web Interface 421...
Страница 464: ...Chapter 7 Using the Web Interface 444...
Страница 465: ...Chapter 7 Using the Web Interface 445 Continued...
Страница 746: ...Appendix A Specifications 726...
Страница 823: ...Appendix I RADIUS Configuration Illustration 803 Note If your PX3TS uses PAP then select PAP...
Страница 824: ...Appendix I RADIUS Configuration Illustration 804 10 Select Standard to the left of the dialog and then click Add...
Страница 825: ...Appendix I RADIUS Configuration Illustration 805 11 Select Filter Id from the list of attributes and click Add...
Страница 828: ...Appendix I RADIUS Configuration Illustration 808 14 The new attribute is added Click OK...
Страница 829: ...Appendix I RADIUS Configuration Illustration 809 15 Click Next to continue...
Страница 860: ...Appendix J Additional PX3TS Information 840...
Страница 890: ...Appendix K Integration 870 3 Click OK...
Страница 900: ......


