


Appendix J: Additional PX3TS Information
833
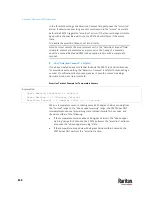
Interface
Client identifier conversion
ETH1
PEG1A00003 = 50 45 47 31 41 30 30 30 30 33
ETH2
PEG1A00003
-ETH2
= 50 45 47 31 41 30 30 30 30 33
2D 45
54 48 32
▪
The suffix comprising the dash symbol and the word
"ETH2" is also converted.
WIRELESS
PEG1A00003
-WIRELESS
= 50 45 47 31 41 30 30 30 30 33
2D
57 49 52 45 4C 45 53 53
▪
The suffix comprising the dash symbol and the word
"WIRELESS" is also converted.
BRIDGE
PEG1A00003 = 50 45 47 31 41 30 30 30 30 33
2.
Separate the converted ASCII codes with a colon, and a prefix "00:" must
be added to the beginning of the converted codes.
For example, the
converted
client identifier of the ETH1 interface looks like
the following:
00:50:45:47:31:41:30:30:30:30:33
3.
Now enter the converted client identifier with the following syntax.
host mypx {
option dhcp-client-identifier = 00:50:45:47:31:41:30:30:30:30:33;
fixed-address 192.168.20.1;
}
Illustration without ASCII code conversion:
1.
Use the original client identifier of the desired network interface. DO NOT
convert them into ASCII codes.
2.
A prefix "\000" must be added to the beginning of the client identifier.
For example, the client identifier of the ETH1 interface looks like the
following:
\000
PEG1A00003
3.
Now enter the original client identifier with the following syntax. The client
identifier is enclosed in quotation marks.
host mypx {
option dhcp-client-identifier = "\000PEG1A00003";
fixed-address 192.168.20.1;
}
Содержание Raritan PX3TS
Страница 4: ......
Страница 6: ......
Страница 20: ......
Страница 52: ...Chapter 3 Initial Installation and Configuration 32 Number Device role Master device Slave 1 Slave 2 Slave 3...
Страница 80: ...Chapter 4 Connecting External Equipment Optional 60...
Страница 109: ...Chapter 5 PDU Linking 89...
Страница 117: ...Chapter 5 PDU Linking 97...
Страница 440: ...Chapter 7 Using the Web Interface 420 If wanted you can customize the subject and content of this email in this action...
Страница 441: ...Chapter 7 Using the Web Interface 421...
Страница 464: ...Chapter 7 Using the Web Interface 444...
Страница 465: ...Chapter 7 Using the Web Interface 445 Continued...
Страница 746: ...Appendix A Specifications 726...
Страница 823: ...Appendix I RADIUS Configuration Illustration 803 Note If your PX3TS uses PAP then select PAP...
Страница 824: ...Appendix I RADIUS Configuration Illustration 804 10 Select Standard to the left of the dialog and then click Add...
Страница 825: ...Appendix I RADIUS Configuration Illustration 805 11 Select Filter Id from the list of attributes and click Add...
Страница 828: ...Appendix I RADIUS Configuration Illustration 808 14 The new attribute is added Click OK...
Страница 829: ...Appendix I RADIUS Configuration Illustration 809 15 Click Next to continue...
Страница 860: ...Appendix J Additional PX3TS Information 840...
Страница 890: ...Appendix K Integration 870 3 Click OK...
Страница 900: ......


