


Chapter 7: Using the Web Interface
295
SHX Request Maximum Cooling
The PX3TS allows you to remotely activate the Schroff SHX 30's maximum
cooling feature. Both LHX 20 and LHX 40 do not support remote activation of
maximum cooling.
The Request Maximum Cooling feature is available only after the PX3TS detects
SHX 30. For additional information on the SHX 30 maximum cooling feature,
refer to the SHX 30 documentation.
To perform maximum cooling:
•
Go to the SHX page, and click Request Maximum Cooling.
Then the SHX 30 enters into emergency cooling mode and runs at its
maximum cooling level of 100% in order to cool the device.
When maximum cooling is requested for an SHX 30, the message
"Maximum cooling requested" is displayed.
To stop maximum cooling:
•
Click Cancel Maximum Cooling.
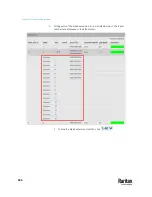
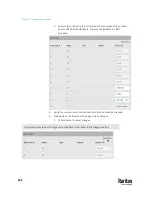
Power CIM
After connecting and detecting a Raritan power CIM, the PX3TS shows 'Power
CIM' in place of 'Feature Port' in the menu. See
Dominion KX II / III
Configuration
(on page 867) or
Dominion KSX II, SX or SX II Configuration
(on
page 872).
Open the Power CIM page by clicking it in the
Menu
(on page 176). This page
shows the CIM's status, including:
•
Number of the FEATURE port where this CIM is connected
•
Its device type
•
Its connection status
For the functionality of this icon
on the top-right corner, see
Feature Port
(on page 279).
Содержание Raritan PX3TS
Страница 4: ......
Страница 6: ......
Страница 20: ......
Страница 52: ...Chapter 3 Initial Installation and Configuration 32 Number Device role Master device Slave 1 Slave 2 Slave 3...
Страница 80: ...Chapter 4 Connecting External Equipment Optional 60...
Страница 109: ...Chapter 5 PDU Linking 89...
Страница 117: ...Chapter 5 PDU Linking 97...
Страница 440: ...Chapter 7 Using the Web Interface 420 If wanted you can customize the subject and content of this email in this action...
Страница 441: ...Chapter 7 Using the Web Interface 421...
Страница 464: ...Chapter 7 Using the Web Interface 444...
Страница 465: ...Chapter 7 Using the Web Interface 445 Continued...
Страница 746: ...Appendix A Specifications 726...
Страница 823: ...Appendix I RADIUS Configuration Illustration 803 Note If your PX3TS uses PAP then select PAP...
Страница 824: ...Appendix I RADIUS Configuration Illustration 804 10 Select Standard to the left of the dialog and then click Add...
Страница 825: ...Appendix I RADIUS Configuration Illustration 805 11 Select Filter Id from the list of attributes and click Add...
Страница 828: ...Appendix I RADIUS Configuration Illustration 808 14 The new attribute is added Click OK...
Страница 829: ...Appendix I RADIUS Configuration Illustration 809 15 Click Next to continue...
Страница 860: ...Appendix J Additional PX3TS Information 840...
Страница 890: ...Appendix K Integration 870 3 Click OK...
Страница 900: ......


