


Index
890
Setting Thresholds for Total Active Energy or
Power
• 211, 215
Setting Up a TLS Certificate
• 309, 348, 355
Setting Up External Authentication
• 309, 348, 360,
845
Setting Wireless E
AP Parameters • 590
Setting Wireless Parameters • 588
Setting Your Preferred Measurement Units • 262,
296, 300, 305, 306
Short Circuit Detection • 119, 120, 722
Showing an Outlet's Information • 149, 150
Showing Information • 530
Showing Network Connection
s • 707
Showing the Firmware Upgrade Progress • 162,
475
Shut down a Server and Control its Power
• 395,
400
SHX Request Maximum Cooling
• 294, 295
Single Login Limitation • 617
Slave Device Events in the Log
• 848
SmartLock
• 507, 508, 513
SmartLock and Card Reader
• 177, 506
SNMP Gets and Sets • 521
SNMP Sets and Thresholds • 522
SNMPv2c Notifications
• 341, 516
SNMPv3 Notifications • 341, 516, 517
Sorting a List • 179, 185, 222, 249, 259, 283, 301,
304, 323, 425, 471, 479
Special Character Requirement •
621
Specifications
• 9, 721
Specifying Non-Critical Outlets
• 552, 573
Specifying the Agreement Contents • 616
Specifying the Asset Strip Orientation • 689
Specifying the CC Sensor Type • 663
Specifying the Device Altitude • 575
Specifying the EnergyWise Domain • 685
Specifying the EnergyWise Secret • 685
Specifying the Number of Rack Units • 687
Specifying the Rack Unit Numbering Mode • 688
Specifying the Rack Unit Numbering Offset • 688
Specifying the SSH Public Key
• 599, 643
Standard Attributes
• 792
Start or Stop a Lua Script
• 396, 412, 457, 459
Static Route Examples
• 310, 314, 324, 580, 584
Step A
Add Your PX3TS as a RADIUS Client
• 792, 793,
811, 812
Step A. Determine User Accounts and Roles • 777
Step B
Configure Connection Policies and Standard
Attributes • 793, 797
Configure Connection Policies and
Vendor-
Specific Attributes • 811, 816
Step B. Configure User Groups on the AD Server •
778
Step C. Configure LDAP Authentication on the
PX3TS • 779
Step D. Configure Roles on
the PX3TS • 782
Strong Passwords • 619
Supported Maximum DPX Sensor Distances
• 51,
55
Supported Sensor Configurations for Power
Sharing • 38, 39
Supported Web Browsers • 169
Supported Wireless LAN Configuration • 15, 846
Switch LHX/SHX
• 396, 413
Switch Outlet Group
• 396, 413
Switch Outlets
• 396, 414
Switch Peripheral Actuator
• 396, 414
Switching Off an Actuator • 703
Switching On an Actuator • 702
Switching to a Different PDU • 85
Syslog Message
• 396, 415
System and USB Requirements
• 731, 732
T
Technical Specifications
• 6, 7, 118, 164, 166, 721
Testing Indicator Lamps • 119, 120
Testing the Network Connectivity • 708, 849
TFTP Requirements
• 747, 748
The ? Command for Showing Available Commands
• 528
The Ping Tool
• 848, 849
The PX3TS MIB • 521
Thresholds and Sensor States • 834
Time Configuration Commands • 603
Time Units • 207, 214, 239, 367, 368
TLS Certificate Chain
• 316, 320, 342, 363, 416,
438, 859
Tracing the Route • 709
Transfer Switch
• 111, 112,
116, 118, 146, 182,
184, 193, 200, 202, 205, 220
Transfer Switch and Inlet Status • 117, 118, 184,
194, 200, 209
Transfer Switch Indicator Lamps
• 109, 114
Transfer Switch Information • 530, 564
Содержание Raritan PX3TS
Страница 4: ......
Страница 6: ......
Страница 20: ......
Страница 52: ...Chapter 3 Initial Installation and Configuration 32 Number Device role Master device Slave 1 Slave 2 Slave 3...
Страница 80: ...Chapter 4 Connecting External Equipment Optional 60...
Страница 109: ...Chapter 5 PDU Linking 89...
Страница 117: ...Chapter 5 PDU Linking 97...
Страница 440: ...Chapter 7 Using the Web Interface 420 If wanted you can customize the subject and content of this email in this action...
Страница 441: ...Chapter 7 Using the Web Interface 421...
Страница 464: ...Chapter 7 Using the Web Interface 444...
Страница 465: ...Chapter 7 Using the Web Interface 445 Continued...
Страница 746: ...Appendix A Specifications 726...
Страница 823: ...Appendix I RADIUS Configuration Illustration 803 Note If your PX3TS uses PAP then select PAP...
Страница 824: ...Appendix I RADIUS Configuration Illustration 804 10 Select Standard to the left of the dialog and then click Add...
Страница 825: ...Appendix I RADIUS Configuration Illustration 805 11 Select Filter Id from the list of attributes and click Add...
Страница 828: ...Appendix I RADIUS Configuration Illustration 808 14 The new attribute is added Click OK...
Страница 829: ...Appendix I RADIUS Configuration Illustration 809 15 Click Next to continue...
Страница 860: ...Appendix J Additional PX3TS Information 840...
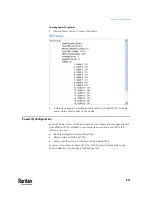
Страница 890: ...Appendix K Integration 870 3 Click OK...
Страница 900: ......