


Chapter 7: Using the Web Interface
456
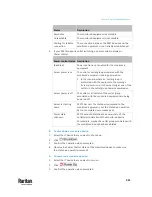
2.
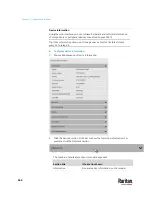
Click the 'Console baud rate' field to select the baud rate intended for
console management.
Note: For a serial RS-232 or USB connection between a computer and the
PX3TS, leave it at the default (115200 bps).
3.
Click the 'Modem baud rate' field to select the baud rate for the modem
connected to the PX3TS.
The following modem settings/fields appear in the web interface after the
PX3TS detects the connection of an analog or GSM modem.
To configure the analog modem:
1.
Select the 'Answer incoming calls' checkbox to enable the remote access
via a modem. Otherwise, deselect it.
2.
Type a value in the 'Number of rings before answering' field to determine
the number of rings the PX3TS must wait before answering the call.
To configure the GSM modem:
1.
Enter the SIM PIN code.
2.
Select the 'Use custom SMS center number' checkbox if a custom SMS
center will be used.
▪
Enter the SMS center number in the 'SMS center' field.
3.
If needed, click Advanced Information to view detailed information about
the modem, SIM and mobile network.
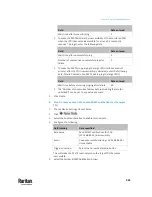
4.
To test whether the PX3TS can successfully send out SMS messages with
the modem settings:
a.
Enter the number of the recipient's phone in the Recipient Phone
field.
b.
Click Send SMS Test to send a test SMS message.
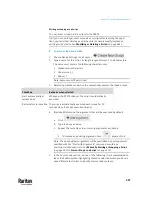
Lua Scripts
If you can write or obtain any Lua scripts, you can create or load them into the
PX3TS to control its behaviors.
Raritan also provides some Lua scripts examples, which you can load as
needed.
Note: Not all Raritan Lua script examples can apply to your PX3TS model. You
should read each example's introduction before applying them.
You must have the Administrator Privileges to manage Lua scripts.
Содержание Raritan PX3TS
Страница 4: ......
Страница 6: ......
Страница 20: ......
Страница 52: ...Chapter 3 Initial Installation and Configuration 32 Number Device role Master device Slave 1 Slave 2 Slave 3...
Страница 80: ...Chapter 4 Connecting External Equipment Optional 60...
Страница 109: ...Chapter 5 PDU Linking 89...
Страница 117: ...Chapter 5 PDU Linking 97...
Страница 440: ...Chapter 7 Using the Web Interface 420 If wanted you can customize the subject and content of this email in this action...
Страница 441: ...Chapter 7 Using the Web Interface 421...
Страница 464: ...Chapter 7 Using the Web Interface 444...
Страница 465: ...Chapter 7 Using the Web Interface 445 Continued...
Страница 746: ...Appendix A Specifications 726...
Страница 823: ...Appendix I RADIUS Configuration Illustration 803 Note If your PX3TS uses PAP then select PAP...
Страница 824: ...Appendix I RADIUS Configuration Illustration 804 10 Select Standard to the left of the dialog and then click Add...
Страница 825: ...Appendix I RADIUS Configuration Illustration 805 11 Select Filter Id from the list of attributes and click Add...
Страница 828: ...Appendix I RADIUS Configuration Illustration 808 14 The new attribute is added Click OK...
Страница 829: ...Appendix I RADIUS Configuration Illustration 809 15 Click Next to continue...
Страница 860: ...Appendix J Additional PX3TS Information 840...
Страница 890: ...Appendix K Integration 870 3 Click OK...
Страница 900: ......


