


Chapter 7: Using the Web Interface
365
Note: If the PX3TS clock and the LDAP server clock are out of sync, the installed
TLS certificates, if any, may be considered expired. To ensure proper
synchronization, administrators should configure the PX3TS and the LDAP
server to use the same NTP server(s).
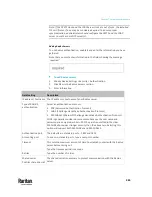
Adding Radius Servers
To use Radius authentication, enable it and enter the information you have
gathered.
Note that you must enter information in the fields showing the message
'required.'
To add Radius servers:
1.
Choose Device Settings > Security > Authentication.
2.
Click New in the Radius Servers section.
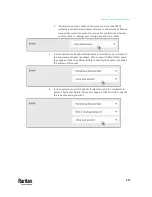
3.
Enter information.
Field/setting
Description
IP address / hostname The IP address or hostname of your Radius server.
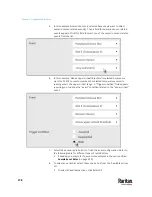
Type of RADIUS
authentication
Select an authentication protocol.
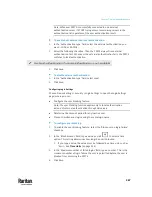
▪
PAP (Password Authentication Protocol)
▪
CHAP (Challenge Handshake Authentication Protocol)
▪
MS-CHAPv2 (Microsoft Challenge Handshake Authentication Protocol)
CHAP is generally considered more secure because the user name and
password are encrypted, while in PAP they are transmitted in the clear.
MS-CHAPv2 provides stronger security than the above two. Selecting this
option will support both MS-CHAPv1 and MS-CHAPv2.
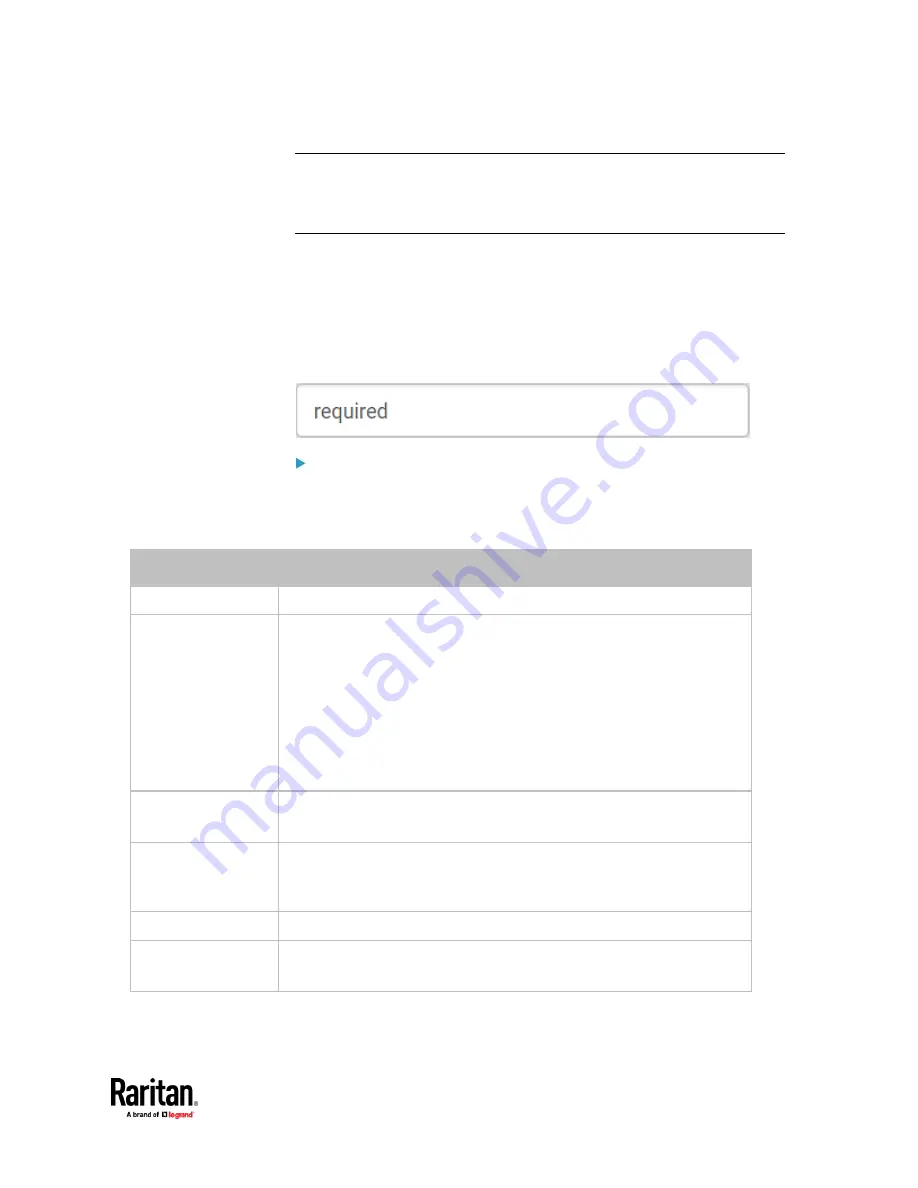
Authentication port,
Accounting port
The defaults are standard ports -- 1812 and 1813.
To use non-standard ports, type a new port number.
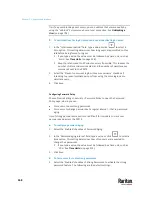
Timeout
This sets the maximum amount of time to establish contact with the Radius
server before timing out.
Type the timeout period in seconds.
Retries
Type the number of retries.
Shared secret,
Confirm shared secret
The shared secret is necessary to protect communication with the Radius
server.
Содержание Raritan PX3TS
Страница 4: ......
Страница 6: ......
Страница 20: ......
Страница 52: ...Chapter 3 Initial Installation and Configuration 32 Number Device role Master device Slave 1 Slave 2 Slave 3...
Страница 80: ...Chapter 4 Connecting External Equipment Optional 60...
Страница 109: ...Chapter 5 PDU Linking 89...
Страница 117: ...Chapter 5 PDU Linking 97...
Страница 440: ...Chapter 7 Using the Web Interface 420 If wanted you can customize the subject and content of this email in this action...
Страница 441: ...Chapter 7 Using the Web Interface 421...
Страница 464: ...Chapter 7 Using the Web Interface 444...
Страница 465: ...Chapter 7 Using the Web Interface 445 Continued...
Страница 746: ...Appendix A Specifications 726...
Страница 823: ...Appendix I RADIUS Configuration Illustration 803 Note If your PX3TS uses PAP then select PAP...
Страница 824: ...Appendix I RADIUS Configuration Illustration 804 10 Select Standard to the left of the dialog and then click Add...
Страница 825: ...Appendix I RADIUS Configuration Illustration 805 11 Select Filter Id from the list of attributes and click Add...
Страница 828: ...Appendix I RADIUS Configuration Illustration 808 14 The new attribute is added Click OK...
Страница 829: ...Appendix I RADIUS Configuration Illustration 809 15 Click Next to continue...
Страница 860: ...Appendix J Additional PX3TS Information 840...
Страница 890: ...Appendix K Integration 870 3 Click OK...
Страница 900: ......


