


Chapter 7: Using the Web Interface
202
It may not be a problem when the inlets are out of sync. The PX3TS device can
still work fine in that state. However, depending on your transfer settings, the
'out of sync' state may prevent an automatic retransfer from the standby inlet
to the preferred inlet. For details, see
Power Transfer Settings
(on page 203).
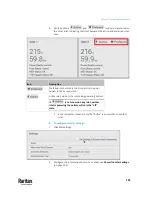
Power data of the transfer switch:
•
Active power (W)
•
Apparent power (VA)
•
RMS current (A)
•
Power Factor
•
Active Energy (Wh or kWh)
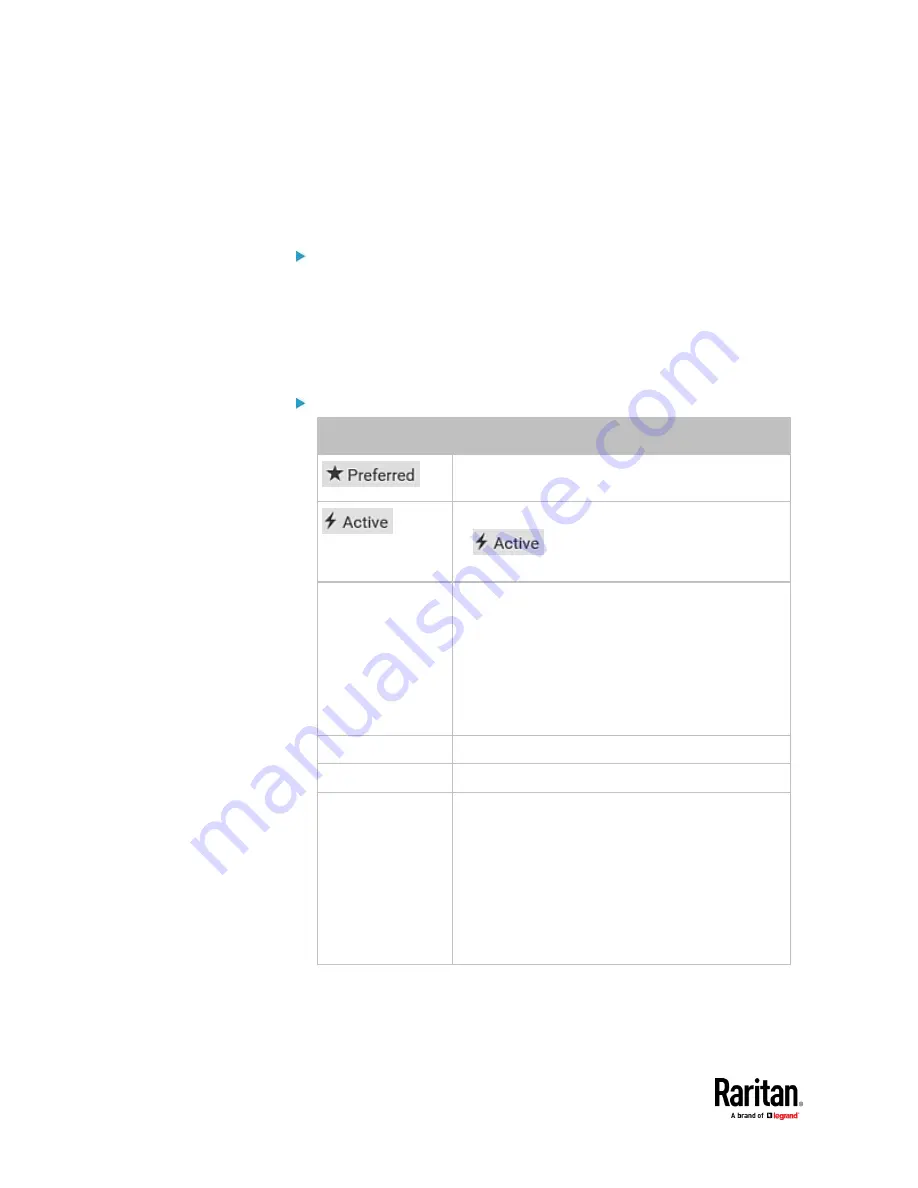
Status of inlet sensors related to the transfer switch:
Data
Description
Indicates which inlet is the first priority to power
outlets in the normal state.
Indicates which inlet is powering outlets.
If
is not shown on any inlet, neither inlet
is powering the outlets, which is the "off" state.
Power Quality
Shows the power quality of both inlets, which is one
of the following:
▪
normal
▪
warning
▪
critical
To configure power quality thresholds, see
Transfer
Switch
(on page 193).
RMS Voltage (V)
Shows each inlet's voltage value.
Line Frequency (Hz) Shows each inlet's line frequency value.
Fuse Status
Indicates whether each fuse works properly.
▪
open
: The fuse works fine.
▪
closed
: The fuse is blown or malfunctions.
When this occurs, replace the fuse. See
Fuses for
the Inlet Transfer Switch
(on page 164).
▪
unavailable
: The PX3TS cannot determine the
fuse's status. For example, "unavailable" is shown
when there is no inlet power available.
Содержание Raritan PX3TS
Страница 4: ......
Страница 6: ......
Страница 20: ......
Страница 52: ...Chapter 3 Initial Installation and Configuration 32 Number Device role Master device Slave 1 Slave 2 Slave 3...
Страница 80: ...Chapter 4 Connecting External Equipment Optional 60...
Страница 109: ...Chapter 5 PDU Linking 89...
Страница 117: ...Chapter 5 PDU Linking 97...
Страница 440: ...Chapter 7 Using the Web Interface 420 If wanted you can customize the subject and content of this email in this action...
Страница 441: ...Chapter 7 Using the Web Interface 421...
Страница 464: ...Chapter 7 Using the Web Interface 444...
Страница 465: ...Chapter 7 Using the Web Interface 445 Continued...
Страница 746: ...Appendix A Specifications 726...
Страница 823: ...Appendix I RADIUS Configuration Illustration 803 Note If your PX3TS uses PAP then select PAP...
Страница 824: ...Appendix I RADIUS Configuration Illustration 804 10 Select Standard to the left of the dialog and then click Add...
Страница 825: ...Appendix I RADIUS Configuration Illustration 805 11 Select Filter Id from the list of attributes and click Add...
Страница 828: ...Appendix I RADIUS Configuration Illustration 808 14 The new attribute is added Click OK...
Страница 829: ...Appendix I RADIUS Configuration Illustration 809 15 Click Next to continue...
Страница 860: ...Appendix J Additional PX3TS Information 840...
Страница 890: ...Appendix K Integration 870 3 Click OK...
Страница 900: ......


