


Chapter 7: Using the Web Interface
264
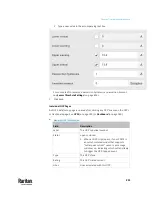
: Turn ON.
: Turn OFF.
Note: Per default you can turn on as many dry contact actuators as you
want, but only one "powered dry contact" actuator can be turned on at the
same time. To change this limitation of "powered dry contact" actuators,
modify the active powered dry contact setting. See
Peripherals
(on page
258).
4.
Confirm the operation when prompted.
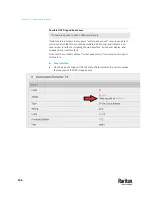
If you select a DX2-DH2C2 door handle lock, then the Open and Close buttons
appear. For detailed operations, see
Door Handle Status and Control
(on page
511).
Tip: If intending to control the actuator via the front panel, see
Front Panel
Settings
(on page 454).
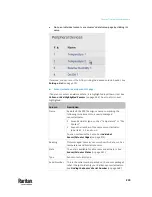
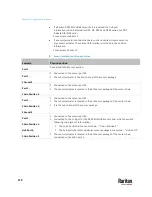
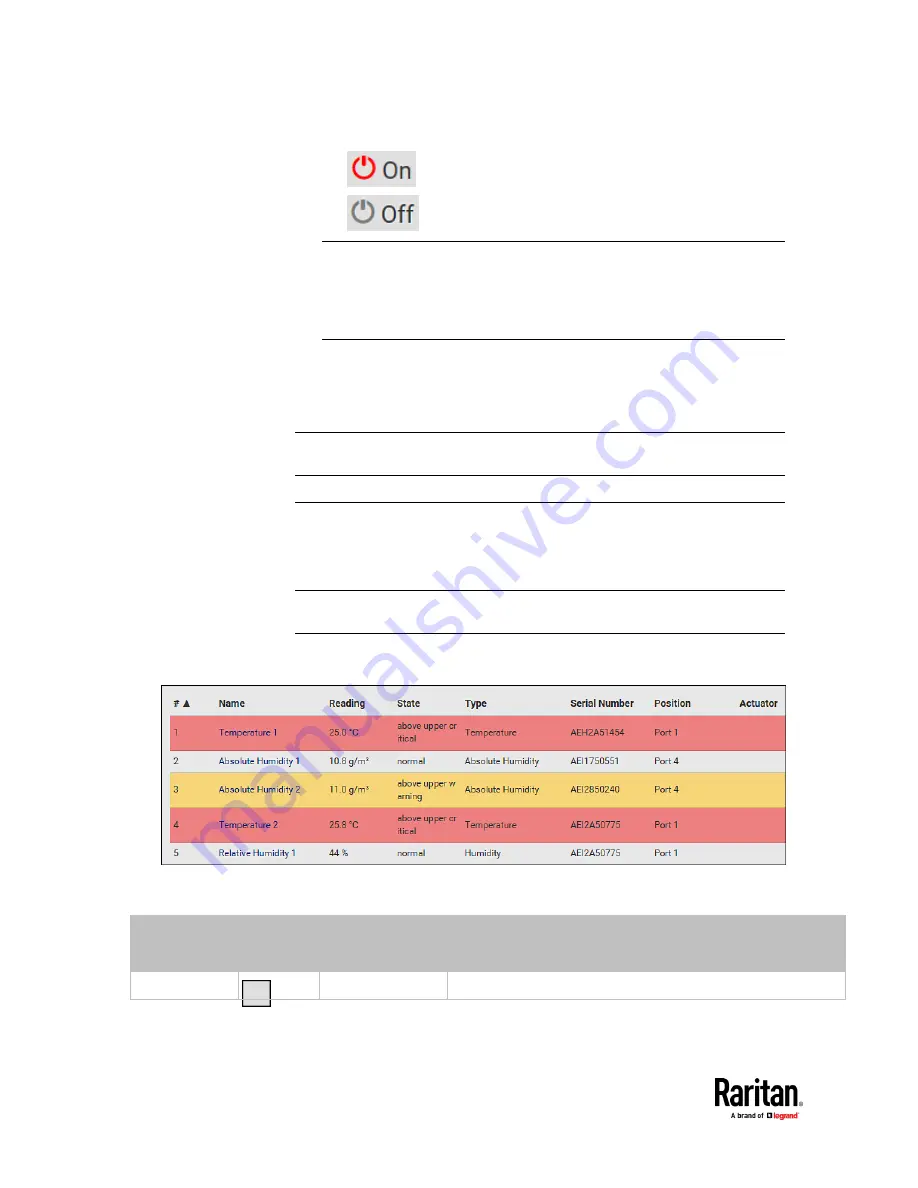
Yellow- or Red-Highlighted Sensors
The PX3TS highlights those sensors that enter the abnormal state with a yellow
or red color. Note that numeric sensors can change colors only after you have
enabled their thresholds.
Tip: When an actuator is turned ON, it is also highlighted in red for drawing
attention.
For concepts of thresholds, deassertion hysteresis and assertion timeout, see
Sensor Threshold Settings
(on page 834).
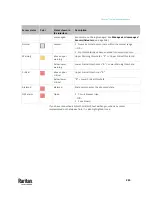
In the following table, "R" represents any numeric sensor's reading. The symbol
<= means "smaller than" or "equal to."
Sensor status
Color
States shown in
the interface
Description
Unknown
unavailable
Sensor state or readings cannot be detected.
Содержание Raritan PX3TS
Страница 4: ......
Страница 6: ......
Страница 20: ......
Страница 52: ...Chapter 3 Initial Installation and Configuration 32 Number Device role Master device Slave 1 Slave 2 Slave 3...
Страница 80: ...Chapter 4 Connecting External Equipment Optional 60...
Страница 109: ...Chapter 5 PDU Linking 89...
Страница 117: ...Chapter 5 PDU Linking 97...
Страница 440: ...Chapter 7 Using the Web Interface 420 If wanted you can customize the subject and content of this email in this action...
Страница 441: ...Chapter 7 Using the Web Interface 421...
Страница 464: ...Chapter 7 Using the Web Interface 444...
Страница 465: ...Chapter 7 Using the Web Interface 445 Continued...
Страница 746: ...Appendix A Specifications 726...
Страница 823: ...Appendix I RADIUS Configuration Illustration 803 Note If your PX3TS uses PAP then select PAP...
Страница 824: ...Appendix I RADIUS Configuration Illustration 804 10 Select Standard to the left of the dialog and then click Add...
Страница 825: ...Appendix I RADIUS Configuration Illustration 805 11 Select Filter Id from the list of attributes and click Add...
Страница 828: ...Appendix I RADIUS Configuration Illustration 808 14 The new attribute is added Click OK...
Страница 829: ...Appendix I RADIUS Configuration Illustration 809 15 Click Next to continue...
Страница 860: ...Appendix J Additional PX3TS Information 840...
Страница 890: ...Appendix K Integration 870 3 Click OK...
Страница 900: ......