


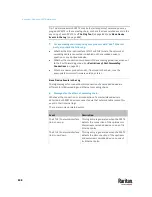


Appendix J: Additional PX3TS Information
859
TLS Certificate Chain
A TLS server sends out a certificate to any client attempting to connect to it.
The receiver determines whether a TLS server can be trusted by verifying that
server's certificate, using the certificate (chain) stored on the receiver.
Therefore, to successfully connect to a TLS server, you must upload a valid
certificate or (partial) certificate chain to the receiver.
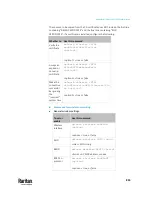
The uploaded certificate (chain) must contain all missing certificates "related
to" that TLS server's certificate in some way. Otherwise, the connection made
to that TLS server will fail.
•
For information on how the uploaded certificate (chain) is related to a TLS
server's certificate, see
What is a Certificate Chain
(on page 859).
•
For an example of creating and uploading a TLS certificate to PX3TS, see
Illustration - GMAIL SMTP Certificate Chain
(on page 862).
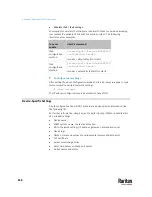
What is a Certificate Chain
If you are familiar with a certificate chain, you can ignore this topic and refer
to
Illustration - GMAIL SMTP Certificate Chain
(on page 862).
A certificate or a chain of certificates is used for trusting a TLS server that you
want to connect.
The receiver, such as PX3TS, can trust a TLS server only after an appropriate
certificate (chain) which is "related to" that TLS server's certificate is uploaded
to the receiver.
How a certificate chain is generated:
To explain how a TLS server's certificate is "related to" the certificate (chain)
that is uploaded to the receiver, we assume that there are three "related"
certificates.
•
Certificate C
. The certificate issued to the TLS server you want to connect.
'Certificate C' is issued by the certificate authority (CA) entity called 'Issuer
B'.
•
Certificate B
. The certificate issued to 'Issuer B'.
'Certificate B' is issued by a CA entity called 'Issuer A', and it is an
intermediate certificate.
Содержание Raritan PX3TS
Страница 4: ......
Страница 6: ......
Страница 20: ......
Страница 52: ...Chapter 3 Initial Installation and Configuration 32 Number Device role Master device Slave 1 Slave 2 Slave 3...
Страница 80: ...Chapter 4 Connecting External Equipment Optional 60...
Страница 109: ...Chapter 5 PDU Linking 89...
Страница 117: ...Chapter 5 PDU Linking 97...
Страница 440: ...Chapter 7 Using the Web Interface 420 If wanted you can customize the subject and content of this email in this action...
Страница 441: ...Chapter 7 Using the Web Interface 421...
Страница 464: ...Chapter 7 Using the Web Interface 444...
Страница 465: ...Chapter 7 Using the Web Interface 445 Continued...
Страница 746: ...Appendix A Specifications 726...
Страница 823: ...Appendix I RADIUS Configuration Illustration 803 Note If your PX3TS uses PAP then select PAP...
Страница 824: ...Appendix I RADIUS Configuration Illustration 804 10 Select Standard to the left of the dialog and then click Add...
Страница 825: ...Appendix I RADIUS Configuration Illustration 805 11 Select Filter Id from the list of attributes and click Add...
Страница 828: ...Appendix I RADIUS Configuration Illustration 808 14 The new attribute is added Click OK...
Страница 829: ...Appendix I RADIUS Configuration Illustration 809 15 Click Next to continue...
Страница 860: ...Appendix J Additional PX3TS Information 840...
Страница 890: ...Appendix K Integration 870 3 Click OK...
Страница 900: ......


