


Chapter 4: Connecting External Equipment (Optional)
64
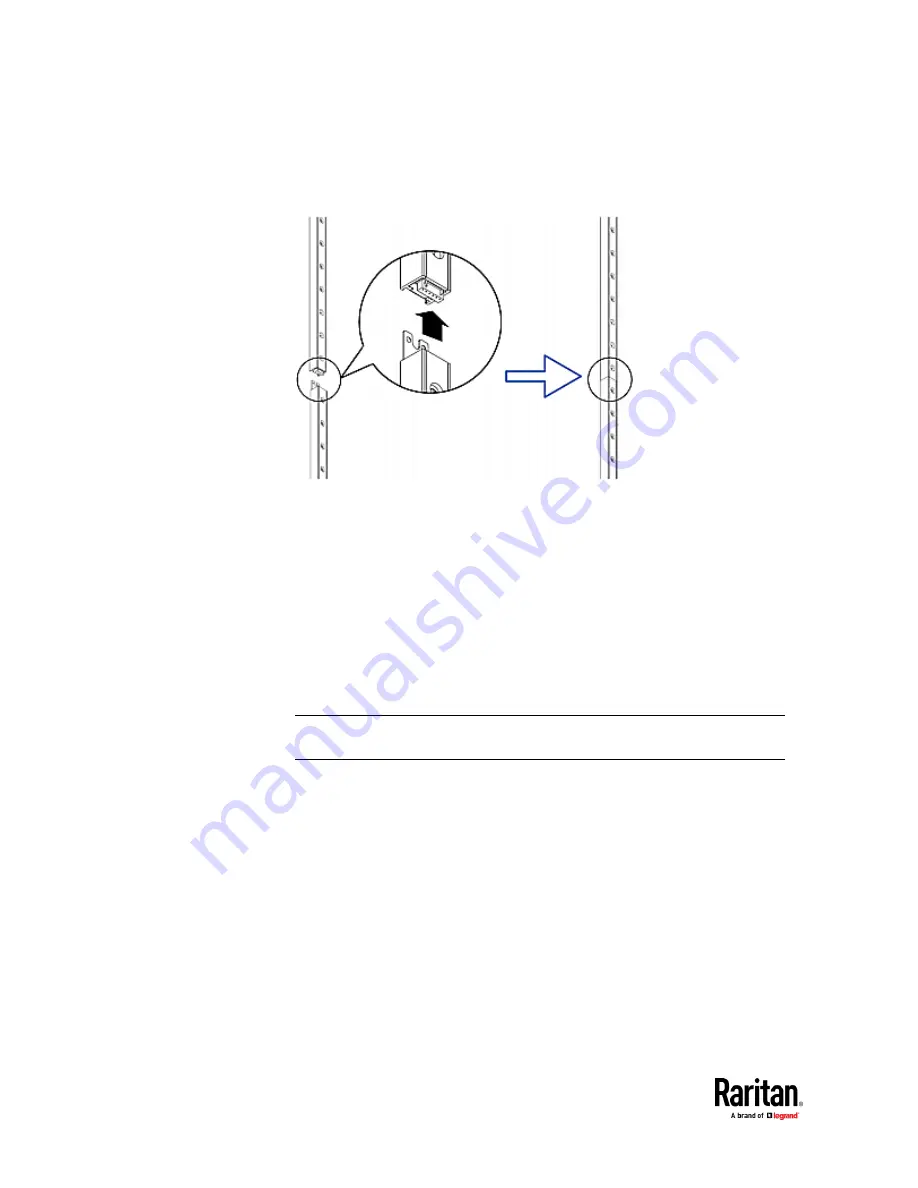
▪
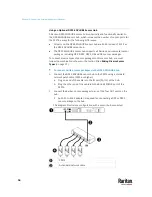
Make sure that the U-shaped sheet metal adjacent to the male DIN
connector is inserted into the rear slot of the master strip. Screw up
the U-shaped sheet metal to reinforce the connection.
2.
Connect another 8U slave strip to the one being attached to the master
strip in the same manner as Step 1.
3.
Repeat the above step to connect more slave strips. The length of the
asset strip assembly can be up to 64U.
▪
The final slave strip can be 8U or 5U, depending on the actual height of
your rack.
▪
Connect the "ending" asset strip as the final one in the assembly.
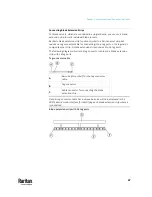
4.
Vertically attach the asset strip assembly to the rack, next to the IT
equipment, making each tag port horizontally align with a rack unit.
5.
The asset strips are automatically attracted to the rack because of
magnetic stripes on the back.
Note: The asset strip is implemented with a tilt sensor so it can be mounted
upside down.
Содержание Raritan PX3TS
Страница 4: ......
Страница 6: ......
Страница 20: ......
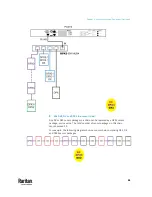
Страница 52: ...Chapter 3 Initial Installation and Configuration 32 Number Device role Master device Slave 1 Slave 2 Slave 3...
Страница 80: ...Chapter 4 Connecting External Equipment Optional 60...
Страница 109: ...Chapter 5 PDU Linking 89...
Страница 117: ...Chapter 5 PDU Linking 97...
Страница 440: ...Chapter 7 Using the Web Interface 420 If wanted you can customize the subject and content of this email in this action...
Страница 441: ...Chapter 7 Using the Web Interface 421...
Страница 464: ...Chapter 7 Using the Web Interface 444...
Страница 465: ...Chapter 7 Using the Web Interface 445 Continued...
Страница 746: ...Appendix A Specifications 726...
Страница 823: ...Appendix I RADIUS Configuration Illustration 803 Note If your PX3TS uses PAP then select PAP...
Страница 824: ...Appendix I RADIUS Configuration Illustration 804 10 Select Standard to the left of the dialog and then click Add...
Страница 825: ...Appendix I RADIUS Configuration Illustration 805 11 Select Filter Id from the list of attributes and click Add...
Страница 828: ...Appendix I RADIUS Configuration Illustration 808 14 The new attribute is added Click OK...
Страница 829: ...Appendix I RADIUS Configuration Illustration 809 15 Click Next to continue...
Страница 860: ...Appendix J Additional PX3TS Information 840...
Страница 890: ...Appendix K Integration 870 3 Click OK...
Страница 900: ......


