Chapter 9: Using the Command Line Interface
564
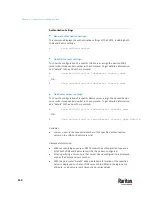
Quitting Configuration Mode
Both of "apply" and "cancel" commands let you quit the configuration mode.
The difference is that "apply" saves all changes you made in the configuration
mode while "cancel" aborts all changes.
To quit the configuration mode, use either command:
config:#
apply
-- OR --
config:#
cancel
The # or > prompt appears after pressing Enter, indicating that you have
entered the administrator or user mode. See
Different CLI Modes and Prompts
(on page 527).
PX3TS Control and Configuration
To configure the PX3TS device or network settings through the CLI, it is highly
recommended to log in as the administrator so that you have full permissions.
To configure any settings, enter the configuration mode. Configuration
commands are case sensitive so ensure you capitalize them correctly.
Controlling the Transfer Switch
A transfer switch command begins with
ts
. You can use these commands to
control the power transfer behavior or manage power transfer settings.
Performing Manual Transfer
Performing manual transfer remotely requires either of these permissions:
"Switch Transfer Switch" or "Administrator Privileges."
To verify the current active inlet and preferred inlet configuration via CLI, see
Transfer Switch Information
(on page 530).
To perform manual transfer via CLI:
1.
Ensure that the current mode is the administrator or user mode. See
Different CLI Modes and Prompts
(on page 527).
2.
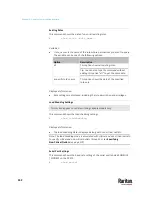
Type either of the following commands and press Enter.
#
ts transfer <inlet>
OR
#
ts transfer <inlet> /y
<inlet> is one of the inlet numbers: 1 or 2.
Содержание Raritan PX3TS
Страница 4: ......
Страница 6: ......
Страница 20: ......
Страница 52: ...Chapter 3 Initial Installation and Configuration 32 Number Device role Master device Slave 1 Slave 2 Slave 3...
Страница 80: ...Chapter 4 Connecting External Equipment Optional 60...
Страница 109: ...Chapter 5 PDU Linking 89...
Страница 117: ...Chapter 5 PDU Linking 97...
Страница 440: ...Chapter 7 Using the Web Interface 420 If wanted you can customize the subject and content of this email in this action...
Страница 441: ...Chapter 7 Using the Web Interface 421...
Страница 464: ...Chapter 7 Using the Web Interface 444...
Страница 465: ...Chapter 7 Using the Web Interface 445 Continued...
Страница 746: ...Appendix A Specifications 726...
Страница 823: ...Appendix I RADIUS Configuration Illustration 803 Note If your PX3TS uses PAP then select PAP...
Страница 824: ...Appendix I RADIUS Configuration Illustration 804 10 Select Standard to the left of the dialog and then click Add...
Страница 825: ...Appendix I RADIUS Configuration Illustration 805 11 Select Filter Id from the list of attributes and click Add...
Страница 828: ...Appendix I RADIUS Configuration Illustration 808 14 The new attribute is added Click OK...
Страница 829: ...Appendix I RADIUS Configuration Illustration 809 15 Click Next to continue...
Страница 860: ...Appendix J Additional PX3TS Information 840...
Страница 890: ...Appendix K Integration 870 3 Click OK...
Страница 900: ......

