


Chapter 9: Using the Command Line Interface
527
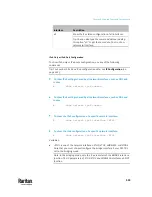
With an Analog Modem
The PX3TS supports remote access to the CLI via a connected analog modem.
This feature is especially useful when the LAN access is not available.
To connect to the PX3TS via the modem:
1.
Make sure the PX3TS has an analog modem connected. See
Connecting an
Analog Modem
(on page 73).
2.
Make sure the computer you are using has an appropriate modem
connected.
3.
Launch a terminal emulation program, and configure its baud rate settings
according to the baud rate set for the analog modem connected to the
PX3TS. See
Configuring the Serial Port
(on page 455).
4.
Type the following AT command to make a connection with the PX3TS.
ATD<modem phone number>
5.
The CLI login prompt appears after the connection is established
successfully. Then type the user name and password to log in to the CLI.
To disconnect from the PX3TS:
1.
Return to the modem's command mode using the escape code +++.
2.
After the OK prompt appears, type the following AT command to
disconnect from the PX3TS.
ATH
Different CLI Modes and Prompts
Depending on the login name you use and the mode you enter, the system
prompt in the CLI varies. The PDU name appears with the prompt.
•
User Mode: When you log in as a normal user, who may not have full
permissions to configure the PX3TS, the
>
prompt appears.
•
Administrator Mode: When you log in as an administrator, who has full
permissions to configure the PX3TS, the
#
prompt appears.
•
Configuration Mode: You can enter the configuration mode from the
administrator or user mode. In this mode, the prompt changes to
config:#
or
config:>
and you can change PX3TS device and network configurations.
See
Entering Configuration Mode
(on page 563).
•
Diagnostic Mode: You can enter the diagnostic mode from the
administrator or user mode. In this mode, the prompt changes to
diag:#
or
diag:>
and you can perform the network troubleshooting commands, such
as the ping command. See
Entering Diagnostic Mode
(on page 706).
Содержание Raritan PX3TS
Страница 4: ......
Страница 6: ......
Страница 20: ......
Страница 52: ...Chapter 3 Initial Installation and Configuration 32 Number Device role Master device Slave 1 Slave 2 Slave 3...
Страница 80: ...Chapter 4 Connecting External Equipment Optional 60...
Страница 109: ...Chapter 5 PDU Linking 89...
Страница 117: ...Chapter 5 PDU Linking 97...
Страница 440: ...Chapter 7 Using the Web Interface 420 If wanted you can customize the subject and content of this email in this action...
Страница 441: ...Chapter 7 Using the Web Interface 421...
Страница 464: ...Chapter 7 Using the Web Interface 444...
Страница 465: ...Chapter 7 Using the Web Interface 445 Continued...
Страница 746: ...Appendix A Specifications 726...
Страница 823: ...Appendix I RADIUS Configuration Illustration 803 Note If your PX3TS uses PAP then select PAP...
Страница 824: ...Appendix I RADIUS Configuration Illustration 804 10 Select Standard to the left of the dialog and then click Add...
Страница 825: ...Appendix I RADIUS Configuration Illustration 805 11 Select Filter Id from the list of attributes and click Add...
Страница 828: ...Appendix I RADIUS Configuration Illustration 808 14 The new attribute is added Click OK...
Страница 829: ...Appendix I RADIUS Configuration Illustration 809 15 Click Next to continue...
Страница 860: ...Appendix J Additional PX3TS Information 840...
Страница 890: ...Appendix K Integration 870 3 Click OK...
Страница 900: ......


