


Chapter 7: Using the Web Interface
455
Or you can turn on or off actuators by operating the front panel. See
Peripherals
(on page 151).
Configuring the Serial Port
You can change the bit rate of the serial port labeled CONSOLE / MODEM on
the PX3TS. The default bit rate for console and modem operation is 115200
bps.
The PX3TS supports using the following devices via the serial interface:
•
A computer for console management.
•
A Raritan KVM product.
•
An analog modem for remote dial-in and access to the CLI.
•
A GSM modem for sending out SMS messages to a cellular phone.
Bit-rate adjustment may be necessary. Change the bit rate before connecting
the supported device to the PX3TS through the serial port, or there are
communication problems.
Note: The serial port bit-rate change is required when the PX3TS works in
conjunction with Raritan's Dominion LX KVM switch. Dominion LX only supports
19200 bps for communications over the serial interface.
You can set diverse bit-rate settings for console and modem operations.
Usually the PX3TS can detect the device type, and automatically apply the
preset bit rate.
The PX3TS will indicate the detected device in the Port State section of the
Serial Port page.
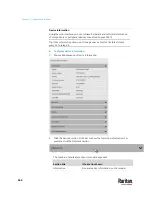
To configure serial port and modem settings, choose Device Settings > Serial
Port.
To change the serial port's baud rate settings:
1.
Click the 'Connected device' field to make the serial port enter an
appropriate state.
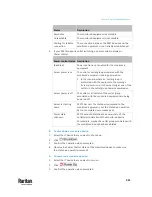
Options
Description
Automatic detection
The PX3TS automatically detects the type of the device
connected to the serial port.
Select this option unless your PX3TS cannot correctly
detect the device type.
Force console
The PX3TS attempts to recognize that the connected
device is set for the console mode.
Force analog modem
The PX3TS attempts to recognize that the connected
device is an analog modem.
Force GSM modem
The PX3TS attempts to recognize that the connected
device is a GSM modem.
Содержание Raritan PX3TS
Страница 4: ......
Страница 6: ......
Страница 20: ......
Страница 52: ...Chapter 3 Initial Installation and Configuration 32 Number Device role Master device Slave 1 Slave 2 Slave 3...
Страница 80: ...Chapter 4 Connecting External Equipment Optional 60...
Страница 109: ...Chapter 5 PDU Linking 89...
Страница 117: ...Chapter 5 PDU Linking 97...
Страница 440: ...Chapter 7 Using the Web Interface 420 If wanted you can customize the subject and content of this email in this action...
Страница 441: ...Chapter 7 Using the Web Interface 421...
Страница 464: ...Chapter 7 Using the Web Interface 444...
Страница 465: ...Chapter 7 Using the Web Interface 445 Continued...
Страница 746: ...Appendix A Specifications 726...
Страница 823: ...Appendix I RADIUS Configuration Illustration 803 Note If your PX3TS uses PAP then select PAP...
Страница 824: ...Appendix I RADIUS Configuration Illustration 804 10 Select Standard to the left of the dialog and then click Add...
Страница 825: ...Appendix I RADIUS Configuration Illustration 805 11 Select Filter Id from the list of attributes and click Add...
Страница 828: ...Appendix I RADIUS Configuration Illustration 808 14 The new attribute is added Click OK...
Страница 829: ...Appendix I RADIUS Configuration Illustration 809 15 Click Next to continue...
Страница 860: ...Appendix J Additional PX3TS Information 840...
Страница 890: ...Appendix K Integration 870 3 Click OK...
Страница 900: ......


