


Chapter 7: Using the Web Interface
409
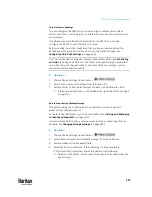
▪
When clicking anywhere inside the text box, the Event Context
Information displays, showing a list of placeholders and their
definitions. Just scroll down to select the desired placeholder. For
details, see
Placeholders for Custom Messages
(on page 425).
▪
To start a new line in the text box, press Enter.
Note: In case you need to type any square brackets "[" and "]" in the
custom message for non-placeholder words, always add a backslash in
front of the square bracket. That is, \[ or \]. Otherwise, the message sent
will not display the square brackets.
Send Snapshots via Email
This option notifies one or multiple persons for the selected events by emailing
snapshots or videos captured by a connected Logitech
®
webcam.
Operation:
1.
Choose Device Settings > Event Rules >
.
2.
Select 'Send snapshots via email' from the Action list.
3.
In the 'Recipient email addresses' field, specify the email address(es) of the
recipient(s). Use a comma to separate multiple email addresses.
4.
By default, the SMTP server specified on the SMTP Server page will be the
SMTP server for performing this action.
To use a different SMTP server, select the 'Use custom SMTP server'
checkbox. The fields for customized SMTP settings appear. For information
on each field, see
Configuring SMTP Settings
(on page 342).
Содержание Raritan PX3TS
Страница 4: ......
Страница 6: ......
Страница 20: ......
Страница 52: ...Chapter 3 Initial Installation and Configuration 32 Number Device role Master device Slave 1 Slave 2 Slave 3...
Страница 80: ...Chapter 4 Connecting External Equipment Optional 60...
Страница 109: ...Chapter 5 PDU Linking 89...
Страница 117: ...Chapter 5 PDU Linking 97...
Страница 440: ...Chapter 7 Using the Web Interface 420 If wanted you can customize the subject and content of this email in this action...
Страница 441: ...Chapter 7 Using the Web Interface 421...
Страница 464: ...Chapter 7 Using the Web Interface 444...
Страница 465: ...Chapter 7 Using the Web Interface 445 Continued...
Страница 746: ...Appendix A Specifications 726...
Страница 823: ...Appendix I RADIUS Configuration Illustration 803 Note If your PX3TS uses PAP then select PAP...
Страница 824: ...Appendix I RADIUS Configuration Illustration 804 10 Select Standard to the left of the dialog and then click Add...
Страница 825: ...Appendix I RADIUS Configuration Illustration 805 11 Select Filter Id from the list of attributes and click Add...
Страница 828: ...Appendix I RADIUS Configuration Illustration 808 14 The new attribute is added Click OK...
Страница 829: ...Appendix I RADIUS Configuration Illustration 809 15 Click Next to continue...
Страница 860: ...Appendix J Additional PX3TS Information 840...
Страница 890: ...Appendix K Integration 870 3 Click OK...
Страница 900: ......


