


Chapter 7: Using the Web Interface
341
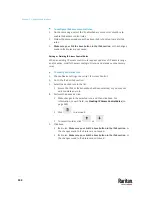
2.
Enable or disable "SNMP v1 / v2c" and/or "SNMP v3" by clicking the
corresponding checkbox.
▪
The SNMP v1/v2c read-only access is enabled by default. The default
'Read community string' is "public."
▪
To enable read-write access, type the 'Write community string.' Usually
the string is "private."
3.
Enter the MIB-II system group information, if applicable.
▪
sysContact - the contact person in charge of the system
▪
sysName - the name assigned to the system
▪
sysLocation - the location of the system
4.
To configure SNMP notifications:
a.
Select the 'Enable SNMP notifications' checkbox.
b.
Select a notification type -- SNMPv2c trap, SNMPv2c inform, SNMPv3
trap, and SNMPv3 inform.
c.
Specify the SNMP notification destinations and enter necessary
information. For details, refer to:
▪
SNMPv2c Notifications
(on page 516)
▪
SNMPv3 Notifications
(on page 517)
Note: Any changes made to the 'SNMP Notifications' section on the SNMP
page will update the settings of the System SNMP Notification Action, and
vice versa. See
Available Actions
(on page 394). To add more than three
SNMP destinations, you can create new SNMP notification actions. See
Send an SNMP Notification
(on page 411).
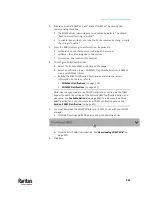
5.
You must download the SNMP MIB for your PX3TS to use with your SNMP
manager.
a.
Click the Download MIBs title bar to show the download links.
b.
Click the PDU2-MIB download link. See
Downloading SNMP MIB
(on
page 520).
6.
Click Save.
Содержание Raritan PX3TS
Страница 4: ......
Страница 6: ......
Страница 20: ......
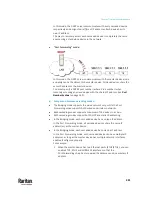
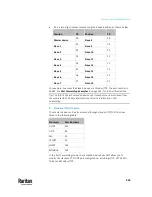
Страница 52: ...Chapter 3 Initial Installation and Configuration 32 Number Device role Master device Slave 1 Slave 2 Slave 3...
Страница 80: ...Chapter 4 Connecting External Equipment Optional 60...
Страница 109: ...Chapter 5 PDU Linking 89...
Страница 117: ...Chapter 5 PDU Linking 97...
Страница 440: ...Chapter 7 Using the Web Interface 420 If wanted you can customize the subject and content of this email in this action...
Страница 441: ...Chapter 7 Using the Web Interface 421...
Страница 464: ...Chapter 7 Using the Web Interface 444...
Страница 465: ...Chapter 7 Using the Web Interface 445 Continued...
Страница 746: ...Appendix A Specifications 726...
Страница 823: ...Appendix I RADIUS Configuration Illustration 803 Note If your PX3TS uses PAP then select PAP...
Страница 824: ...Appendix I RADIUS Configuration Illustration 804 10 Select Standard to the left of the dialog and then click Add...
Страница 825: ...Appendix I RADIUS Configuration Illustration 805 11 Select Filter Id from the list of attributes and click Add...
Страница 828: ...Appendix I RADIUS Configuration Illustration 808 14 The new attribute is added Click OK...
Страница 829: ...Appendix I RADIUS Configuration Illustration 809 15 Click Next to continue...
Страница 860: ...Appendix J Additional PX3TS Information 840...
Страница 890: ...Appendix K Integration 870 3 Click OK...
Страница 900: ......