


Appendix K: Integration
874
Dominion SX II
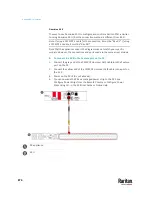
The way to use Dominion SX II to configure and control a Raritan PDU is similar
to using Dominion KX III, but the connection method is different from KX III.
Note: If using a CSCSPCS-1 cable for the connection, it must be "Rev.0C". If using
a CSCSPCS-10 cable, it must be "Rev.0D".
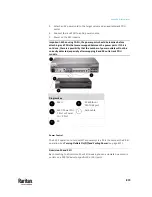
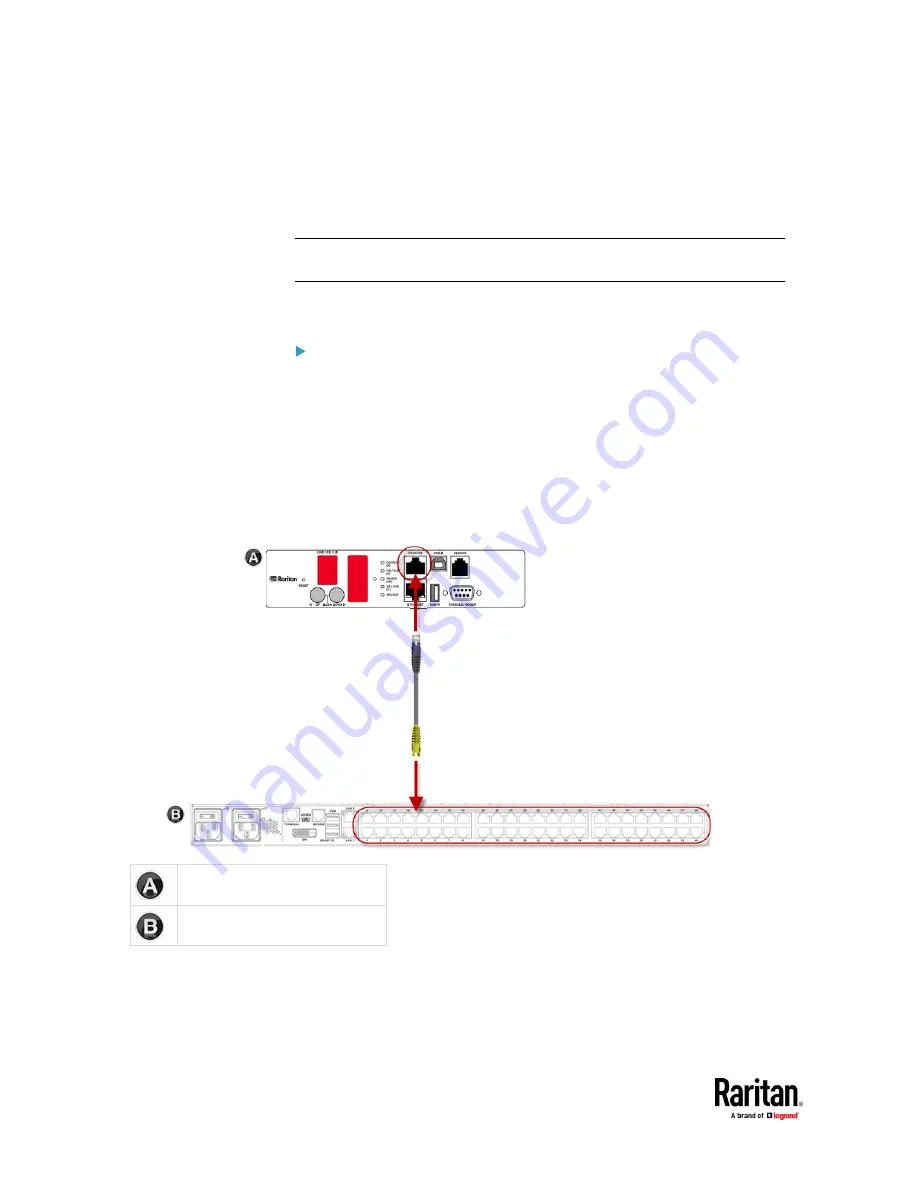
Note that the appliances used in the diagram may not match your specific
models. However, the connections and ports used are the same across models.
To connect the SX II to the Feature port on the PX:
1.
Connect the gray end of the CSCSPCS crossover Cat5 cable into the Feature
port on the PX.
2.
Connect the yellow end of the CSCSPCS crossover Cat5 cable into a port on
the SX II.
3.
Power on the PX (if it is not already).
4.
You can now add the PX as a managed power strip to the SX II. See
Configure Power Strips from the Remote Console or Configure Power
Strips Using CLI. in the SX II User Guide or Online Help.
PX appliance
SX II
Содержание Raritan PX3TS
Страница 4: ......
Страница 6: ......
Страница 20: ......
Страница 52: ...Chapter 3 Initial Installation and Configuration 32 Number Device role Master device Slave 1 Slave 2 Slave 3...
Страница 80: ...Chapter 4 Connecting External Equipment Optional 60...
Страница 109: ...Chapter 5 PDU Linking 89...
Страница 117: ...Chapter 5 PDU Linking 97...
Страница 440: ...Chapter 7 Using the Web Interface 420 If wanted you can customize the subject and content of this email in this action...
Страница 441: ...Chapter 7 Using the Web Interface 421...
Страница 464: ...Chapter 7 Using the Web Interface 444...
Страница 465: ...Chapter 7 Using the Web Interface 445 Continued...
Страница 746: ...Appendix A Specifications 726...
Страница 823: ...Appendix I RADIUS Configuration Illustration 803 Note If your PX3TS uses PAP then select PAP...
Страница 824: ...Appendix I RADIUS Configuration Illustration 804 10 Select Standard to the left of the dialog and then click Add...
Страница 825: ...Appendix I RADIUS Configuration Illustration 805 11 Select Filter Id from the list of attributes and click Add...
Страница 828: ...Appendix I RADIUS Configuration Illustration 808 14 The new attribute is added Click OK...
Страница 829: ...Appendix I RADIUS Configuration Illustration 809 15 Click Next to continue...
Страница 860: ...Appendix J Additional PX3TS Information 840...
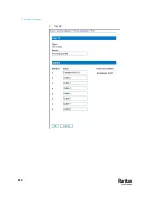
Страница 890: ...Appendix K Integration 870 3 Click OK...
Страница 900: ......


