


Chapter 7: Using the Web Interface
193
•
A bar showing OCP current levels
•
OCP status -- open or closed
•
Associated line pair
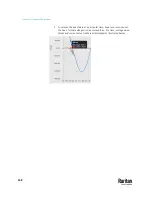
The RMS current bars automatically change colors to indicate the current
status if OCP thresholds have been enabled. To configure thresholds, see
OCPs
(on page 249).
Status
Bar colors
normal
above upper warning
above upper critical
Note: The "below lower warning" and "below lower critical" states also show
yellow and red colors respectively. However, it is not meaningful to enable the
two thresholds for current levels.
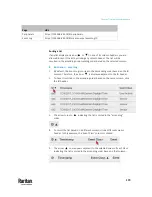
Transfer Switch
On the Transfer Switch page, you can:
•
View the transfer switch status, and the history of last several transfers,
such as the transfer log.
•
Change power transfer settings.
•
Determine the power quality thresholds of voltage and frequency.
•
Perform manual power transfer or retransfer
Note: Whenever the PX3TS prevents a manual transfer from being performed, it
is disabled across all interfaces, including the front panel button, web interface
and CLI command.
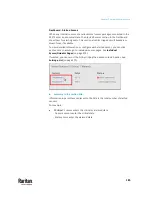
To open the Transfer Switch page, click 'Transfer Switch' in the
Menu
(on page
176).
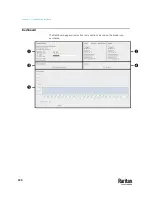
Transfer switch-related information shown:
•
Transfer switch status
•
Status of Inlet sensors related to the transfer switch
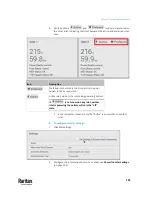
•
Indicate which one is the 'active' inlet by showing
on either
inlet's section
If
is not shown on any inlet, neither inlet is powering the
outlets, which is the "off" state.
Содержание Raritan PX3TS
Страница 4: ......
Страница 6: ......
Страница 20: ......
Страница 52: ...Chapter 3 Initial Installation and Configuration 32 Number Device role Master device Slave 1 Slave 2 Slave 3...
Страница 80: ...Chapter 4 Connecting External Equipment Optional 60...
Страница 109: ...Chapter 5 PDU Linking 89...
Страница 117: ...Chapter 5 PDU Linking 97...
Страница 440: ...Chapter 7 Using the Web Interface 420 If wanted you can customize the subject and content of this email in this action...
Страница 441: ...Chapter 7 Using the Web Interface 421...
Страница 464: ...Chapter 7 Using the Web Interface 444...
Страница 465: ...Chapter 7 Using the Web Interface 445 Continued...
Страница 746: ...Appendix A Specifications 726...
Страница 823: ...Appendix I RADIUS Configuration Illustration 803 Note If your PX3TS uses PAP then select PAP...
Страница 824: ...Appendix I RADIUS Configuration Illustration 804 10 Select Standard to the left of the dialog and then click Add...
Страница 825: ...Appendix I RADIUS Configuration Illustration 805 11 Select Filter Id from the list of attributes and click Add...
Страница 828: ...Appendix I RADIUS Configuration Illustration 808 14 The new attribute is added Click OK...
Страница 829: ...Appendix I RADIUS Configuration Illustration 809 15 Click Next to continue...
Страница 860: ...Appendix J Additional PX3TS Information 840...
Страница 890: ...Appendix K Integration 870 3 Click OK...
Страница 900: ......


