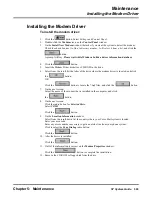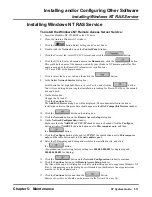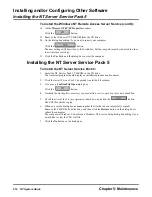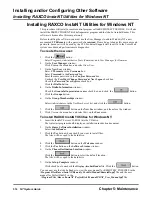
Maintenance
Windows NT Server Version 4.0 Setup Procedure
Chapter 5: Maintenance
NT System Guide
505
To use the floppy diskettes for setup:
Note: The BIOS setup boot sequence should cause the Voice Mail system to boot up from the A: drive.
1.
Insert Setup Disk 1 into the A: drive, and allow the computer to boot up.
After the disk is read, the screen prompts will tell you when to insert Disk #2 and Disk #3.
Disk #3 provides the required driver software for detecting hardware and mass storage devices,
such as CD-ROMs.
2.
After the CD-ROM has been detected:
Press the Enter key to continue the install process.
3.
After the CD-ROM driver has been loaded:
Follow the screen prompts to insert the Windows NT Server CD-ROM into the drive. After the
CD drive light goes on and then off, press the Enter key.
4.
To scroll through the Windows NT Licensing Agreement:
Press the Page Down key several times until you reach the end of the document, and press the
F8 key to continue.
Windows NT will report the hardware and software components detected on the PC.
5.
Press N on the next window to perform a full installation.
6.
Press the Enter key after reading the message on the next screen.
7.
On the window asking about the desired hard drive partitioning:
a. Press C for Create the Partition.
b. Enter 4095 for size of the partition.
c. Press the Enter key.
d. Press the Enter key again to install.
VoiceSupport uses the maximum NTFS partition size allowed for the C: drive, which is 4 GB
and uses the NTFS format.
8.
To proceed with formatting:
Select Format the partition using the NTFS file system, and press the Enter key.
Formatting will begin and should last approximately 5 to 10 minutes.
The NT server default directory is C: \WINNT.
9.
To check the hard drive for any signs of corruption:
Press the Enter key again.
Checking will last a couple of minutes.
10. After checking:
Press the Enter key to continue the installation.
Setup will copy files onto the hard drive. Copying will last a couple of minutes.
11. Remove the floppy disk and CD as instructed by the prompts.
12. Press the Enter key to restart the computer.
13. When prompted:
Insert the CD again into the CD drive, and click the
button.
The setup software will gather information about this computer.
14. After you see the message that the setup has started:
Click the
button.
15. On the screen asking you for name and organization information:
Enter your name or initials into the Name box, enter the name of the company where you work
into the Organization box, and click the
button.
Summary of Contents for NVM-NT
Page 28: ...Table of Contents Chapter 5 Maintenance xxvi NT System Guide ...
Page 130: ...Installing SMDI 102 NT System Guide Chapter 3 Programming ...
Page 146: ...Customizing Caller I D Tables General Tab 118 NT System Guide Chapter 3 Programming ...
Page 156: ...Customizing Callout Options Optional Tab 128 NT System Guide Chapter 3 Programming ...
Page 182: ...Customizing Distribution Lists General Tab 154 NT System Guide Chapter 3 Programming ...
Page 338: ...Customizing Port Options General Tab 310 NT System Guide Chapter 3 Programming ...
Page 358: ...Customizing System Options Timers Tab 330 NT System Guide Chapter 3 Programming ...
Page 362: ...Customizing System Options Timers Tab 334 NT System Guide Chapter 3 Programming ...
Page 367: ...Customizing Tenant Options General Tab Chapter 3 Programming NT System Guide 339 ...
Page 396: ...Viewing and Printing Reports System Options Report 368 NT System Guide Chapter 3 Programming ...
Page 400: ...Performing a Local Backup Backup Dialog Box 372 NT System Guide Chapter 3 Programming ...
Page 440: ...Using Port Activities 412 NT System Guide Chapter 3 Programming ...
Page 454: ...Using Message Status Message Status Dialog Box 426 NT System Guide Chapter 3 Programming ...


