Chapter 3: Using the Web Interface
97
2
Select the checkbox for the lines you want to add to the diagram.
Each line is assigned a custom color.
3
Hover the mouse over the graph line to view details for the
minute. Each line color is coordinated in the details.
PMC Power Metering Controller
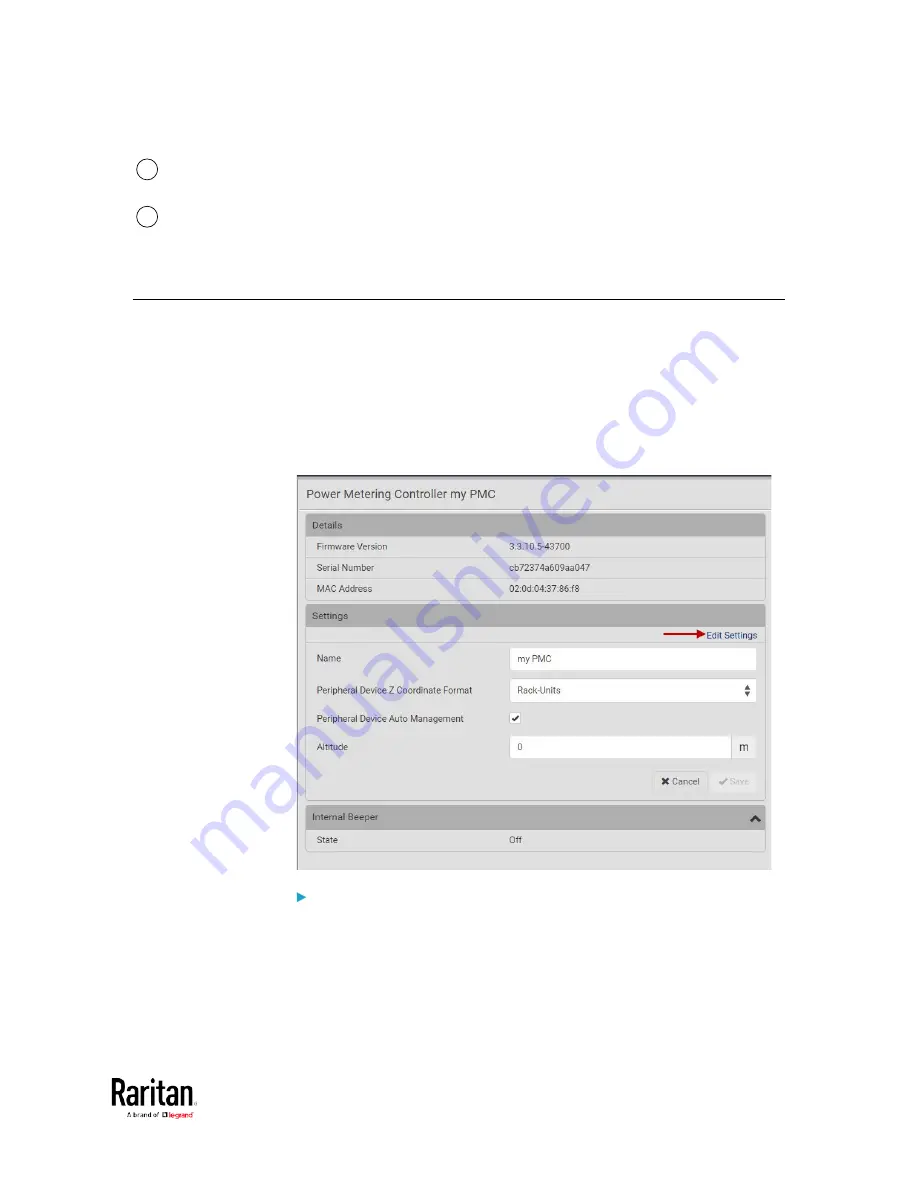
Click PMC in the Menu to open the Power Metering Controller page.
You can view details on the PMC:
•
Firmware Version
•
Serial Number
•
MAC Address
•
Internal beeper state
To edit PMC settings:
•
Click the Edit Settings link. The following settings can be changed.
1.
Name: The name of the PMC appears in the top bar of the web
interface.
2.
Peripheral Device Z Coordinate Format: Select Rack Units or Free
Form.
Содержание PMC-1000
Страница 3: ...BCM2 Series Power Meter Xerus Firmware v3 4 0 User Guide...
Страница 23: ...Chapter 1 Installation and Initial Configuration 11 Panel Wiring Example...
Страница 54: ...Chapter 1 Installation and Initial Configuration 42 Branch Circuit Details...
Страница 76: ...Chapter 2 Connecting External Equipment Optional 64...
Страница 123: ...Chapter 3 Using the Web Interface 111...
Страница 558: ...Appendix D RADIUS Configuration Illustration 546 Note If your BCM2 uses PAP then select PAP...
Страница 559: ...Appendix D RADIUS Configuration Illustration 547 10 Select Standard to the left of the dialog and then click Add...
Страница 560: ...Appendix D RADIUS Configuration Illustration 548 11 Select Filter Id from the list of attributes and click Add...
Страница 563: ...Appendix D RADIUS Configuration Illustration 551 14 The new attribute is added Click OK...
Страница 564: ...Appendix D RADIUS Configuration Illustration 552 15 Click Next to continue...
Страница 594: ...Appendix E Additional BCM2 Information 582...
Страница 612: ......


