Installing the Software
Installing Octel 50 Software
Octel 50 Installation Guide
4-4
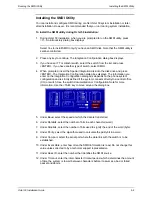
6. A dialog box displays asking whether you will be using the Fax Solution (an optional
module that enables access to the fax mail and fax retrieval features:
•
Press <Y> if the system will be using the Fax Solution module for fax mail
and fax retrieval.
•
Press <N> to select No if the system does not have the Fax Solution module.
If you select <N>.
7. If more than one hard drive is detected, you are prompted to select the drive to which
the Octel 50 files should be installed. A list of all local fixed drives is displayed. (Drives
A and B are usually disk drives.) Highlight the drive onto which you want to install the
system and press <ENTER>.
8. The system prompts you to enter the total amount of memory in the computer.
Highlight an option and press <ENTER>.
9. The system prompts you to enter the number of voice ports installed. Enter the
number of ports on the system and press <ENTER>.
10. The system displays a list of supported voice boards. Highlight the model of voice
board installed in the PC and press <ENTER>. If a DIALOG/4 board is installed,
select D/4xD.
11. If you selected <Y> in step 6, the system prompts you to enter the number of fax
ports installed on the system. Enter the number of ports and press <ENTER>.
12. The system prompts you to select the hardware interrupt level of the voice boards.
You set the hardware interrupt for the voice boards when you installed the boards.
Select the interrupt and press <ENTER>.
13. If you selected <Y> in step 6, the system prompts you to select the hardware interrupt
level of the fax boards. You set the hardware interrupt for the fax boards when you
installed the boards. Select the interrupt and press <ENTER>.
14. The system prompts, “Do you want to install the 4.0 program files?” Press <Y>.
15. A dialog box displays describing the installation process and informing you that if
identical filenames are detected on the hard disk and the installation disk, you will be
prompted whether to overwrite the file. To continue, press any key.
During the actual file installation, the screen displays two boxes. The top box
indicates the files that are being read from the disk and written to your hard drive. The
bottom box indicates the status of each file being read or written to and the overall
installation status.
16. As prompted by the system, replace installation disks, then press any key.
17. The system prompts, “Do you want to put the voice files in a RAMdisk?” It is
recommended that you use a RAMDrive if you have more than 2 MB of RAM on your
system. Press <Y> for Yes or <N> for No.
When the system creates a RAMDrive, it uses 1 MB (1024K) of extended memory to
store the SO3-ALL.VAP voice file.
18. If you press <Y>, you are prompted to enter the drive of the RAMDrive. The system
notifies you if the RAMDrive you specify does not exist.
The system automatically creates 10 directories needed to store messages and
greetings: \REC00 through \REC09. If you indicated in step 6 that you ar e using Fax
Solution, 10 fax directories, named \FAX00 through \FAX09, are also created.
Содержание Octel 50
Страница 2: ......
Страница 3: ...Octel 50 Installation Guide 585 313 134 Comcode 108503004 101 1840 000 Issue 1 June 1999 ...
Страница 8: ......
Страница 22: ...Determining System Needs Step 3 Consider Additional Hardware Needs OCTEL 50 INSTALLATION GUIDE 2 6 Notes ...
Страница 36: ...Installing the Hardware Step 10 Installing the Sentinel Octel 50 Installation Guide 3 14 Notes ...
Страница 52: ...Running the SMDI Utility Running SMDI as a Standalone Utility Octel 50 Installation Guide 5 4 Notes ...
Страница 180: ...Integrating with an Uninterruptible Power Supply Running UPS Integration Octel 50 Installation Guide 10 4 Notes ...


