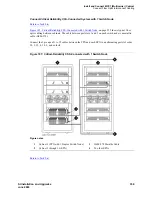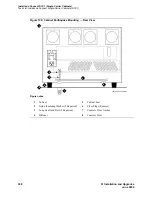
Install and Connect SCC1 (Single-Carrier Cabinets)
Task List: Install and Connect Single-Carrier Cabinets (SCC1)
SI Installation and Upgrades
365
June 2004
Correct Shipping Errors
Return to Task List
1
Red-tag all defective and over-shipped equipment.
For Streamlined Implementation in the United States, call 1-800-772-5409. For customers outside
the United States, contact your order service agent.
Position the Cabinets (Standard Reliability)
Return to Task List
CAUTION:
Lifting the cabinet may require 2 people, as it may weigh as much as 130 pounds (60
kilograms). Use caution to avoid injury.
Before beginning the cabinet installation, check the location of the AC/DC power receptacles. The
receptacles must be on separately fused circuits not controlled by wall switches. They must be located
within 10 feet (3 meters) of the cabinet, and outside the Main Distribution Frame (MDF) area.
Refer to the serial numbers and lettered designation strips in the Customer Service Document (CSD)
when stacking the cabinets. If earthquake protection is required, skip to
Install Earthquake Protection for
SCC1
on page 367. Return to this section when finished.
Perform this step first for all standard reliability cabinet installations.
1
Install the cabinet stack (processor port network)
— Place Control Cabinet A (J58890L) on the floor in the position determined when the room
layout was planned.
— Set Port Cabinet B (J58890H) on top of Control Cabinet A.
— Set Port Cabinet C (J58890H) on top of Port Cabinet B.
— Set Port Cabinet D (J58890H) on top of Port Cabinet C.
2
If additional cabinet stacks are being installed, install the second cabinet stack
(EPN)
— Place the Expansion Control Cabinet (J58890N) on the floor next to Control Cabinet A.
See previous instructions.
— Set Port Cabinet B (J58890H) on top of the Expansion Control Cabinet.
— Set Port Cabinet C (J58890H) on top of Port Cabinet B.
— Set Port Cabinet D (J58890H) on top of Port Cabinet C.
3
If three cabinet stacks are being installed, install the third cabinet stack (EPN).
— Place the second Expansion Control Cabinet (J58890N) on the floor next to the first
Expansion Control Cabinet. See previous instructions.
— Set Port Cabinet B (J58890H) on top of the Expansion Control Cabinet.
— Set Port Cabinet C (J58890H) on top of Port Cabinet B.
— Set Port Cabinet D (J58890H) on top of Port Cabinet C.
Return to Task List

