Add IP Solutions
Installing a TN802B in IP Trunk Mode
626
SI Installation and Upgrades
June 2004
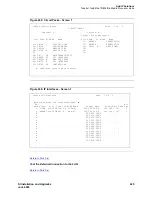
To test the external IP connections, ping the IP Interface server, and ping a known computer connected to
your network. If everything is configured correctly, the
Result
column on the Ping Results screen
reads
pass
. If it reads
abort
, verify the IP-address information and check the connectivity, including the
cabling.
1
Type
ping ip-address
nnn.nnn.nnn.nnn board UUCSS
and press Enter. The variable
nnn.nnn.nnn.nnn
is the IP address of the TN802B IP Interface and
UUCSS
is the cabinet, carrier,
and slot of the TN802B IP Interface.
2
Type
ping ip-address
nnn.nnn.nnn.nnn board UUCSS
and press Enter. The variable
nnn.nnn.nnn.nnn
is the IP address of the customer’s gateway and
UUCSS
is the cabinet, carrier,
and slot of the TN802B IP Interface.
3
Type
ping ip-address
nnn.nnn.nnn.nnn board UUCSS
and press Enter. The variable
nnn.nnn.nnn.nnn
is the IP address of another computer beyond the gateway and
UUCSS
is the
cabinet, carrier, and slot of the TN802B IP Interface.
Return to Task List
Installing a TN802B in IP Trunk Mode
Return to Task List
NOTE:
IP Trunk mode should only be used to maintain compatibility with existing Release 7 IP
Trunk or ITS-E installations. We strongly recommend that MedPro mode be used
whenever possible.
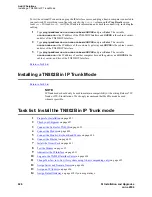
Task list: Install the TN802B in IP Trunk mode
1
Prepare for Installation
on page 627
2
Check your Shipment
on page 627
3
Connect the Cables for TN802B
on page 629
4
Connect the Modem
on page 629
5
Connect the Monitor, Keyboard, and Mouse
on page 630
6
Connect the Ethernet
on page 631
7
Install the Circuit Pack
on page 631
8
Test the Modem
on page 633
9
Administer the IP Interface
on page 633
10
Log onto the TN802B Interface Server
on page 634
11
Change Mu-Law to A-Law (for systems using A-Law companding only)
on page 635
12
Assign Server and Domain Names
on page 636
13
Assign an IP Address
on page 636
14
Assign Default Gateway
on page 638 if you use gateways.


