Add IP Solutions
Task list: Install the TN802B in IP Trunk mode
SI Installation and Upgrades
631
June 2004
Connect the Ethernet
Return to Task List
Connect the network cable to the ETHERNET connector on the TN802B external cable assembly.
You need a CAT5 or better cable for 100-Mbyte operation.
Install the Circuit Pack
Return to Task List
NOTE:
The TN802B IP Interface is hot-swappable, so you do not need to power down the carrier
to install it.
If you need to remove the TN802B IP Interface from the carrier at a later time, shut down
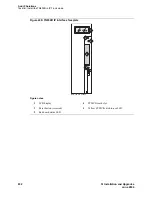
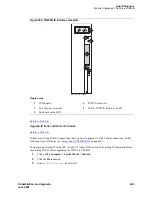
Windows NT first by pressing the recessed reset button on the faceplate (see
Figure 249,
TN802B IP Interface faceplate,
on page 632) of the TN802B IP Interface until the LCD
shows a flashing
MSHUT *
. When the flashing stops and the asterisk disappears (about 2
min), it is safe to remove the circuit pack.
1
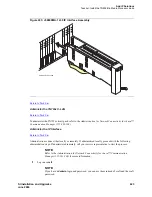
Insert the TN802B IP Interface into the rightmost of the three slots you reserved for it (see
Figure
250, J58890MA-1 L30 IP Interface Assembly,
on page 633).
NOTE:
To properly seat the circuit pack, push firmly on the front of the faceplate until the latch
reaches the bottom rail of the carrier. Then close the latch until it is fully engaged.
When you plug in the TN802B IP Interface, the circuit pack starts to boot and the LCD reads
PC
Boot
then after about 3 to 4 minutes it changes to
IP TRK *
, the default mode.


