Add IP Solutions
Task List: Upgrade TN802 to TN2302AP
SI Installation and Upgrades
611
June 2004
Task List: Upgrade TN802 to TN2302AP
Perform these tasks to upgrade the TN802 to TN2302AP:
1
Perform Pre-upgrade Administration
on page 611
2
Remove the Circuit Packs
on page 611
3
Replace the Cables
on page 611
4
Install the Circuit Packs
on page 612
5
Administer and Test
on page 612
Perform Pre-upgrade Administration
Return to Task List
1
Type
list configuration all
and press Enter to locate all the TN802 circuit pack ports.
2
Type
display port
UUCSSppp
and press Enter to find the trunk group number associated with
the TN802 circuit pack port.
3
Type
change trunk-group
number
and press Enter. Go to screen 4. Delete all the TN802 ports.
4
Repeat steps1 through 3 for each port.
5
Type
remove ds1
UUCSS
and press Enter.
Remove the Circuit Packs
Return to Task List
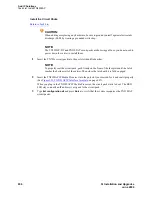
CAUTION:
When adding or replacing any hardware, be sure to ground yourself against electrostatic
discharge (ESD) by wearing a grounded wrist strap.
NOTE:
The TN799 and TN2302AP circuit packs are hot-swappable, so you do not need to power
down the carrier to remove or install them.
1
Press the recessed Reset button on the TN802 circuit pack until
MSHUT*
starts flashing on the
LCD. When
MSHUT*
is in a steady state, it is safe to remove the circuit pack.
2
Remove the TN799 and TN802 circuit packs.
Replace the Cables
Return to Task List
1
Disconnect the network cable from the Ethernet connection.
2
Turn off the monitor and unplug it from the AC outlet, if necessary.
3
Disconnect the monitor, keyboard, and mouse from the H600-512 external cable assembly, if
necessary.
4
Turn off the modem and unplug it from the AC outlet.
5
Disconnect the modem’s RS232 port from the H600-512 external cable assembly.

