9.
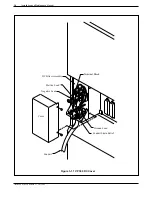
Lift the cabinet straight up, then out of the pallet towards the pallet opening. This can be done
most easily by gripping the front flange of the cabinet top with one hand and gripping under
the louvered panel on the back of the system with the other hand.
10. Replace the front door.
11. When the VP 300 is installed, the levelers should be adjusted until the top of the cabinet is
level and does not wobble. A bubble level is recommended for this purpose. No special tools
are required to adjust the leveling feet.
■
Reshipping Procedures
If the VP 300 is to be shipped from your location, use the original shipping carton.
1.
Check that all cabinet assemblies are secure.
A. All boards seated and secured with locking ejectors.
B. All captive fasteners on disk drive and power supply secured to the cabinet with a flat
blade screw driver.
2.
Remove cabinet front door by opening door and pulling straight up until free of the two
hinges.
3.
Remove the front section from the pallet and place the cabinet on the shipping pallet.
4.
Replace and lock the front door.
5.
Resecure the front pallet section against the front door using two pallet bolts.
6.
Replace the plastic bag over the cabinet.
7.
Replace the door key and power supply cord in the documentation bag and tape bag to top of
chassis.
8.
Replace the foam inserts and cardboard container.
9.
Tape the top of the cardboard carton closed and secure to pallet using new strapping material.
◆
W A R N I N G
◆
Do not transport the VP 300 cabinet without securing it on the shipping pallet in the
vertical upright position. Move and ship in upright position only.
■
Moving the Equipment On-Site
Before moving the equipment, verify the status of the new site.
•
Is the input power ready?
•
Does it agree with the input power required for the VP 300?
•
Is the installation location ready?
•
Are the telephone extensions ready to be hooked up?
Move the VP 300 cabinet in the vertical upright position on the shipping pallet. Be careful and always
remember the VP 300 is sophisticated electronic equipment.
Toshiba VP Systems Release 7.1 July, 1994
3-2
Installation and Maintenance Manual
Summary of Contents for VP 300
Page 2: ......
Page 10: ......
Page 14: ......
Page 20: ...Toshiba VP Systems Release 7 1 July 1994 ...
Page 52: ...Toshiba VP Systems Release 6 1 February 1993 2 14 Installation and Maintenance Manual ...
Page 56: ...Toshiba VP Systems Release 7 1 July 1994 ...
Page 146: ......
Page 312: ...Toshiba VP Systems Release 7 1 July 1994 ...
Page 314: ......
Page 444: ......
Page 496: ......
Page 542: ......
Page 598: ...Toshiba VP Systems Release 6 1 February 1993 ...
Page 600: ...Toshiba VP Systems Release 6 1 February 1993 ...


