Wiring
In most cases, the existing wiring is not consistent as to placement of the
connections. In order to isolate faults quickly, it is recommended that the slots
be connected in numerical order, allowing for known or anticipated expansion.
At least, be sure that the slot and port number can be translated to an extension
number that is meaningful to the servicing technician.
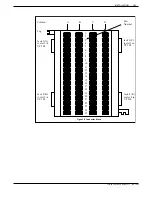
For example, a 16-port system requires one connector block and four 25-pair
cables. From the rear of the cabinet, connect the first 25-pair cable from P1 to
jack position 1 of the 66M4-4W connector block, or column A; connect the
second 25-pair cable from P2 to jack position 2, or column B; etc. Refer to
Figure 3-9.
For maximum configuration, three connector blocks and six 25-pair cables are
required.
The actual wiring (cross-connecting from the 66M4-4W connector block to the
66M block, or equivalent), can be made in any manner consistent with good
telephony practice. There are two guidelines to follow when punching down
wires to ensure correct installation:
•
Do not touch the pins on the connector block with your fingers or with dirty
tools. The pins may oxidize and “go open” after a few months.
•
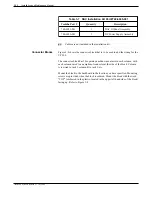
Tip is always above Ring on the block when a pair is punched down. Refer
to Table 3-8.
Figure 3-9 Cabinet to Block Connection
P6
P1
66M4-4W
66M4-4W
VP 300
Rear View
Toshiba VP Systems Release 7.1 July, 1994
3-34
Installation and Maintenance Manual
Summary of Contents for VP 300
Page 2: ......
Page 10: ......
Page 14: ......
Page 20: ...Toshiba VP Systems Release 7 1 July 1994 ...
Page 52: ...Toshiba VP Systems Release 6 1 February 1993 2 14 Installation and Maintenance Manual ...
Page 56: ...Toshiba VP Systems Release 7 1 July 1994 ...
Page 146: ......
Page 312: ...Toshiba VP Systems Release 7 1 July 1994 ...
Page 314: ......
Page 444: ......
Page 496: ......
Page 542: ......
Page 598: ...Toshiba VP Systems Release 6 1 February 1993 ...
Page 600: ...Toshiba VP Systems Release 6 1 February 1993 ...

