Toshiba VP Systems Release 7.1
July, 1994
PROCEDURES
6-77
Action
VP 300 Description and Response
At this point, the VP 300 has completely booted from floppy diskette.
6.
Press
twice.
To log on to system.
7.
Install the disk.
Refer to MAINTENANCE, Hard Disk Drive (HD) Replacement, for
procedures to follow physical installation of a drive. Hard disks may
be hot plugged.
8.
:DSKTST
At the @ prompt enter the slot number for the added drive. The VCU
tests the slot and updates its status record.
Repeat DSKTST for each drive to be added.
9.
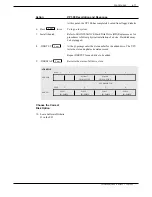
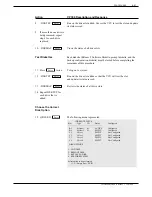
:DSKMAP
Reviews the status of all drive slots.
Choose the Correct
Disk Option
10. Leave Software Diskette
#1 in the FD.
•DSKMAP
SHELF B
OCC MISMATCH
SHELF C
Voice 1
ID: EMPTY
SLOT:
1
2
3
4
System 1
ID: S1 ACTIVE
SLOT: 1
3
4
5
2
System 2
ID: S2 ACTIVE
Voice 2
ID: EMPTY
Voice 3
ID: EMPTY
Voice 4
ID: EMPTY
+
+
+
+
+
+
+
+
Enter
Enter
Enter
Summary of Contents for VP 300
Page 2: ......
Page 10: ......
Page 14: ......
Page 20: ...Toshiba VP Systems Release 7 1 July 1994 ...
Page 52: ...Toshiba VP Systems Release 6 1 February 1993 2 14 Installation and Maintenance Manual ...
Page 56: ...Toshiba VP Systems Release 7 1 July 1994 ...
Page 146: ......
Page 312: ...Toshiba VP Systems Release 7 1 July 1994 ...
Page 314: ......
Page 444: ......
Page 496: ......
Page 542: ......
Page 598: ...Toshiba VP Systems Release 6 1 February 1993 ...
Page 600: ...Toshiba VP Systems Release 6 1 February 1993 ...


