


General Instrument Setup
R&S
®
ESW
320
User Manual 1177.6298.02 ─ 08
To restore the original dynamic range, you have to compensate for the transducer fac-
tor. You can do this by adjusting the reference level accordingly. If you turn on the auto-
matic adjustment of the reference level (
➙
"Adjust Ref Level"), the R&S
ESW restores
the original dynamic range as best as possible by changing the reference level by the
maximum level shift defined in the active transducer factor.
Remote command:
See
Design and management of transducer factors
Before you define the characteristics of a transducer factor, make sure that you have
actually selected the tab to configure transducer factors.
You can configure a transducer factor in several ways:
●
Edit a transducer factor that already exists (
➙
"Edit").
●
Create a new transducer factor (
➙
"New").
●
Create a new transducer factor based on an existing one (
➙
"Copy").
If necessary, you can delete the selected transducer factor at any time (
➙
"Delete")
Each of the options opens the dialog box that contains the functionality to characterize
a transducer factor.
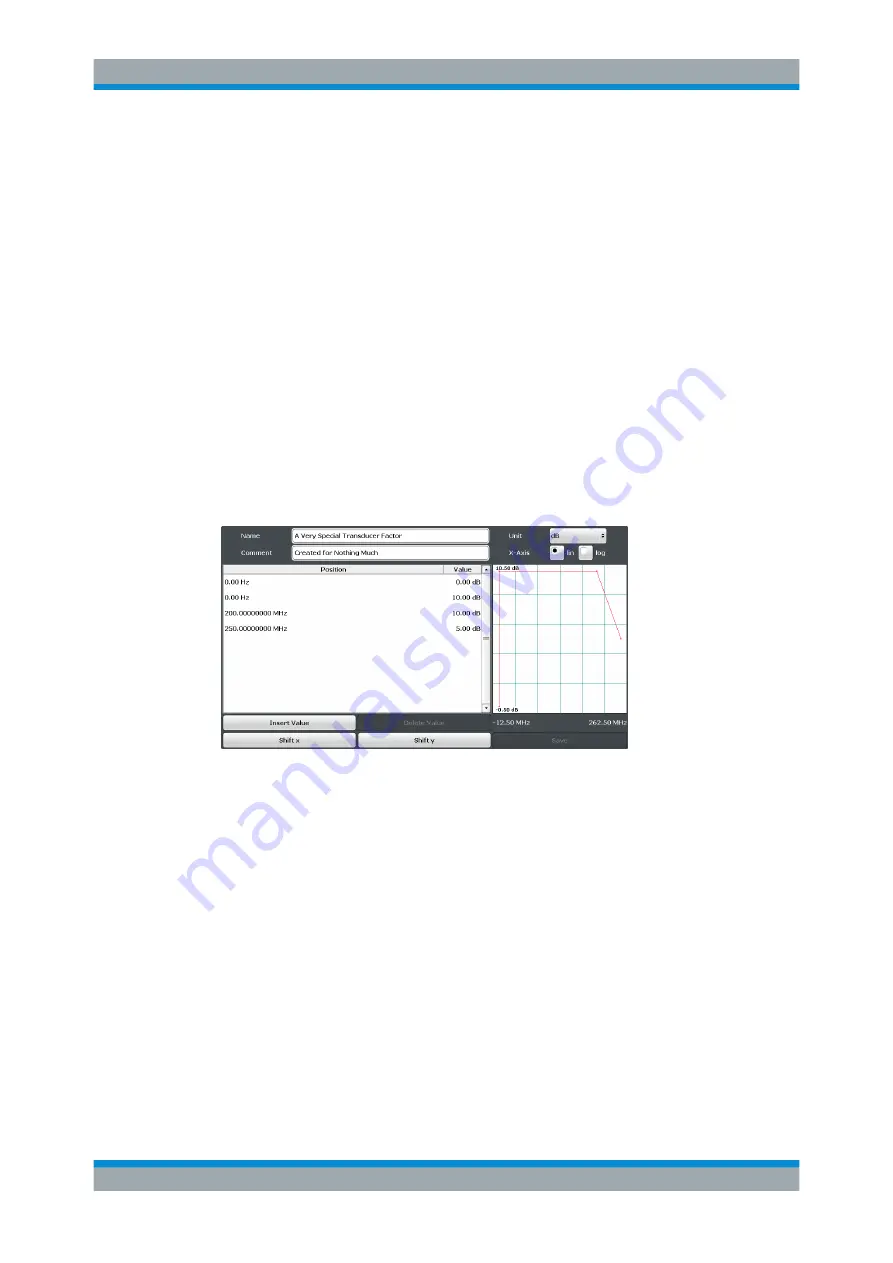
●
"Name" / "Comment"
Defines a name and / or comment of the transducer factor.
●
"Unit"
Selects the unit of the transducer factor.
●
"X-Axis"
Selects linear or logarithmic scaling of the x-axis.
●
"Position" and "Value"
Define the data points of the transducer factor (including a graphical preview).
●
"Insert Value"
Insert a transducer factor data point. Alternatively, you can click in the table itself to
add a new data point.
●
"Delete Value"
Deletes the currently selected data point. The currently selected data point is high-
lighted blue.
●
"Shift x" / "Shift y"
Shifts all data points of the transducer factor horizontally or vertically by a certain
amount.
●
"Import" / "Export"
Transducers


