Creating a WAN Routing Group
Page 19-37
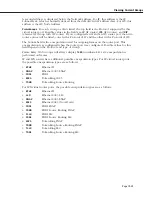
k.
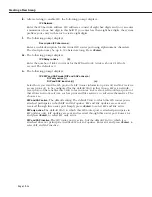
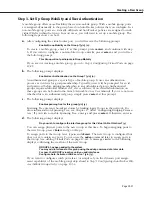
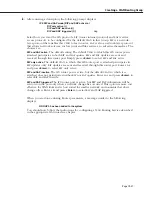
After entering a description, the following prompt displays:
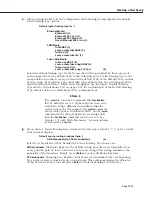
IPX RIP and SAP mode {RIP and SAP active (a)
RIP only active (r)
RIP and SAP inactive (i)}
RIP and SAP triggered (t)}
(a):
Select how you want the
IPX
protocols,
RIP
(router internet protocol) and
SAP
(service
access protocol), to be configured for the default
VLAN
in this Group.
RIP
is a network-
layer protocol that enables this
VLAN
to learn routes.
SAP
is also a network-layer protocol
that allows network services, such as print and files services, to advertise themselves. The
choices are:
RIP and SAP active
. The default setting. The default
VLAN
to which this
IPX
router port is
attached participates in both
RIP
and
SAP updates
.
RIP
and
SAP
updates are sent and
received through this router port. Simply press
<Enter>
to select
RIP
and
SAP
active.
RIP only active
.
The default
VLAN
to which this
IPX
router port is attached participates in
RIP
updates only.
RIP
updates are sent and received through this router port. Enter an
r
and press
<Enter>
to select
RIP
only active.
RIP and SAP inactive
.
The
IPX
router port is active, but the default
VLAN
to which it is
attached does not participate in either
RIP
nor
SAP updates
. Enter an
i
and press
<Enter>
to
select
RIP
and SAP inactive.
RIP and SAP triggered
.
The
IPX
router port is active, but RIP and SAP information will be
sent out on the port only when a network change has occurred. This option is more cost
effective for WAN links and is best suited for smaller network environments that don’t
change often. Enter a
t
and press
<Enter>
to select
RIP
and SAP triggered.
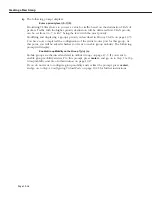
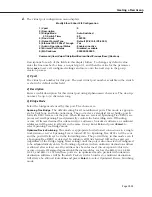
When you are done entering Router parameters, a message similar to the following
displays:
GROUP 5 has been added to the system
You should now follow the instructions for configuring a
WAN
Routing Service described
in the appropriate
WAN
interface chapter.
Summary of Contents for Omni Switch/Router
Page 1: ...Part No 060166 10 Rev C March 2005 Omni Switch Router User Manual Release 4 5 www alcatel com ...
Page 4: ...page iv ...
Page 110: ...WAN Modules Page 3 40 ...
Page 156: ...UI Table Filtering Using Search and Filter Commands Page 4 46 ...
Page 164: ...Using ZMODEM Page 5 8 ...
Page 186: ...Displaying and Setting the Swap State Page 6 22 ...
Page 202: ...Creating a New File System Page 7 16 ...
Page 270: ...Displaying Secure Access Entries in the MPM Log Page 10 14 ...
Page 430: ...OmniChannel Page 15 16 ...
Page 496: ...Configuring Source Route to Transparent Bridging Page 17 48 ...
Page 542: ...Dissimilar LAN Switching Capabilities Page 18 46 ...
Page 646: ...Application Example DHCP Policies Page 20 30 ...
Page 660: ...GMAP Page 21 14 ...
Page 710: ...Viewing the Virtual Interface of Multicast VLANs Page 23 16 ...
Page 722: ...Application Example 5 Page 24 12 ...
Page 788: ...Viewing UDP Relay Statistics Page 26 24 ...
Page 872: ...The WAN Port Software Menu Page 28 46 ...
Page 960: ...Deleting a PPP Entity Page 30 22 ...
Page 978: ...Displaying Link Status Page 31 18 ...
Page 988: ...Displaying ISDN Configuration Entry Status Page 32 10 ...
Page 1024: ...Backup Services Commands Page 34 14 ...
Page 1062: ...Diagnostic Test Cable Schematics Page 36 24 ...
Page 1072: ...Configuring a Switch with an MPX Page A 10 ...
Page 1086: ...Page B 14 ...
Page 1100: ...Page I 14 Index ...

