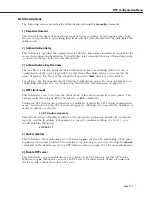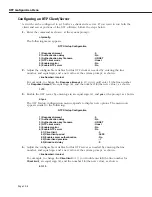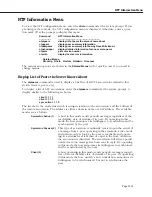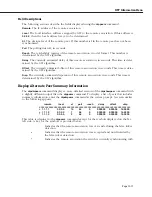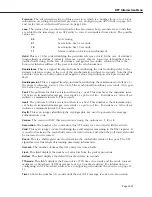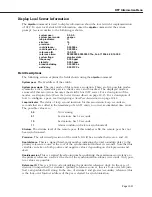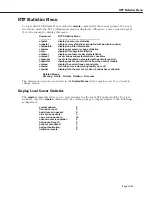
NTP Configuration Menu
Page 12-12
Configuring a New Peer Association
When you have configured the
NTP
client and/or server, you will need to set at least one
peer association for the switch. An
NTP
peer is a machine of the same stratum that will
compare and check time information sent from the switch, and in turn send time information
to the switch.
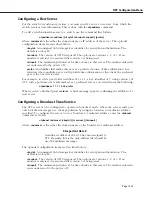
To configure a new peer, enter the
ntpaddpeer
command in the following manner:
ntpaddpeer <address> [<keyId> <version> <minpol>] [prefer]
where
<address>
is the either the domain name or IP address of the peer machine. The
optional configuration items are described below:
<keyId>
. An unsigned 32-bit integer key identifier for encryption authentication. The
default is for no key
ID
.
<version>.
The version of
NTP
being used. The options are versions 1, 2, or 3. If no
number is entered, it is assumed that version 3 is being used.
<minpol>.
The minimum poll interval for time checks to this peer. The number entered is
seconds raised to the power of 2.
prefer
. An identifier that marks this peer as a preferred source of time information. In a
situation where multiple peers could provide time information to this client, the preferred
peer is the one that is used.
For example, to add a peer with an address of 1.1.1.1, a key identifier of 5, using version 3 of
NTP
, minimum poll of 16 seconds, and marked as a preferred server, you would enter the
following:
ntpaddpeer 1.1.1.1 5 3 4 prefer
When you have finished press
<return>
. A brief message appears confirming the addition of a
new peer.
Summary of Contents for Omni Switch/Router
Page 1: ...Part No 060166 10 Rev C March 2005 Omni Switch Router User Manual Release 4 5 www alcatel com ...
Page 4: ...page iv ...
Page 110: ...WAN Modules Page 3 40 ...
Page 156: ...UI Table Filtering Using Search and Filter Commands Page 4 46 ...
Page 164: ...Using ZMODEM Page 5 8 ...
Page 186: ...Displaying and Setting the Swap State Page 6 22 ...
Page 202: ...Creating a New File System Page 7 16 ...
Page 270: ...Displaying Secure Access Entries in the MPM Log Page 10 14 ...
Page 430: ...OmniChannel Page 15 16 ...
Page 496: ...Configuring Source Route to Transparent Bridging Page 17 48 ...
Page 542: ...Dissimilar LAN Switching Capabilities Page 18 46 ...
Page 646: ...Application Example DHCP Policies Page 20 30 ...
Page 660: ...GMAP Page 21 14 ...
Page 710: ...Viewing the Virtual Interface of Multicast VLANs Page 23 16 ...
Page 722: ...Application Example 5 Page 24 12 ...
Page 788: ...Viewing UDP Relay Statistics Page 26 24 ...
Page 872: ...The WAN Port Software Menu Page 28 46 ...
Page 960: ...Deleting a PPP Entity Page 30 22 ...
Page 978: ...Displaying Link Status Page 31 18 ...
Page 988: ...Displaying ISDN Configuration Entry Status Page 32 10 ...
Page 1024: ...Backup Services Commands Page 34 14 ...
Page 1062: ...Diagnostic Test Cable Schematics Page 36 24 ...
Page 1072: ...Configuring a Switch with an MPX Page A 10 ...
Page 1086: ...Page B 14 ...
Page 1100: ...Page I 14 Index ...

