Configuring Spanning Tree
Page 17-27
8.
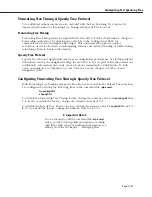
The following prompt is displayed allowing you to set the Bridge Forward Delay:
New Bridge Forward Delay (4..30 secs)
(current value is 4) :
Enter the
Forward Delay Time
as a number between 4 and 30, or press
<return>
to accept
the default listed in parenthesis. This time value controls how fast a port changes its
spanning state when moving toward the Forwarding state. The value determines how
long the port stays in each of the Listening and Learning states, which precede the
Forwarding state. This value is also used when a topology change has been detected and
is underway to age out all dynamic entries in the Forwarding Database. Enter a value
between 4 and 30 seconds. A value that is too small can cause temporary loops in the
network due to data being forwarded before the reconfiguration message has reached all
nodes on the network.
9.
The following prompt is displayed allowing you to set the Ageing Time:
Ageing Time (10..1000000 sec)
(current value is 300) :
Enter the
Ageing Time
as a number between 10 and 1000000, or press
<return>
to accept
the default listed in parenthesis. The timeout period in seconds for aging out dynamically
learned forwarding information. Enter a new Ageing Time between 10 and 1000000
seconds.
10.
The following prompt is displayed allowing you to set the Auto-Tracker VLAN Ageing
Time:
Auto-Tracker VLAN Ageing Time (10..1000000 sec) (current value is 1200) :
Enter the
Auto-Tracker VLAN Ageing TIme
as a number between 10 and 1000000, or press
<return>
to accept the default listed in parenthesis. The length of time in seconds to
remember which VLAN a port belonged to even after the port has been aged out of the
Bridge Filtering Database. The MAC and port information are preserved for the set length
of time. In the case of IPX it should be set to greater than the server Keep Alive Timer in
order to prevent the server from losing communication with the station. The default is
1200 seconds.
11.
The final prompt is displayed asking you if you would like to save the new parameters:
Save the new Spanning Tree Bridge parameters ? y/n :
Enter
y
to save the parameters, or
n
to discard them. If you chose to save the parameters,
a confirmation message similar to the following is shown:
Port 5/1 set to Forwarding!
Port 5/2 set to Forwarding!
Port 5/3 set to Forwarding!
As a variation of this command you can enter the
stc
command without specifying a
group. This will allow you to set up spanning tree for the previously selected group. For
information on selecting a group see
Selecting a Default Group
on page 17-7.
Summary of Contents for Omni Switch/Router
Page 1: ...Part No 060166 10 Rev C March 2005 Omni Switch Router User Manual Release 4 5 www alcatel com ...
Page 4: ...page iv ...
Page 110: ...WAN Modules Page 3 40 ...
Page 156: ...UI Table Filtering Using Search and Filter Commands Page 4 46 ...
Page 164: ...Using ZMODEM Page 5 8 ...
Page 186: ...Displaying and Setting the Swap State Page 6 22 ...
Page 202: ...Creating a New File System Page 7 16 ...
Page 270: ...Displaying Secure Access Entries in the MPM Log Page 10 14 ...
Page 430: ...OmniChannel Page 15 16 ...
Page 496: ...Configuring Source Route to Transparent Bridging Page 17 48 ...
Page 542: ...Dissimilar LAN Switching Capabilities Page 18 46 ...
Page 646: ...Application Example DHCP Policies Page 20 30 ...
Page 660: ...GMAP Page 21 14 ...
Page 710: ...Viewing the Virtual Interface of Multicast VLANs Page 23 16 ...
Page 722: ...Application Example 5 Page 24 12 ...
Page 788: ...Viewing UDP Relay Statistics Page 26 24 ...
Page 872: ...The WAN Port Software Menu Page 28 46 ...
Page 960: ...Deleting a PPP Entity Page 30 22 ...
Page 978: ...Displaying Link Status Page 31 18 ...
Page 988: ...Displaying ISDN Configuration Entry Status Page 32 10 ...
Page 1024: ...Backup Services Commands Page 34 14 ...
Page 1062: ...Diagnostic Test Cable Schematics Page 36 24 ...
Page 1072: ...Configuring a Switch with an MPX Page A 10 ...
Page 1086: ...Page B 14 ...
Page 1100: ...Page I 14 Index ...

