Running Diagnostics on an Entire Chassis
Page 36-21
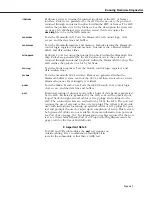
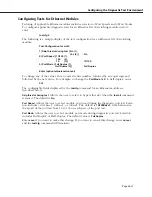
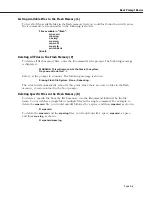
2) Stop on Failure
Enter
2
to halt diagnostics in an active state when a failure occurs or
1
(the default) to exit
diagnostics and display the
Test Summation
and
Failure Summation
sections of the
test
command output. Setting this field to
2
can be used to further troubleshoot problems.
However, setting this field to
2
requires more user intervention during a test.
3) Port Test Bypass
Enter
2
to complete testing of all ports regardless of port test failures or
1
(the default) to stop
testing at the first port failure. Setting this field to
2
can be used to further troubleshoot prob-
lems.
4) Port Test Type
Enter
1
(the default) for a port test,
2
for an Internal Loopback (
ILB
) test,
3
for a stress test, or
4
for an
ILB
stress test. External cables are required for the port and stress tests but not for the
ILB
test. In addition, the stress test requires a special image file (see
Running Diagnostics
on
page 36-2) and is only available for Ethernet (
ESX
and
GSX
) modules on the Omni
Switch/Router.
♦
Note
♦
Option 5,
HRE-X Test Mode
, is for the Omni
Switch/Router only.
5) HRE-X Test Mode
This option lets you configure port tests for
HRE-Xs
installed on Omni Switch/Router switch-
ing modules. It does not affect the port test for
HRE-Xs
installed on
MPXs
. Currently, the port
test on
HRE-Xs
installed on switching modules runs in conjunction with the normal port test.
Each physical port is tested with the normal port test path and then through the
HRE-X
port
test path before testing the next physical port. Subsequent physical ports are tested with only
the normal port test path.
Enter
1
to bypass testing of the
HRE-X
when the port test is run or
2
to perform the test as
described above.
Summary of Contents for Omni Switch/Router
Page 1: ...Part No 060166 10 Rev C March 2005 Omni Switch Router User Manual Release 4 5 www alcatel com ...
Page 4: ...page iv ...
Page 110: ...WAN Modules Page 3 40 ...
Page 156: ...UI Table Filtering Using Search and Filter Commands Page 4 46 ...
Page 164: ...Using ZMODEM Page 5 8 ...
Page 186: ...Displaying and Setting the Swap State Page 6 22 ...
Page 202: ...Creating a New File System Page 7 16 ...
Page 270: ...Displaying Secure Access Entries in the MPM Log Page 10 14 ...
Page 430: ...OmniChannel Page 15 16 ...
Page 496: ...Configuring Source Route to Transparent Bridging Page 17 48 ...
Page 542: ...Dissimilar LAN Switching Capabilities Page 18 46 ...
Page 646: ...Application Example DHCP Policies Page 20 30 ...
Page 660: ...GMAP Page 21 14 ...
Page 710: ...Viewing the Virtual Interface of Multicast VLANs Page 23 16 ...
Page 722: ...Application Example 5 Page 24 12 ...
Page 788: ...Viewing UDP Relay Statistics Page 26 24 ...
Page 872: ...The WAN Port Software Menu Page 28 46 ...
Page 960: ...Deleting a PPP Entity Page 30 22 ...
Page 978: ...Displaying Link Status Page 31 18 ...
Page 988: ...Displaying ISDN Configuration Entry Status Page 32 10 ...
Page 1024: ...Backup Services Commands Page 34 14 ...
Page 1062: ...Diagnostic Test Cable Schematics Page 36 24 ...
Page 1072: ...Configuring a Switch with an MPX Page A 10 ...
Page 1086: ...Page B 14 ...
Page 1100: ...Page I 14 Index ...

