Detector Repairs
6-10
CardioMD Service Manual
1MAN0158-H11 04-2005 CSIP Level 1
Procedure Details
the LED aperture should be changed.
Note
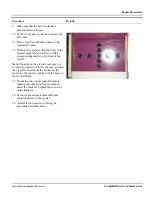
. To change the LED aperture, turn the
slot on the back of the PMT. The slot can be
accessed with a screwdriver through a hole in
the PMT strip board.
18.
Remount the rest of the detector and run a
complete PMT update calibration.
19.
Run a QC check to determine if further
calibrations are required. See the
CardioMD Operator’s Manual Chapter 5
Maintenance
for instructions.
6.3.6
Replacing the Crystal
Procedure Details
1.
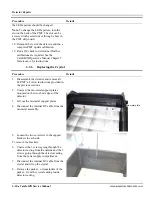
Disassemble the detector and remove all
24 PMT’s. Follow instructions provided in
the previous sections.
2.
Unscrew the mu-metal support plates
mounted on the two short edges of the
detector.
3.
Lift out the mu-metal support plates.
4.
Disconnect the internal HV cable from the
mu-metal assembly.
5.
Loosen the two set screws in the support
brackets in each side.
To remove the brackets:
6.
Unscrew the 3 screws going through the
detector casting from the outside and the 3
screws going through the detector casting
from the power supply compartment.
7.
Disconnect the internal HV cable from the
crystal and lift up the crystal.
8.
Remove the gasket – or remainders of the
gasket – from the crystal seating inside
detector casting.
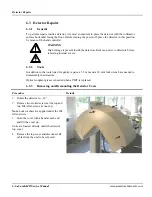
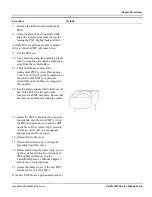
mu-metal plate
Summary of Contents for CARDIOMD
Page 1: ...CARDIOMD SERVICE MANUAL 1MAN0158 H11 04 2005 CSIP Level 1 ...
Page 10: ...Introduction x CardioMD Service Manual 1MAN0158 H11 04 2005 CSIP Level 1 ...
Page 16: ...Safe Operating Practices 1 6 CardioMD Service Manual 1MAN0158 H11 04 2005 CSIP Level 1 ...
Page 164: ...Detector Calibration Files 5 60 CardioMD Service Manual 1MAN0158 H11 04 2005 CSIP Level 1 ...
Page 328: ...Installation Procedures 9 38 CardioMD Service Manual 1MAN0158 H11 04 2005 CSIP Level 1 ...
Page 348: ...Planned Maintenance Procedures 11 6 CardioMD Service Manual 1MAN0158 H11 04 2005 CSIP Level 1 ...
Page 465: ......

