Gantry Repairs
6-4
CardioMD Service Manual
1MAN0158-H11 04-2005 CSIP Level 1
Open the sleeve and pull the inner conduit with the cables through.
3.
Remove the faulty cable from the inner conduit through the sleeve and insert the new cable in
the same manner.
4.
Put back the outer conduit and connect the combined conduit at both ends.
6.2.6
Replacing a Motion Controller
Procedure Details
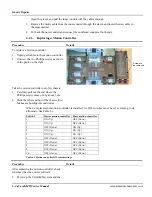
To replace a motion controller:
1.
Unplug all cables to the motion controller
2.
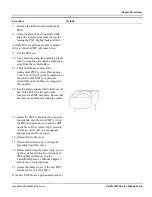
Unscrew the two Phillips screws as shown
in the photo on the right.
Take the motion controller out of its chassis:
3.
Carefully pull out the end where the
Phillips screws came out by about 3 cm.
4.
Slide the other end out of the chassis (two
latches are holding this end down).
When a replacement motion controller is installed, its DIP switches must be set according to its
allocation. See Table 6.1.
Switch #
Master motion controller Slave motion controller
1
ON (Up)
OFF (Down)
2
ON (Up)
OFF (Down)
3
OFF (Down)
ON (Up)
4
ON (Up)
ON (Up)
5
ON (Up)
ON (Up)
6
OFF (Down)
OFF (Down)
7
OFF (Down)
OFF (Down)
8
OFF (Down)
OFF (Down)
9
OFF (Down)
OFF (Down)
10
OFF (Down)
OFF (Down)
Table 6.1 Motion controller DIP switch settings
Procedure Details
After replacing the motion controller, check
whether it has the correct software:
5.
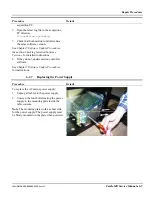
Power up the CardioMD system and the
Screws to
be removed
Summary of Contents for CARDIOMD
Page 1: ...CARDIOMD SERVICE MANUAL 1MAN0158 H11 04 2005 CSIP Level 1 ...
Page 10: ...Introduction x CardioMD Service Manual 1MAN0158 H11 04 2005 CSIP Level 1 ...
Page 16: ...Safe Operating Practices 1 6 CardioMD Service Manual 1MAN0158 H11 04 2005 CSIP Level 1 ...
Page 164: ...Detector Calibration Files 5 60 CardioMD Service Manual 1MAN0158 H11 04 2005 CSIP Level 1 ...
Page 328: ...Installation Procedures 9 38 CardioMD Service Manual 1MAN0158 H11 04 2005 CSIP Level 1 ...
Page 348: ...Planned Maintenance Procedures 11 6 CardioMD Service Manual 1MAN0158 H11 04 2005 CSIP Level 1 ...
Page 465: ......

