Installation
1MAN0158-H11 04-2005 CSIP Level 1
CardioMD Service Manual
8-49
Procedure Details
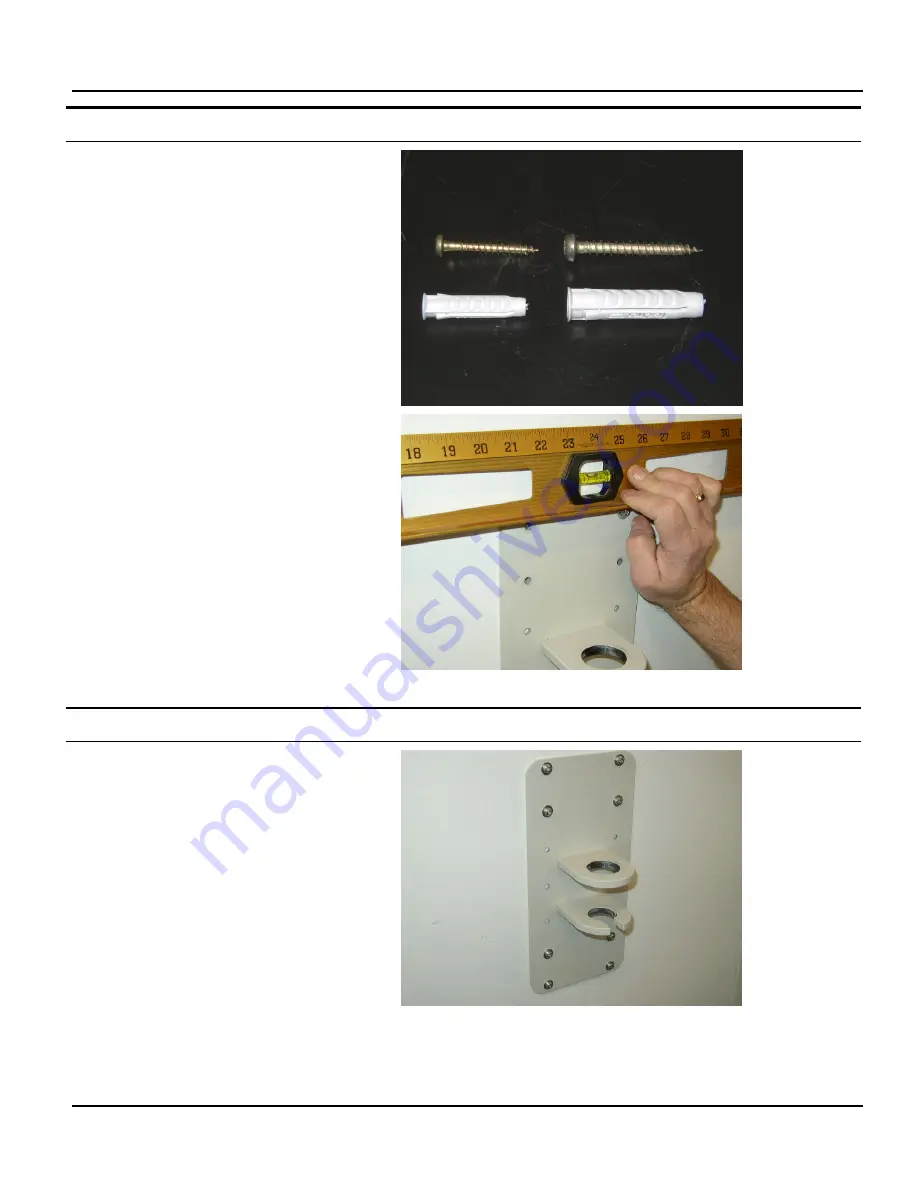
If working in a solid wall, use the plugs
supplied for this purpose (the larger plug and
screw shown in the photo on the right):
4.
Use an 8 mm drill to drill holes for the
wall plugs supplied with the kit.
5.
Insert a plug into the hole just drilled. Seat
plug firmly into the wall by tapping with a
hammer.
6.
Fasten the mounting plate with the first
screw.
7.
Level the wall mount plate and mark the
remaining 3 upper holes, as well as the 4
lower mounting holes.
Note
. It is critical that the wall mounting plate is level.
Procedure Details
8.
Remove the wall mounting plate to give
access to drilling the 7 remaining holes.
9.
Mount anchors/plugs. Seat anchors/plugs
firmly into the wall by tapping with a
hammer.
10.
Mount the plate and tighten all 8 mounting
screws.
Summary of Contents for CARDIOMD
Page 1: ...CARDIOMD SERVICE MANUAL 1MAN0158 H11 04 2005 CSIP Level 1 ...
Page 10: ...Introduction x CardioMD Service Manual 1MAN0158 H11 04 2005 CSIP Level 1 ...
Page 16: ...Safe Operating Practices 1 6 CardioMD Service Manual 1MAN0158 H11 04 2005 CSIP Level 1 ...
Page 164: ...Detector Calibration Files 5 60 CardioMD Service Manual 1MAN0158 H11 04 2005 CSIP Level 1 ...
Page 328: ...Installation Procedures 9 38 CardioMD Service Manual 1MAN0158 H11 04 2005 CSIP Level 1 ...
Page 348: ...Planned Maintenance Procedures 11 6 CardioMD Service Manual 1MAN0158 H11 04 2005 CSIP Level 1 ...
Page 465: ......


