DRIVETRAIN COMPONENTS
Rear Differential and Axle Shafts
Page 14-18
2007 Carryall 295/295 SE & XRT 1550/1550 SE Gasoline, Diesel and IntelliTach M & S Manual
14
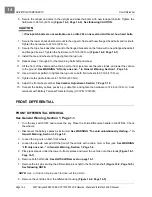
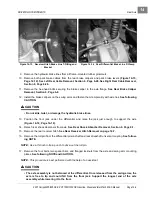
7.1. Ensure shifter handle is clear of the instrument panel in the FORWARD and REVERSE positions.
7.2. Ensure shifter handle is centered between those positions in the NEUTRAL position.
8. Install the passenger seat.
9. Lower and secure the hood.
10.
Gasoline vehicles:
Connect the spark plug wires.
11. Connect the battery cables, positive (+) cable first, and tighten the hardware to 144 in-lb (16 N·m). Coat
terminals with Battery Terminal Protector Spray (CCI P/N 1014305).
FORWARD/REVERSE SHIFTER HANDLE
Shifter Handle Removal
1. Turn the key switch OFF and remove the key. Set the park brake. Place the Forward/Reverse handle in
NEUTRAL. Chock the wheels.
2. Disconnect the battery cables as instructed.
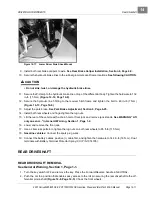
See WARNING “To avoid unintentionally starting...” in
General Warning, Section 1, Page 1-2.
3. Remove the shifter knob.
4. Raise the hood.
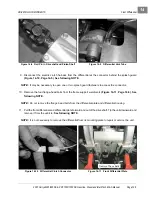
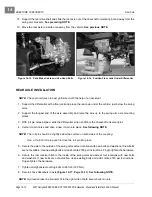
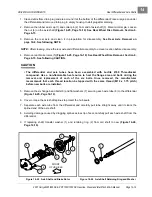
5. Disconnect the cable ball socket from the shifter handle ball stud
(Figure 14-22, Page 14-16)
.
6. Remove the socket-head pivot shoulder bolt, nylon spacer, two large flat washers, and nylon locknut
from the shifter handle and frame bracket.
7. Remove the shifter handle.
Shifter Handle Installation
1. Secure the shifter handle with a new socket-head pivot shoulder bolt (CCI P/N 102684601), nylon
spacer, two large flat washers, and a new nylon locknut. Tighten the hardware to 40 in-lb (5 N·m)
(Figure 14-22, Page 14-16)
.
See following NOTE.
NOTE:
If the previously removed shoulder bolt and nylon locknut are used for installation, add Loctite 262
to the bolt threads and tighten the used hardware to 50 in-lb (6 N·m).
2. Secure the ball socket to the ball stud on the Forward/Reverse shifter handle under the hood.
3. Install the shifter knob.
4. Lower and secure the hood.
5. Connect the battery cables, positive (+) cable first, and tighten the hardware to 144 in-lb (16 N·m). Coat
terminals with Battery Terminal Protector Spray (CCI P/N 1014305).
REAR DIFFERENTIAL AND AXLE SHAFTS
REAR DIFFERENTIAL AND AXLE SHAFT REMOVAL
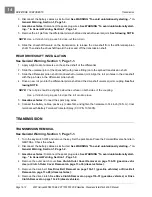
See General Warning, Section 1, Page 1-1.
The rear axle assembly has two axle shafts. The driver side shaft is longer than the passenger side. The axle
tubes must be unbolted from the differential to access the axle shafts. If only a tube or shaft is to be replaced,
it can be done one side at a time without removing the entire rear axle.
Содержание IntelliTach XRT 1550
Страница 2: ......
Страница 22: ...1...
Страница 54: ...4...
Страница 60: ...5...
Страница 90: ...6...
Страница 114: ...8...
Страница 118: ...9...
Страница 196: ...11A...
Страница 290: ...11C...
Страница 468: ...13C...
Страница 490: ...14...
Страница 498: ...15...
Страница 548: ...16...
Страница 560: ...Club Car R NOTES...
Страница 561: ...Club Car R NOTES...
Страница 562: ...Club Car R NOTES...
Страница 563: ......

