ELECTRICAL COMPONENTS: KAWASAKI POWERED GASOLINE VEHICLES
Oil Pressure Sensor
2007 Carryall 295/295 SE & XRT 1550/1550 SE Gasoline, Diesel and IntelliTach M & S Manual
Page 12a-15
12A
OIL PRESSURE SENSOR
See General Warning, Section 1, Page 1-1.
Refer to the engine manual for additional testing, removal, disassembly, and installation procedures.
See the Kawasaki FH680D engine manual (CCI P/N 103351201).
HEADLIGHTS
See General Warning, Section 1, Page 1-1.
Testing the Headlight Bulb and Socket
See Test Procedure 28, Section 11a, Page 11a-38. See also Test Procedure 27 – Light Switch on
page 11a-37.
Headlight Bulb Removal
1. Turn the key switch OFF and remove the key. Place the Forward/Reverse handle in NEUTRAL. Chock
the wheels.
2. Disconnect the battery cables as instructed.
See WARNING “To avoid unintentionally starting...” in
General Warning, Section 1, Page 1-2.
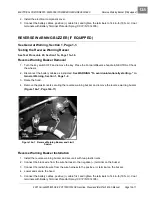
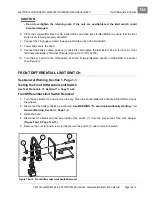
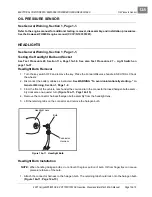
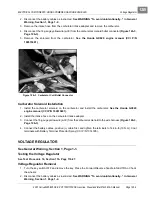
3. From the front of the vehicle, reach under the cowl and turn the connector harness/halogen bulb assem-
bly clockwise one-quarter turn
(Figure 12a-11, Page 12a-15)
.
4. Remove the connector harness/halogen bulb assembly from the headlight lens.
5. Lift the retaining tabs on the connector and remove the halogen bulb.
Headlight Bulb Installation
NOTE:
When handling halogen bulbs, do not touch the glass portion of bulb. Oil from finger tips can cause
premature failure of the bulb.
1. Attach the connector harness to the halogen bulb. The retaining tab should lock onto the halogen bulb
(Figure 12a-11, Page 12a-15)
.
Figure 12a-11 Headlight Bulb
Bulb
Headlight Lens
Connector
Harness
Содержание IntelliTach XRT 1550
Страница 2: ......
Страница 22: ...1...
Страница 54: ...4...
Страница 60: ...5...
Страница 90: ...6...
Страница 114: ...8...
Страница 118: ...9...
Страница 196: ...11A...
Страница 290: ...11C...
Страница 468: ...13C...
Страница 490: ...14...
Страница 498: ...15...
Страница 548: ...16...
Страница 560: ...Club Car R NOTES...
Страница 561: ...Club Car R NOTES...
Страница 562: ...Club Car R NOTES...
Страница 563: ......

