BODY AND TRIM
Roll-Over Protective Structure (ROPS)
Page 4-6
2007 Carryall 295/295 SE & XRT 1550/1550 SE Gasoline, Diesel and IntelliTach M & S Manual
4
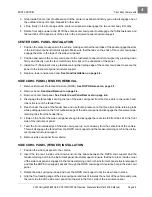
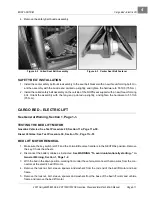
5. Engage and secure the three lower side-retaining tabs into the receiving slots on the top of the fender
flares.
6. Pass the rubber hood latch through the hole in the top of the side cowl panel.
7. Engage and secure the three top retaining tabs of the side cowl panel into the three slots in the under-
hood, inner structure of the fender flare.
8. Reinstall center cowl panel.
See Center Cowl Panel Installation on page 4-5.
9. Replace, lower and secure hood.
See Hood Installation on page 4-4.
10. Reinstall Roll-over Protective Structure (ROPS).
See ROPS Installation on page 4-8.
FRONT FENDER FLARE REMOVAL
1. Remove hood.
See Hood Removal on page 4-4.
2. Remove center cowl panel.
See Center Cowl Panel Removal on page 4-4.
3. Remove side cowl panel (fender).
See Side Cowl Panel (Fender) Removal on page 4-5.
4. Remove front fascia.
See Front Fascia Removal on page 4-4.
5. Pull back the floor mat, and remove the three hex-head screws securing the front fender flare to the floor-
board and the lower, outboard end of the instrument panel.
6. Remove the three hex-head screws securing the front fender flare to the frame, and remove front fender
flare.
FRONT FENDER FLARE INSTALLATION
1. Position the front fender flare to the vehicle, and secure the flare to the upper frame support using the
three hex-head screws. Tighten hardware to 55 in-lb (6.2 N·m).
2. Secure the fender flare to the front floorboard using three hex-head screws. Make sure that the floor mat
is captured underneath the fender flare.
3. Tighten the hardware at the floorboard to 55 in-lb (6.2 N·m).
4. Reinstall front fascia.
See Front Fascia Installation on page 4-4.
5. Reinstall side cowl panel (fender).
See Side Cowl Panel (Fender) Installation on page 4-5.
6. Reinstall center cowl panel.
See Center Cowl Panel Installation on page 4-5.
7. Replace, lower and secure hood.
See Hood Installation on page 4-4.
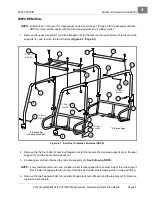
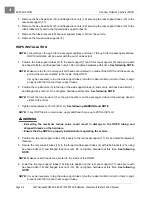
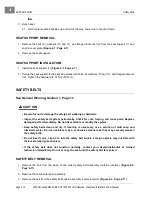
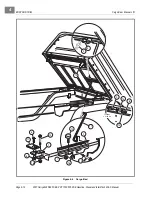
ROLL-OVER PROTECTIVE STRUCTURE (ROPS)
See General Warning, Section 1, Page 1-1.
The vehicle is equipped with a certified Roll-over Protective Structure.
See following WARNING.
ý
WARNING
• Do not modify the ROPS or operate the vehicle with the ROPS removed. Doing so will void the
certification and could result in property damage, personal injury, or death.
• Do not operate the vehicle if the ROPS is damaged. If the ROPS is damaged, replace the
structure. Do not attempt repair.
Содержание IntelliTach XRT 1550
Страница 2: ......
Страница 22: ...1...
Страница 54: ...4...
Страница 60: ...5...
Страница 90: ...6...
Страница 114: ...8...
Страница 118: ...9...
Страница 196: ...11A...
Страница 290: ...11C...
Страница 468: ...13C...
Страница 490: ...14...
Страница 498: ...15...
Страница 548: ...16...
Страница 560: ...Club Car R NOTES...
Страница 561: ...Club Car R NOTES...
Страница 562: ...Club Car R NOTES...
Страница 563: ......


