MIDI/GPI
Using GPI IN
344
RIVAGE PM10 Operation Manual
4.
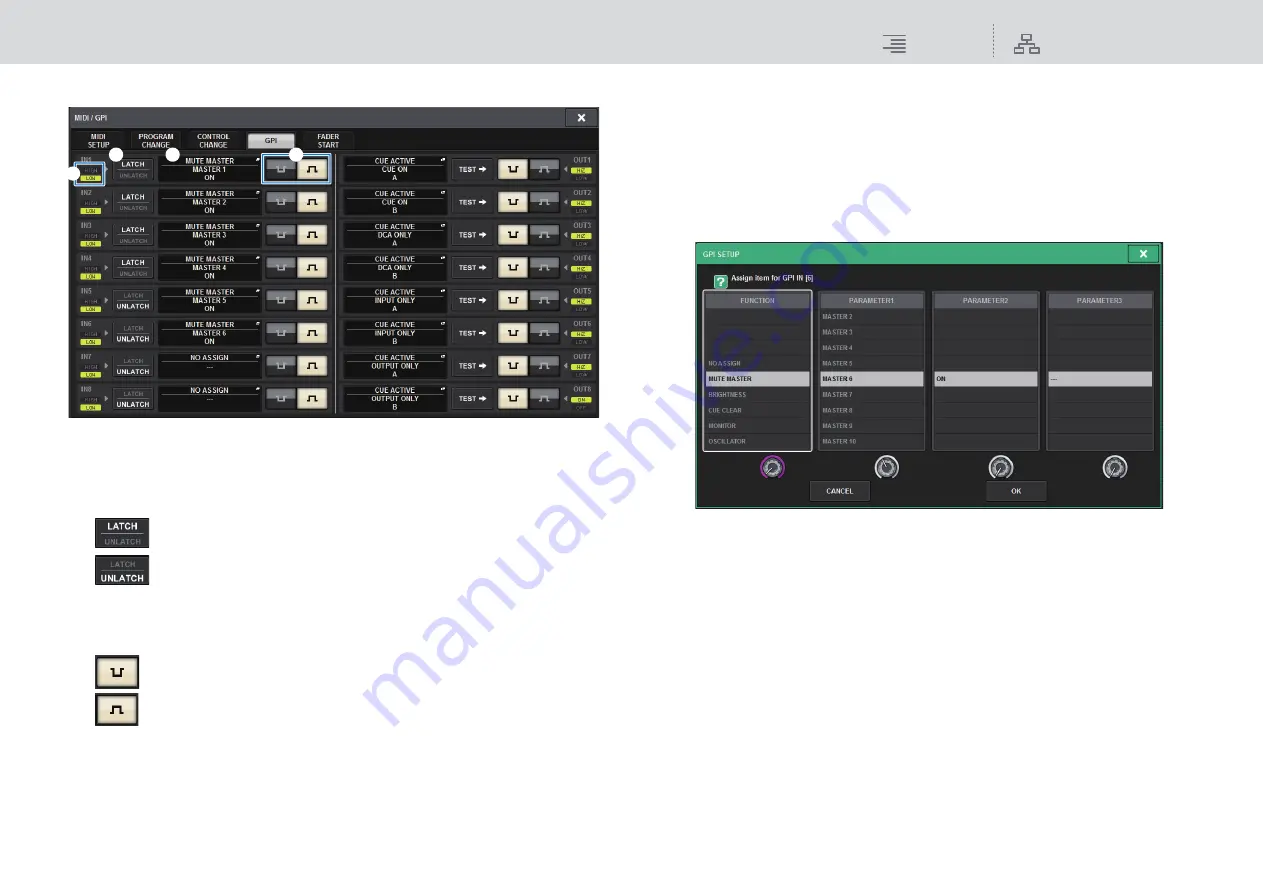
Press the GPI tab to access the GPI page.
1
GPI IN status indicator
Indicates the status of the voltage being input to the GPI IN port.
2
Switch property select buttons
Pressing each button repeatedly will toggle between LATCH and UNLATCH indicators.
.............In general, select this mode if you connect an alternate switch (that toggles
between on and off if you press the switch repeatedly).
.............This mode is useful if you connect a momentary-type switch (that is turned
on only while you are pressing and holding it down, and turned off when
you release it).
3
POLARITY MODE select button
This button selects the polarity of the GPI IN port.
................(Low active) Active when the input signal is low level.
................(High active) Active when the input signal is high level.
4
GPI SETUP popup button
Press this button to access the GPI SETUP popup window.
The button shows the name of the currently-selected function or parameter.
5.
Specify the input type and POLARITY MODE based on the specifications of the
external device you are using.
6.
To assign the function or parameter that you want to control, press the GPI
SETUP popup button to open the GPI SETUP popup window.
NOTE
Available options in the GPI SETUP popup window are the same as for the USER DEFINED
keys (
).
7.
In each field, select the desired function or parameter.
8.
When you finish making settings, press the OK button.
The system will return to the GPI screen.
9.
Repeat steps 5 through 8 to specify functions and parameters for other ports.
NOTE
Settings in the GPI screen are common to all scenes. They can be saved as SETUP data.
1
2
4
3


