Monitor
CUE
147
RIVAGE PM10 Operation Manual
1.
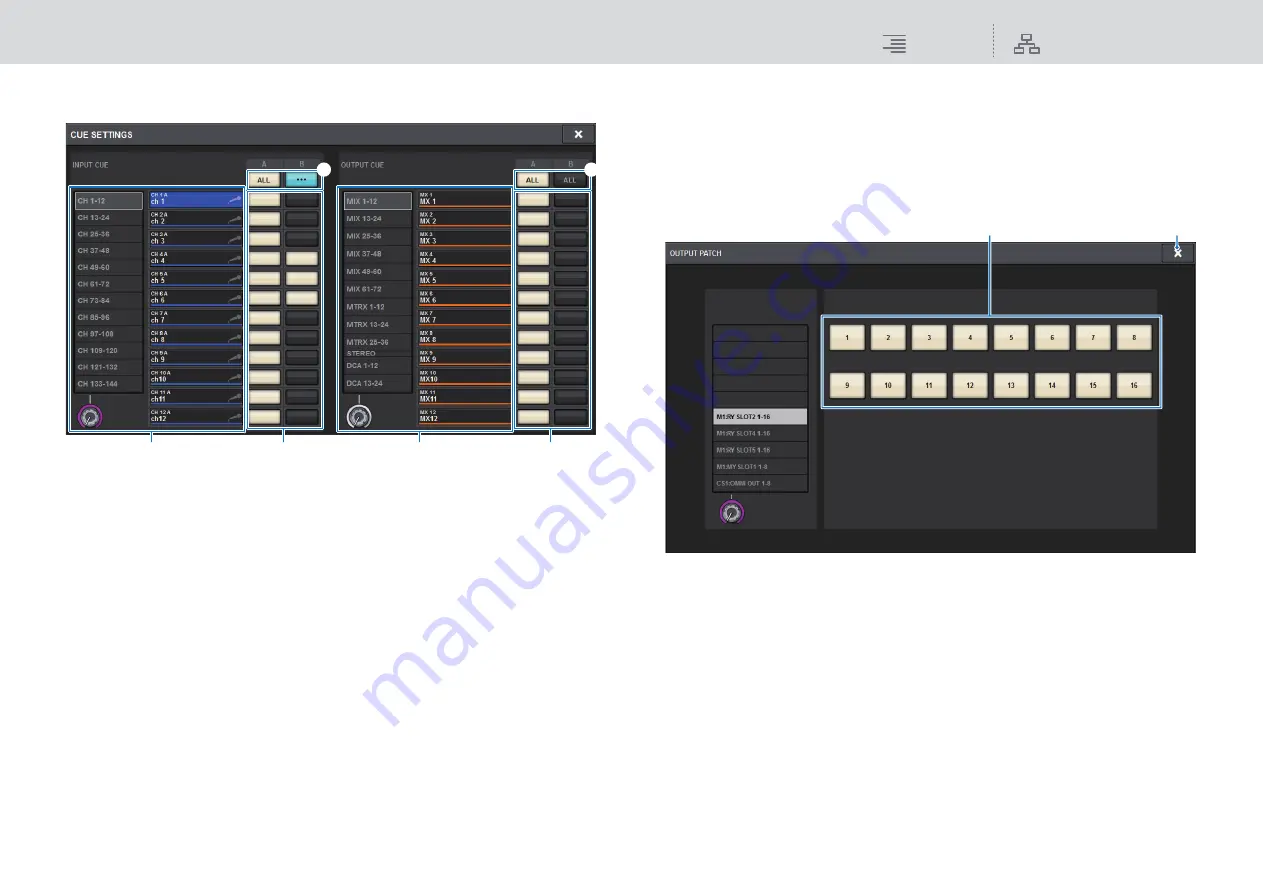
Press the CUE SETTINGS popup button to open the CUE SETTINGS popup
window, and select the cue destination (CUE A, CUE B, or A+B).
1
Channel select list
Enables you to select a channel.
2
ALL button
Press this button to apply or cancel the selected cue destination (CUE A, CUE B) for all
channels simultaneously.
If the cue destination is not selected for some channels in the column, “...” will appear.
3
CUE select buttons
Enable you to select the cue destination for each channel.
2.
Use the CUE MODE buttons to select either the mode in which channels are
mixed for monitoring, or the mode in which only the last-selected channel is
monitored.
Select the MIX CUE button or LAST CUE button.
NOTE
In MIX CUE mode, it is not possible to simultaneously turn on Cue for different Cue groups. The
Cue group to which the last-cued signal belongs will be turned on, allowing only the signals of
that Cue group to be monitored. However, if CUE OPERATION MODE is set to BAY and if LAST
CUE is selected, the cue setting in each bay will be active individually.
3.
Use the buttons and knobs of the INPUT CUE field, DCA CUE field, and OUTPUT
CUE field to specify the output position and output level for each Cue group.
Refer to the explanation for each item in step 2 on
, and make the desired settings.
4.
To specify a port as the output destination for cue signals L and R, press one of
the CUE OUTPUT PATCH buttons (L/R) to open the OUTPUT PATCH popup
window, and choose from the following cue signal output destinations (multiple
selections are allowed).
1
Output jack select buttons
Enable you to select the output jacks to which the signals will be routed.
2
CLOSE button
Press this button to close the popup window and return to the previous screen.
When you have selected output ports, press the CLOSE button to close the CUE OUTPUT
PATCH popup window.
1
3
2
1
3
2
2
1


