Recording
2-track USB recorder
267
RIVAGE PM10 Operation Manual
Assigning channels to the input/output of the recorder
Follow the steps below to patch the desired channels to the input and output of the USB memory
recorder. You can patch any output channel or the direct output of an input channel to the recorder’s
input. You can patch the recorder’s output to any input channel.
1.
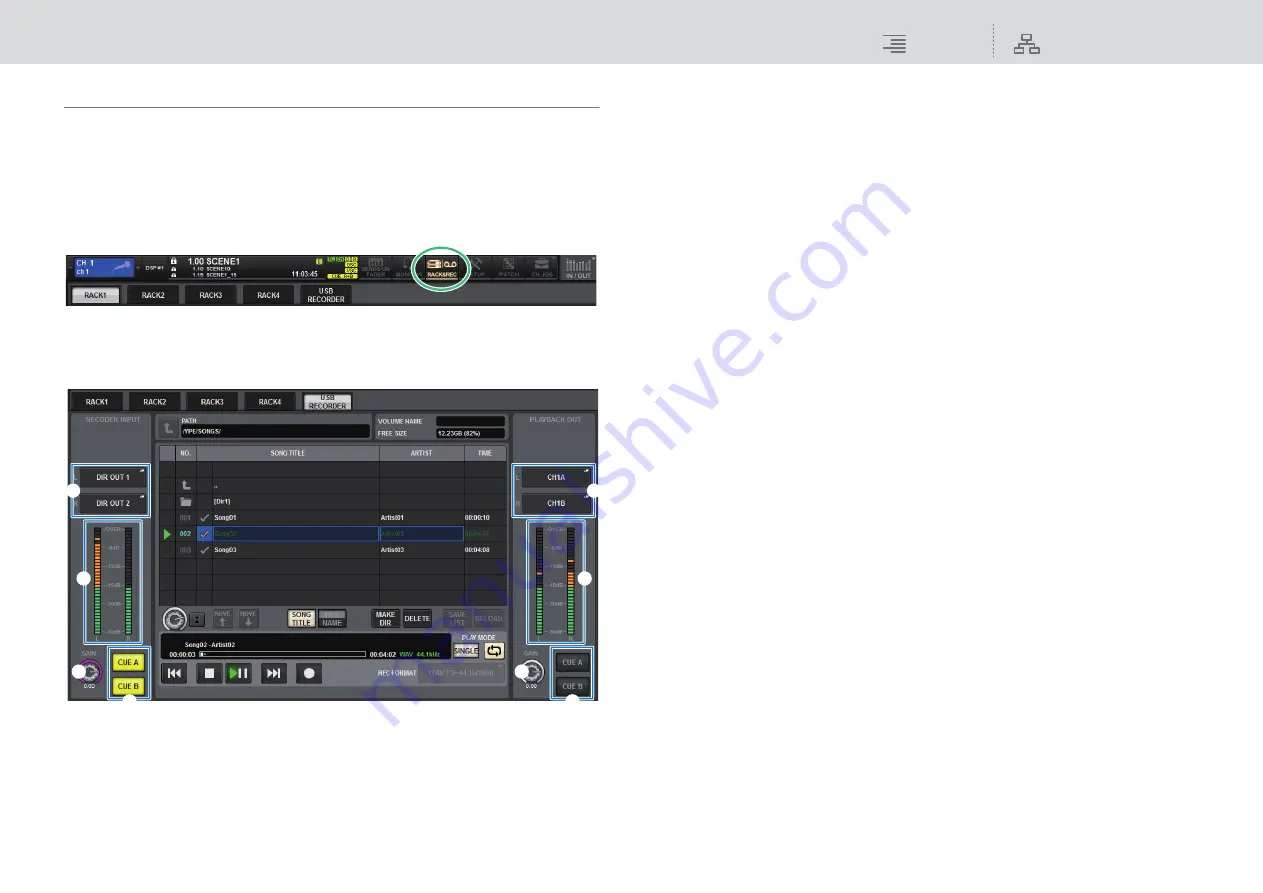
Press the RACK&REC button on the menu bar to access the RACK&REC screen.
This screen includes several pages, which you can switch between using the tabs located at the
top of the screen.
2.
Press the USB RECORDER tab.
In this screen you can assign signals to the input and output of the USB memory recorder, and
perform recording and playback operations.
1
RECORDER INPUT popup buttons (L/R)
Press these buttons to access the INPUT PATCH popup window, in which you can select
signals that will be patched to the recorder’s L/R input channels.
2
RECORDER INPUT GAIN knob
Sets the level of the signal input to the recorder.
3
RECORDER INPUT CUE buttons
If CUE A, or CUE B is on, you will be able to audition the signal input to the recorder.
NOTE
You cannot turn on any of these buttons and the PLAYBACK OUT CUE button simultaneously.
4
RECORDER INPUT meter
Indicates the level of the signals input to the recorder.
5
PLAYBACK OUT popup buttons (L/R)
Press these buttons to access the OUTPUT PATCH popup window, in which you can select
signals that will be patched to the recorder’s L/R output channels for playback.
6
PLAYBACK OUT GAIN knob
Sets the level of the recorder playback output signal.
7
PLAYBACK OUTPUT CUE button
If CUE A, or CUE B is on, you will be able to audition the playback signal output from the
recorder.
NOTE
You cannot turn on any of these buttons and the RECORDER INPUT CUE button
simultaneously.
8
PLAYBACK OUT meter
Indicates the level of the recorder playback output signal.
1
4
2
3
5
8
6
7


