Recording
Multitrack recording/virtual sound check
278
RIVAGE PM10 Operation Manual
■
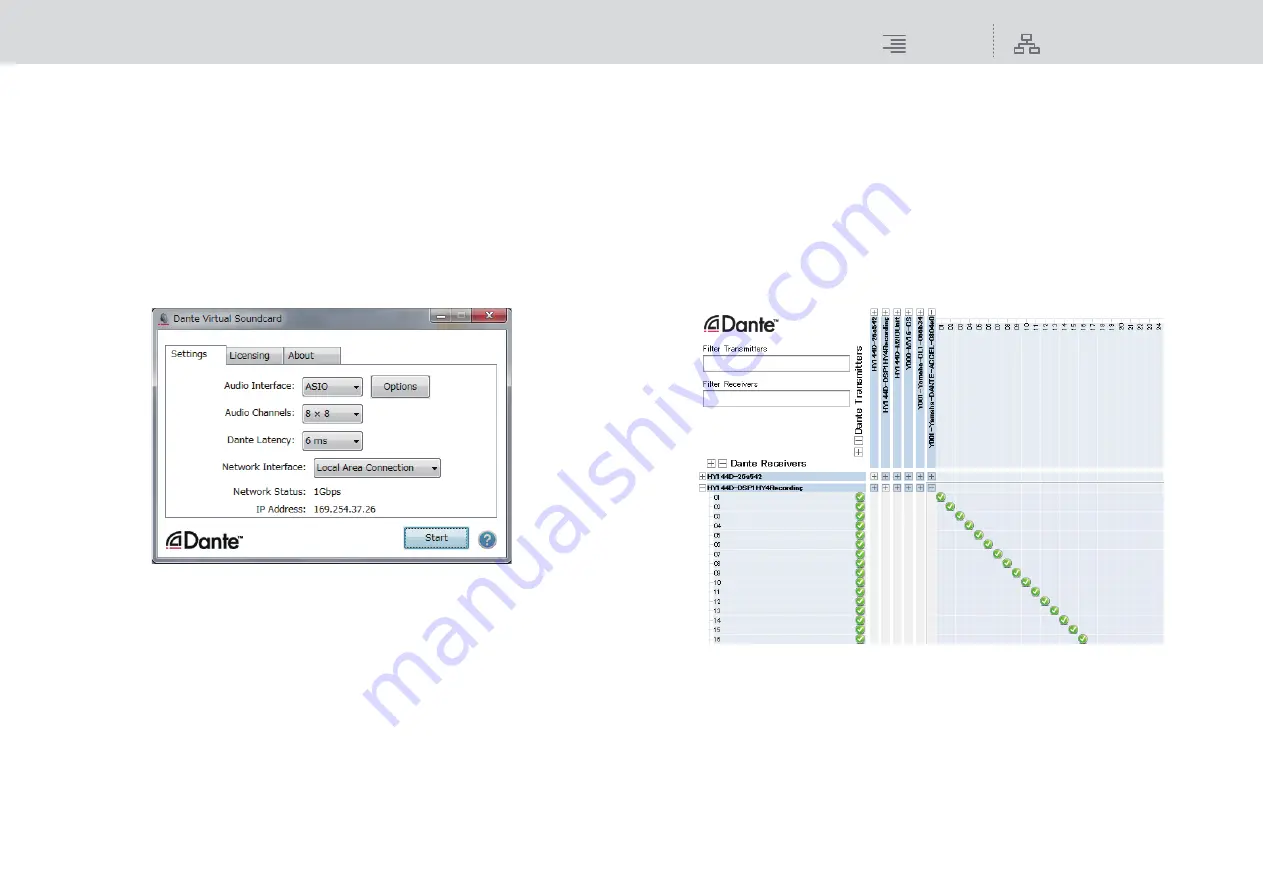
Configuring a Dante Virtual Soundcard
Install a Dante Virtual Soundcard (DVS) and Dante Controller on the computer that you will use for
audio recording. And then, make the following settings before you turn on the DVS.
• Connect the GbE-compatible network port of the computer to a GbE-compatible network
switch.
• Configure the computer to obtain an IP address automatically (this is the default setting).
• Specify the audio format (e.g., 96 kHz, 24-bit).
• Specify the Dante latency. (Choose a larger value for stable multi-channel recording/playback.)
• In the Advanced settings, select the number of channels to be used for recording and playback
(the default is 8 x 8).
NOTE
Please refer to the Dante Virtual Soundcard User’s Guide for more information on ASIO settings
(Windows).
■
Configuring Dante Controller
Connect the network port of the computer to a GbE-compatible network switch. Configure the
computer to obtain an IP address automatically (this is the default setting).
You must make the following settings for Dante Controller.
• For multitrack recording: Patch audio signals from the I/O rack to the DVS or Dante
Accelerator card for multitrack recording.
• For virtual sound check: Patch audio signals in such a way that they will be output from the
computer to the Dante audio network, then routed to the channels on the RIVAGE PM10
system (
).
The following example shows Dante Controller settings for when playback signals from Dante
Accelerator are patched to DSP’s HY144-D card for a virtual sound check.
During multitrack playback, you can switch these settings easily using the VIRTUAL SOUND
CHECK ON button on the RECORDING PATCH screen.
NOTE
Please refer to the Dante Controller manual for more information about operations and settings of the
Dante Controller.
V3.7


