User Setup
CUSTOM FADER
322
RIVAGE PM10 Operation Manual
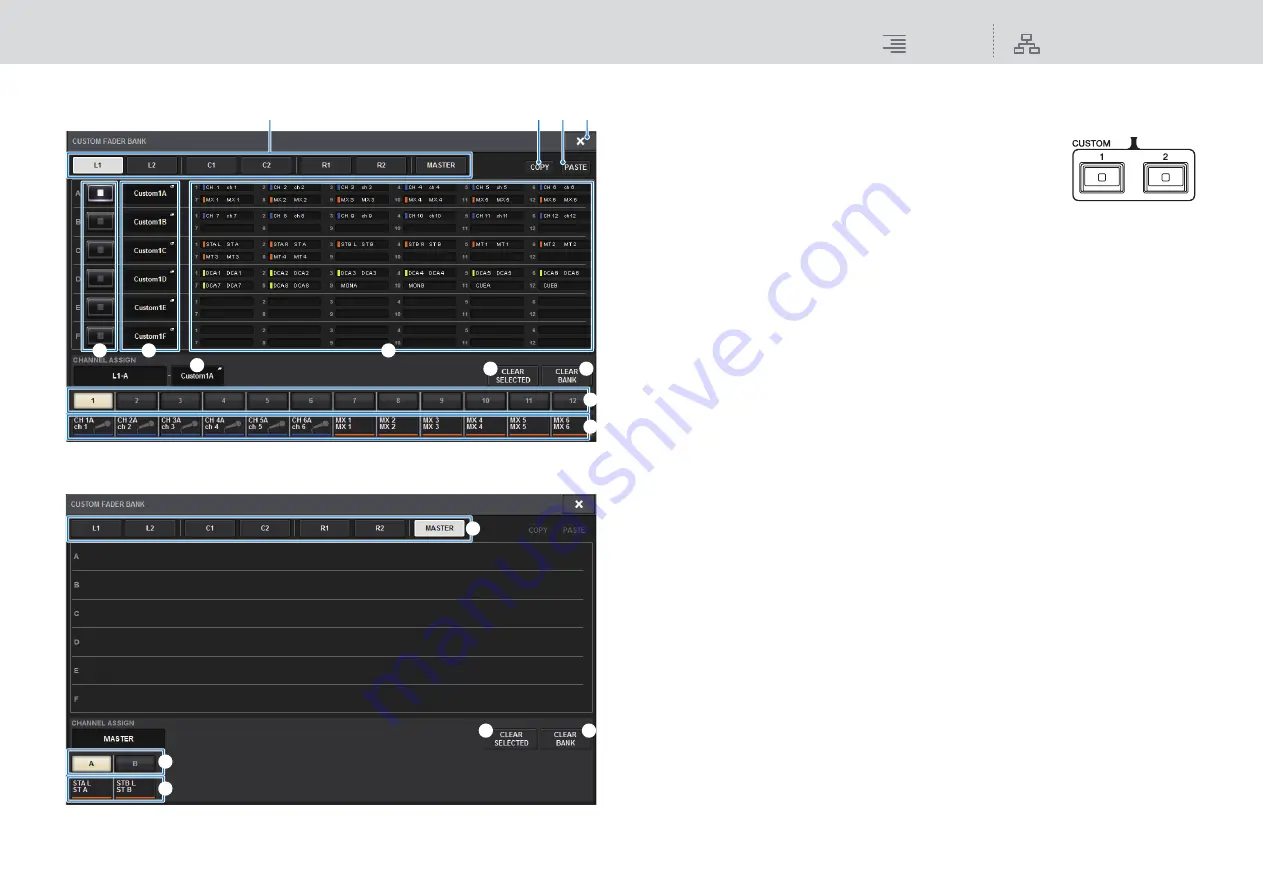
CUSTOM FADER BANK popup window (when a bay is selected)
CUSTOM FADER BANK popup window (when MASTER is selected)
1
Bay select buttons
Enable you to select a bay or master faders to which you want to assign a combination of
channels.
•
L1
.....................................CUSTOM1 of bay L
•
L2
.....................................CUSTOM2 of bay L
•
C1
....................................CUSTOM1 of bay C
•
C2
....................................CUSTOM2 of bay C
•
R1
....................................CUSTOM1 of bay R
•
R2
....................................CUSTOM2 of bay R
•
MASTER
........................Master fader
2
Bank select buttons
Enables you to select a block you want to set up. The selected bank name will appear in the
CHANNEL ASSIGN field.
3
NAME popup buttons
Press one of these buttons to access the NAME popup window, in which you can name the
blocks.
4
Fader assign indicators
Indicate the channels assigned to the corresponding blocks.
5
Fader select button
Enables you to elect the target fader. Press this button to select it, then press [SEL] keys on the
top panel to add the corresponding channels to the selected fader bank.
6
Channel select popup button
Press this button to access the channel select popup window, in which you can select channels
on the touch screen.
7
CLEAR SELECTED button
Clears the current fader assignment.
8
CLEAR BANK button
Clears the current fader bank assignment. Pressing this button will open a confirmation dialog
box. Press OK to clear the assignment. Otherwise, press CANCEL to return to the previous
screen without changing the setting.
9
COPY button
Copies the selected bank setting.
)
PASTE button
Paste the copied setting to the selected bank.
!
CLOSE button
Press this button to close the popup window and return to the previous screen.
5
6
3
7
8
2
3
4
!
1
9 )
1
5
6
7
8


